
vMX Cloud Integrations
Overview
Customers are moving to one or more clouds, but managing multiple environments is complex, requiring:
-
Nuanced processes
-
Differing user experiences
-
Varying configurations
With vMX Cloud Integrations customers can deploy and manage their vMX via the Meraki dashboard, giving them;
-
Unified and automated cloud management
-
Expand network connectivity
-
Consistent user experience
Note: As of April 2024, deleting an integration is not supported.
Deployment Steps
1. Add license(s) to the Meraki dashboard
To complete the vMX Meraki dashboard configuration, a vMX license must be available for use in your organization.
If your organization has already reached its vMX license limit, you will be unable to create new vMX networks until a vMX network is deleted or additional vMX licensing added.
If you do not have access to a vMX license or require additional vMX licenses, please reach out to your Meraki reseller or sales representative.
2. Navigate to Organization > Configuration > Cloud Integrations
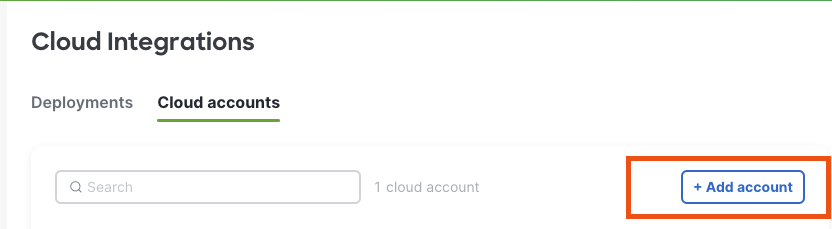
3. [Adding Cloud Accounts] Select Cloud accounts > + Add Account
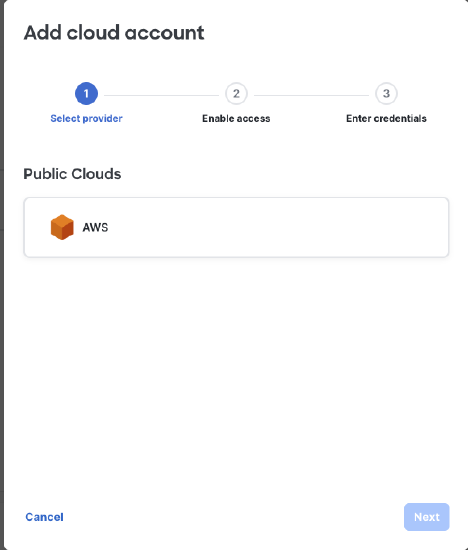
4. [Adding Cloud Accounts] Add Cloud Account Details
Select a provider (AWS for now)
Go to your AWS account and generate an AWS access and secret key and enter the credentials to link your AWS account.
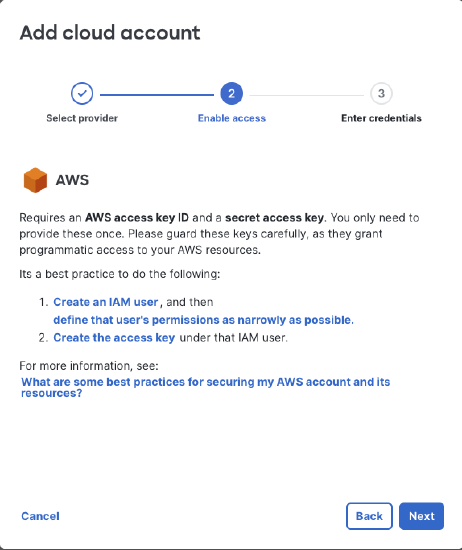
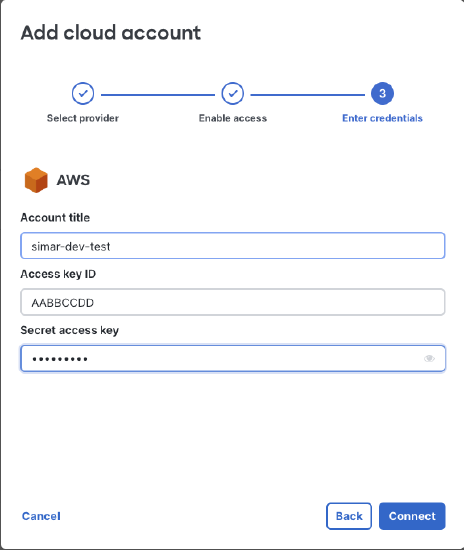
For cloud integration to function properly you would need the access key to have the following permissions
|
|
5. Once the account has been linked, it will show up under the “Select cloud account” list. Select the account that was linked in the previous steps and move on to the general settings section.

6. General Settings
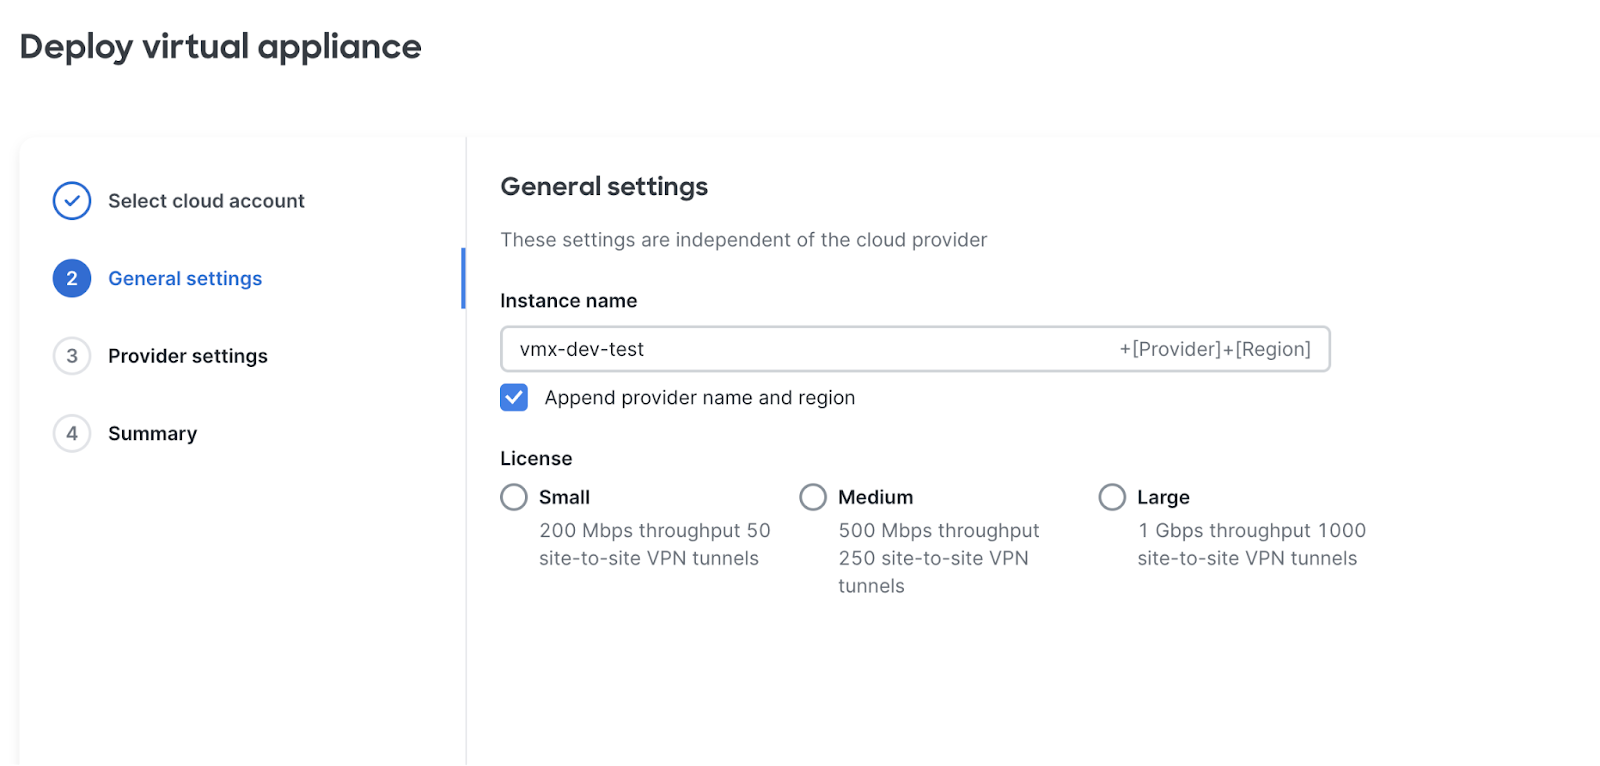
-
Instance name: Name of the vMX network on the dashboard
-
Append provider name and region: Toggle on, if you want to append the provider name (AWS, GCP, ..) and region to the vMX network name on the dashboard.
-
License: Choose vMX license type; vMX-S/M/L
7. Provider Settings
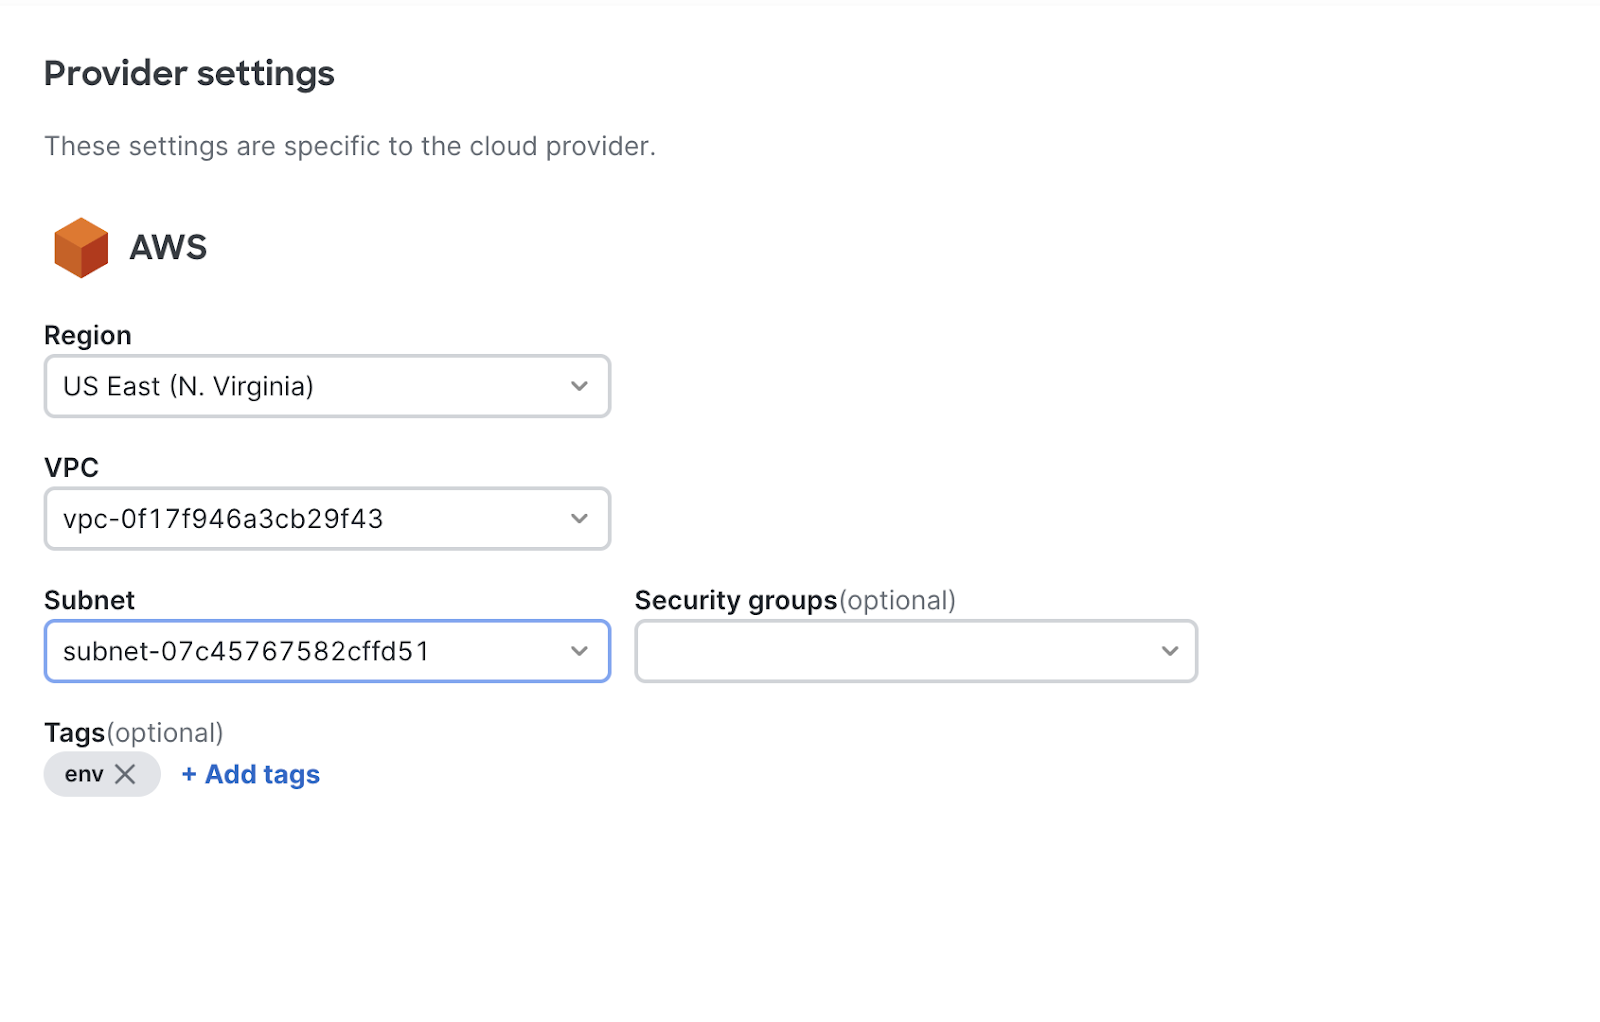
-
Region: Select the cloud provider region you want to deploy the vMX in
-
VPC: Select the VPC within the region you want to deploy the vMX in. If not selected the “Default” VPC for that region would be selected.
-
Subnet: VPC subnet to deploy the vMX in
-
Security groups (optional): Select a predefined security group, if left blank the default security group (allow inbound 22) created as part of the vMX offer would be used.
-
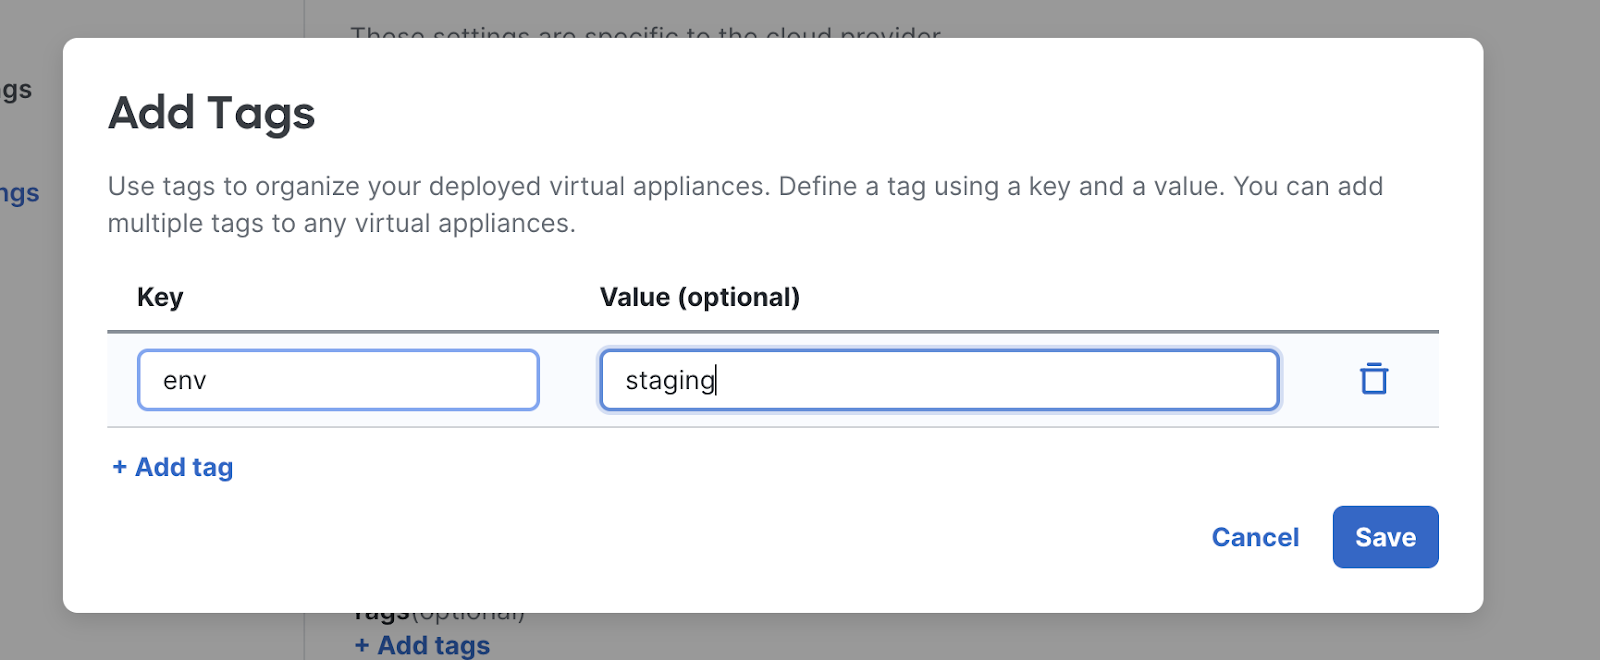
Tags: Create any tags(key/value pair) that would be associated with the instance on AWS.
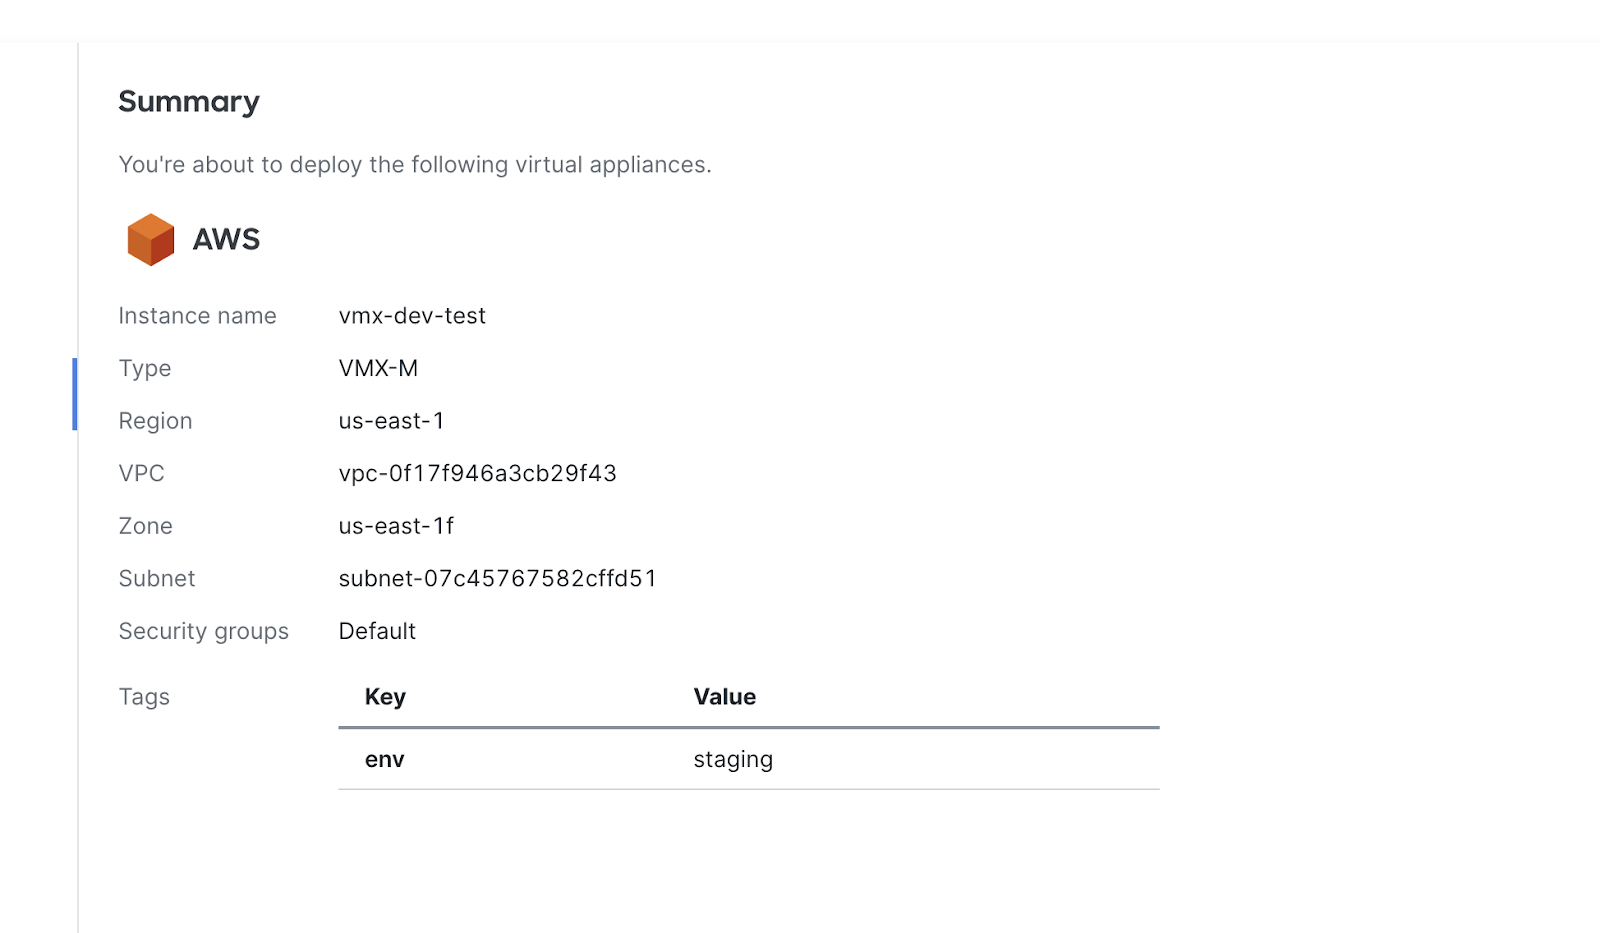
8. Summary
Verify that the configuration for the vMX looks good and hit deploy.
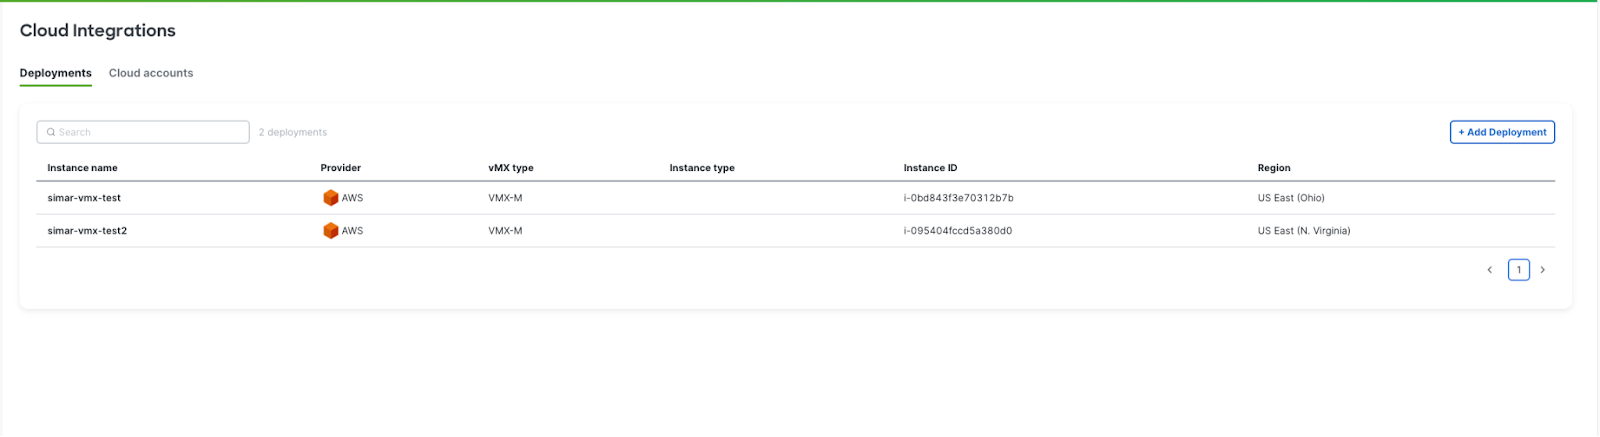
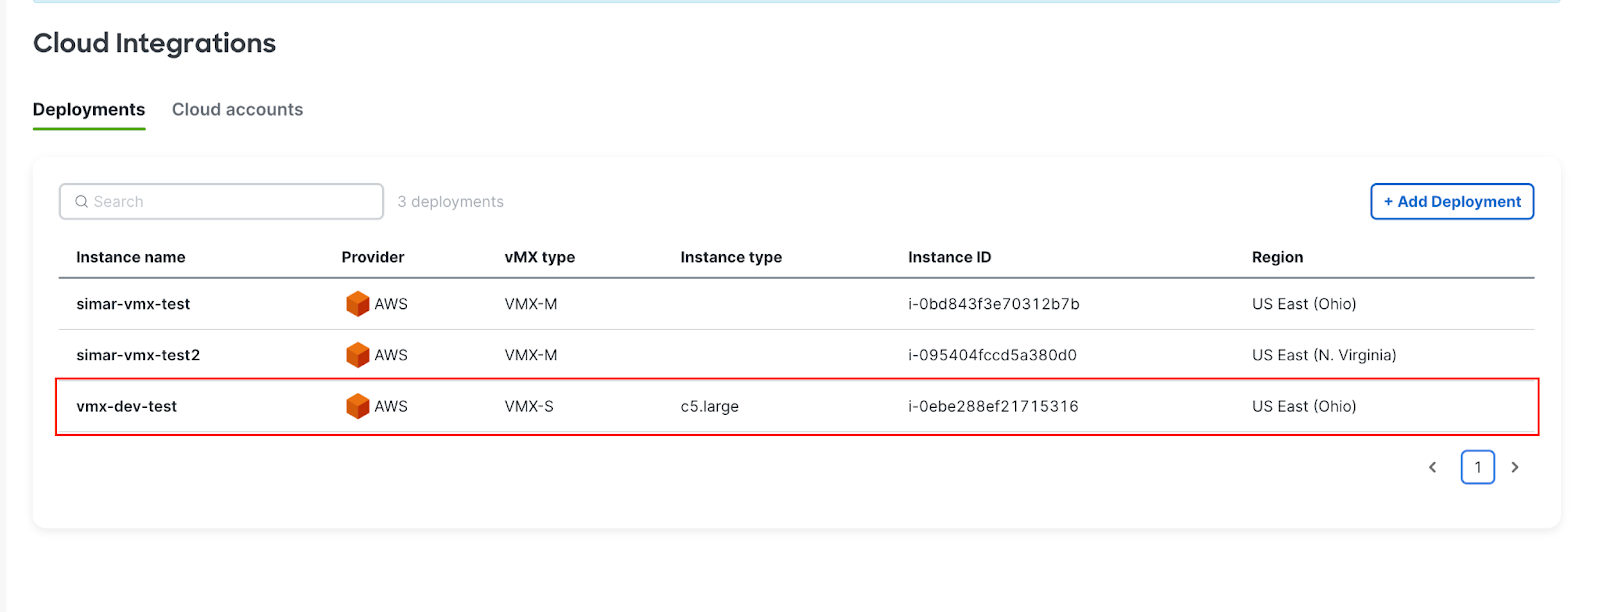
It might take a few minutes for the deployment to complete and once the deployment is complete, it can be seen under the deployments tab
Furthermore, the vMX status can be seen by going to the Security & SD-WAN > Monitor > Appliance status tab.