
Meraki Systems Manager EOL Migration
Cisco Meraki’s Mobile Device Management product Meraki Systems Manager (SM) has reached End-of-Sale. For more information or timeline details for End-Of-Sales (EOS), End-Of-Support (EOST), and/or End-Of-Life (EOL) please see the End-Of-Life Policy, and/or the End-of-Life (EOL) Products and Dates knowledge base article.
This article will cover the technical details and considerations for administrators to perform a successful migration from Meraki Systems Manager to another Mobile Device Management platform for both company-owned devices and end-user owned devices.
Before migration
Before migrating from Meraki Systems Manager to another MDM platform there are some tasks to perform to make this a smoother process. These include backing up existing configurations from Meraki Dashboard so they can be re-used in a new MDM platform.
Note: Many of these Systems Manager configurations can be backed up via API. Please see the Cisco Meraki API documentation for more information.
Export device inventory
Before a migration, backup the currently enrolled devices and their fields to capture their current state. Navigate to the Systems Manager > Devices page. Add any columns with the cogs icon for any fields you would like to backup (visible columns on the page will be added to the exported .csv) and then click Download CSV to export the full list of devices in their current state.

Export owner identity inventory
Systems Manager Owners are the users who have authenticated into your network from various identity providers (more information here). This allows Users (Owners) to be linked to devices, as well as Meraki’s ability to store the Username, email, user groups, owner tags, etc. To backup the Owner inventory go to Systems Manager > Owners page and then in the top right of the page choose Import > Owners > From CSV. Inside the modal that appears, choose either Current CSV for owners or Current CSV for owners and devices. 
Note: Cisco Meraki does not store the passwords for identity provider’s users. Please use the identity provider to manage account passwords. This means that it is expected that the SM Owners page will not show user account's passwords.
Export applications inventory
Copy apps into the new MDM. In the Systems Manager > Apps page, select all applications, and the choose Export > To CSV. This will supply a .csv backup of all the apps.

Note: This apps backup is just a metadata .CSV of the app’s information. Please be sure to backup the actual app files. Any custom apps hosted with Meraki (.ipa, .apk, .msi, .pkg, etc) please be sure to download from their manifest urls, visible on the page. This way the same installation files can be used in the new MDM platform.
Profiles
Copy profiles settings into the new MDM. Make note of the current settings inside Systems Manager SM > Settings page for any profiles which are critical for your deployment. This way you can re-create identical profiles in the new MDM platform.
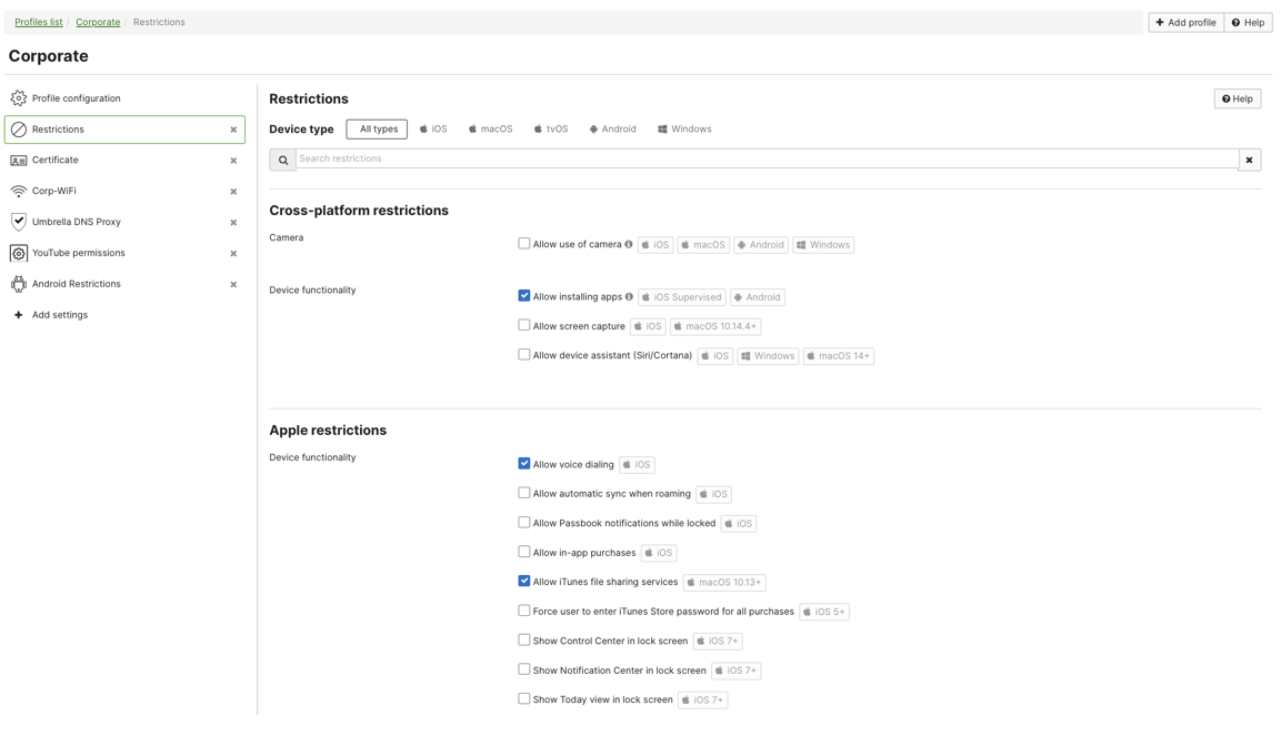
Some important profile settings to backup in the SM > Settings page include (but not limited to):
- Wi-Fi settings and passwords
- Certificates
- Passcodes
- Restrictions
- SSO
- Encryption
- Managed App Configurations

Organization settings
Apple MDM Push Certificate
Since the Apple Push Notification service (APNs) certificate is signed with Cisco Meraki’s certificate signing request (CSR), you will need to create a new APNs certificate with the new MDM vendor (signed by their CSR). It is not necessary to back up the current Cisco Meraki APNs certificate, as this certificate is only applicable within Systems Manager. However, this is a good opportunity to confirm that you still have access to an administrator’s identity.apple.com/pushcert account. In the new MDM platform, a new Apple Push Certificate will have to be created. For more information, please see the new MDM vendor’s documentation.
Apple VPP token
It is not necessary to back up the current VPP token, as a new one can be redownloaded from your Apple Business Manager or Apple School Manager portal anytime. The new MDM vendor should be able to do this, so revoking licenses is not a necessary step.
Note: VPP device assigned licenses will remain assigned based on the SM network’s app scope. A new MDM vendor will be able to revoke and re-assign these. However, if you would like to revoke the licenses from Meraki SM as part of the migration then you may optionally revoke any currently assigned VPP device assigned licenses.
Android Enterprise account
Keep the administrator Android Enterprise account bound in play.google.com/work until you are ready to re-connect it to a new MDM. At that point, you can delete the binding from play.google.com/work and connect it to a new MDM. Alternatively you may use an entirely different Google administrator Android Enterprise login account for the new MDM.
ChromeOS Google Admin Console account
It is not necessary to unbind Google Chrome. However, if you would like to unbind this before removal of SM, you can do so in Organization > MDM > Chrome OS device management > Disable.
Note: For Apple devices (iOS/iPadOS/macOS/tvOS) be sure to review Apple’s official documentation: Intro to planning your MDM migration.
Migrate company-owned endpoints
The steps below showcase how to perform automated device enrollment into another MDM.
Note: This documentation will cover the steps for preparing and resetting/unenrolling from Meraki Dashboard. Please see other platform’s MDM documentation for specific steps on how to enroll into the new platform. For Ivanti Neurons MDM steps: https://help.ivanti.com/mi/help/en_us/cld/8x/rn/DocRoadmap/CloudPlatform.htm
Apple Automated Device Enrollment (ADE)
Please review the offical Apple documentation for how to migrate from one MDM to another MDM here.
Devices not part of ADE will need to follow the migrate user-owned endpoints section.
iOS/iPadOS/macOS/tvOS:
-
Add ADE token to new MDM. This will allow you to sync the devices into the new MDM to pre-stage an enrollment into this new MDM.
-
Assign ADE settings in the new MDM to the devices.
-
Stage the devices into the new MDM (steps below).
Stage the devices into the new MDM without factory reset:
On devices with iOS 26, iPadOS 26, or macOS 26: Apple has added a new feature to migrate devices from one MDM to another without a factory reset. This is great to avoid interruptions to end users as the new management solution will take over after a specific deadline date. To do this sign into business.apple.com or school.apple.com and choose Devices > Assign Device Management > choose the new MDM and add a deadline date. With this method, every previously enrolled device in Meraki Systems Manager will receive a prompt that says “Enrollment required” where they can either select “Not now” or “Start enrollment” If “not now” is selected, the device will be automatically enrolled into the new MDM at the configured deadline date.
Please follow the Apple documentation for more information on this new migration method:
Migrate devices to a new management service in Apple Business Manager
Migrate devices to a new management service in Apple School Manager
Stage the devices into the new MDM with factory reset:
If the above method (without factory reset) is not available, or the administrator would like to use the traditional method of migrating to a new MDM, a factory erase can be used to cleanly setup the device into the new MDM. Issue a factory reset from SM. Optional: delete the device from Meraki Systems Manager network(s) -- this will simply remove the record of this device within Cisco Meraki. Then when devices go through their Apple Setup Assistant initial setup (“Hello”, choose your language, region, etc) the devices will start enrolling into the new MDM.
Note: Keep the apps and profiles similar in the new MDM so the end user’s experience in migrating is similar. Please test on 1-2 test devices first before migrating the entire fleet to ensure the workflow for your specific scenario.
For more detailed instructions please review the specific MDM vendor’s documentation for Apple Automated Device Enrollment (ADE) or Apple Device Enrollment Program (DEP).
Android Device Owner (with Zero Touch Enrollment)
-
Change the DPC extras configuration assignment for devices in the Android Zero Touch customer portal to match the settings required for the new MDM.
-
Issue a factory reset from SM. Optional: delete the device from Meraki Systems Manager network(s) -- this will simply remove the record of this device within Cisco Meraki.
-
When devices go through their initial setup, they will start enrolling into the new MDM platform with the newly assigned DPC extras Zero Touch Enrollment settings.
Android Device Owner (without Android Zero Touch)
Android devices enrolled in Device Owner mode but without Android Zero Touch will be required to manually re-enroll into the new MDM. From Meraki SM, the last action can be a factory reset which will reset it back into factory device setup so the device can be ready to re-enroll in Device Owner mode within the new MDM.
Windows
-
Uninstall the agent and profile by performing the steps in this guide.
-
Optional: delete the device from Meraki Systems Manager network(s) -- this will simply remove the record of this device within Cisco Meraki.
-
Re-enroll the Windows device based on the user/BYOD enrollment strategy for the new MDM product. Please see the new MDM’s documentation for instructions on enrollment. For company-owned Windows devices (if supported by the new MDM) leverage Windows Autopilot to automatically enroll during initial setup.
ChromeOS
The ChromeOS devices will need to be unenrolled from Meraki SM to re-enrolled into the new MDM. This can be done by toggling off the Organization > MDM > ChromeOS API setup and then setting ChromeOS up in the new MDM. Please see the ChromeOS enrollment steps for more information.
Migrate user-owned endpoints
Note: This documentation will cover the steps for preparing and resetting/unenrolling from Meraki Dashboard. Please see other platform’s MDM documentation for specific steps on how to enroll into the new platform. For Ivanti Neurons MDM steps: https://help.ivanti.com/mi/help/en_us/cld/8x/rn/DocRoadmap/CloudPlatform.htm
iOS/iPadOS/tvOS:
Tap on the Remove Management inside Settings > General > Profiles & Device Management > Meraki Management.

macOS:
Tap on the Remove Management inside System Settings > Privacy & Security > Profiles > Meraki Management.
Android Work Profile:
Delete the Work Profile enrollment on the Android devices. The work profile can be deleted from Android Settings > Accounts > Users & accounts > Work > Remove work profile. The official Google documentation also shows how to remove this locally from the device.

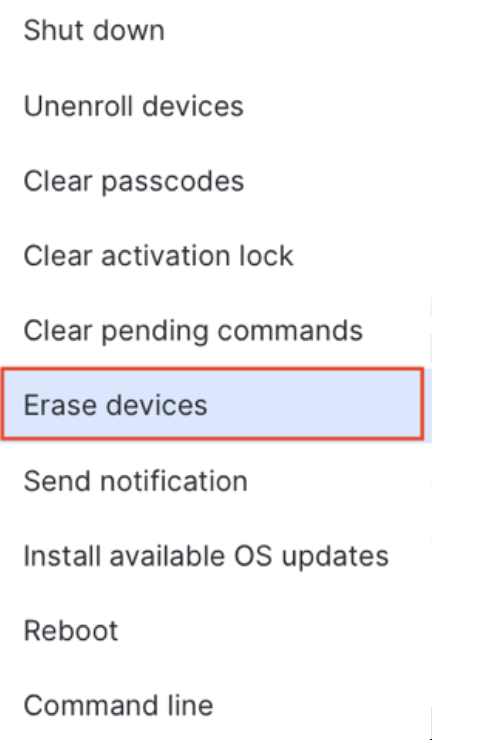
Alternatively, the “Erase Device” command from Dashboard can be used to remove the Work Profile from devices in bulk:
-
Optional: delete the device from Meraki Systems Manager network(s).
-
Re-enroll the Android device based on the user/BYOD enrollment strategy for the new MDM product. Please see the new MDM’s documentation for instructions on enrollment.
Windows:
-
Uninstall the agent and profile by performing the steps in this guide.
-
Optional: delete the device from Meraki Systems Manager network(s).
-
Re-enroll the Windows device based on the user/BYOD enrollment strategy for the new MDM product. Please see the new MDM’s documentation for instructions on enrollment.
After migration - removal of SM
After the migration is complete and all Meraki SM endpoints have been migrated, the Meraki Systems Manager network can be deleted. Before deleting your network, please go through the information above in the "Before migration" selection to validate.
If Systems Manager is part of combined network: be sure to Split networks so only the SM network piece can be deleted. Split networks in the Organization > Overview page.

If your License Info shows Systems Manager clients still counting on your licensing, it means you have not properly removed Systems Manager yet. Removal all devices and/or all networks to get this count to 0 SM devices.
Note: The SM parts of a network may be automatically removed/deleted after the EOST date. Other parts of the network (e.g. MX/MS/MR/MV etc. will not be impacted). After the EOST Meraki SM enrolled endpoints will retain their last configurations from Meraki Systems Manager and be unable to communicate with the Meraki Dashboard to make any further changes.