
Using FileVault 2
Encrypting with FileVault 2
This configuration allows macOS devices enrolled in Systems Manager to enable FileVault encryption. Once enabled, Systems Manager can present the recovery key within Dashboard if it is needed. For more information on MDM FileVault, refer to Apple's documentation Manage FileVault with mobile device management.
This document provides the configuration and validation steps for a FileVault deployment using FileVault personal recovery key with MDM escrow.
macOS supports multiple methods of enabling and recovering the FileVault recovery key. The recommended option of "Personal Recovery key with MDM escrow" is described in this document.
Institutional recovery key options still exist within Systems Manager. These should only be used for legacy devices that may not support personal recovery key with MDM escrow. Existing deployments can refer to the "Institutional Recovery Key (Deprecated)" section below for information on decrypting devices with institutional recovery key configurations.
Public / Private Certificate Pair
A public / private certificate pair is required for FileVault recovery key escrow. The public certificate will be used by the macOS device to encrypt the recovery key during FileVault enablement. This encrypted recovery key will be transmitted and stored on the Meraki Dashboard. The private key can then be used to reveal a device's FileVault recovery key within Dashboard.
To generate a supported public / private certificate pair, follow the "Creating a Public/Private Certificate Pair" documentation. Once completed, save the following files in a secure location that can be accessed later:
- certificate.der
- certificate.crt
- certificate.csr
- public.pem
- private.pem
Maintain these files in a secure location. Loss of the generated certificates will result in the inability to recover the FileVault recovery key from Dashboard.
Dashboard Payload Configuration
Two Dashboard payloads are required for full FileVault to functionality:
FileVault Recovery Key Escrow payload
The "FileVault Recovery Key Escrow" payload allows the FileVault recovery key to be accessed within Dashboard after FileVault is enabled. This payload contains a public certificate. When FileVault is enabled on a target device, the machine will use this public certificate to encrypt the FileVault recovery key. Once encrypted with the public certificate, Dashboard is able to retrieve and store the encrypted FileVault recovery key.
FileVault payload
The FileVault payload is the configuration that will actively enable FileVault on the target device. This payload also contains various configuration options for administrators.
FileVault Recovery Key Escrow Payload Configuration
This step details the configuration process for the "FileVault Recovery Key Escrow" payload.
1. Visit "Systems Manager > Settings" and select "Add profile > Device profile".
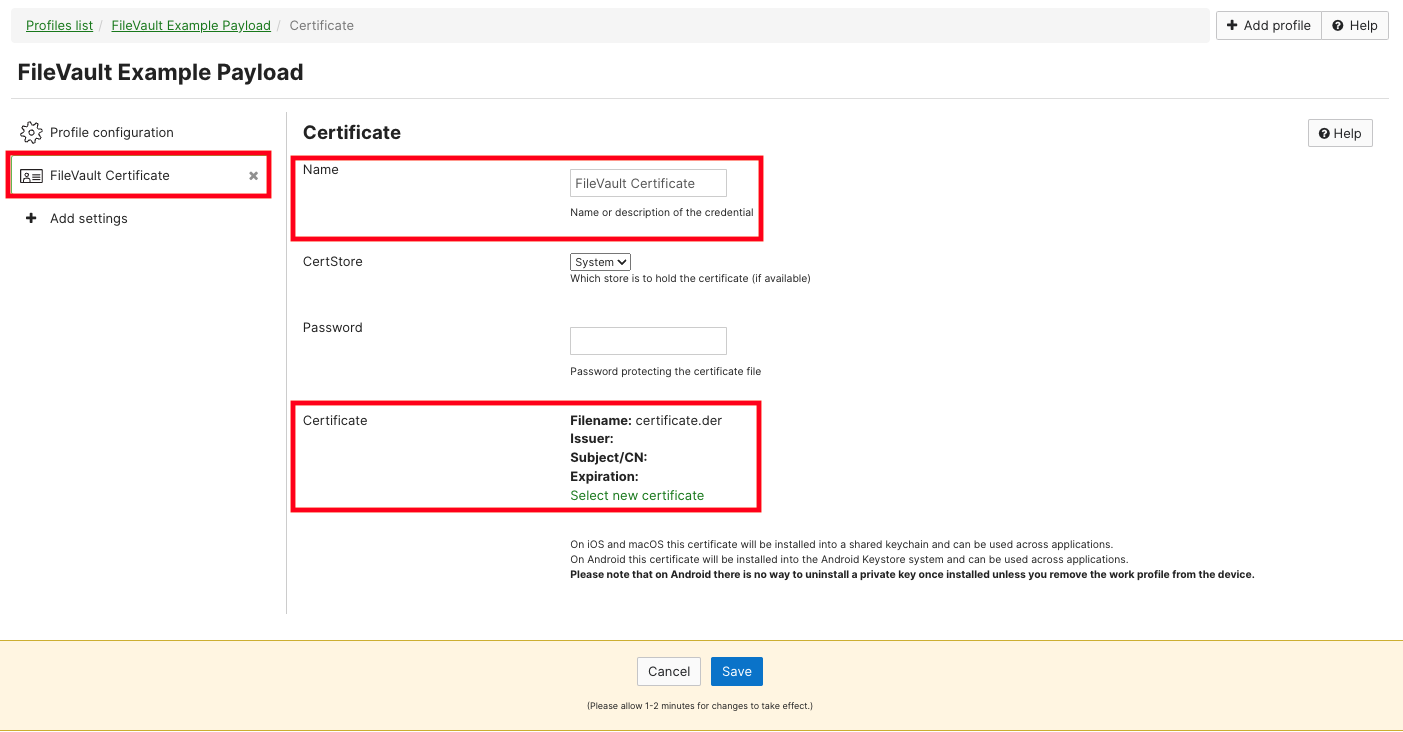
2. Add a "Certificate" payload to this new profile.
3. Provide a name for this certificate, then select the ".der" formatted certificate. Save the payload once finished:
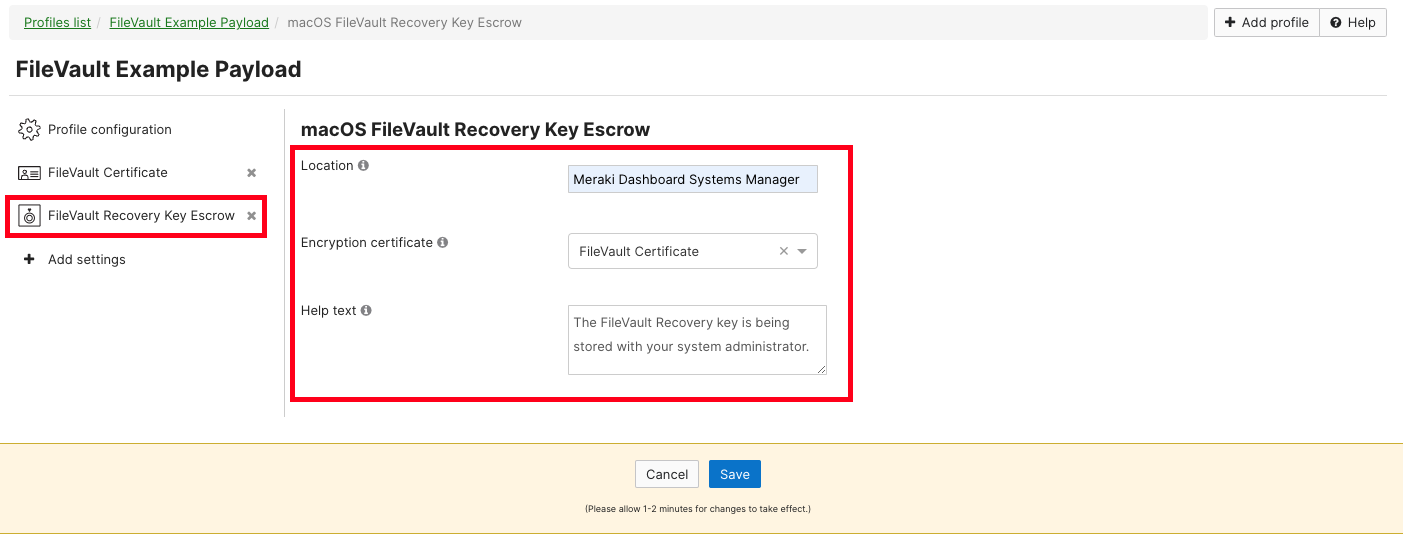
4. Add a "FileVault Recovery Key Escrow" payload to this profile.
5. Complete the text fields, and select the certificate that was previously uploaded. Save the payload once finished:
FileVault Payload Configuration
This step details the configuration process for the "FileVault" payload. Begin by adding the "FileVault" payload to the existing FileVault profile that was started in the last step.
Incorrect configuration of the FileVault payload will result in unexpected behavior. Follow the steps in the sections below for the desired deployment type.
FileVault Configuration for ADE Device Enrollment
This configuration allows Systems Manager to force FileVault enablement during the setup assistant process. During setup assistant, users will receive a mandatory prompt to enable FileVault before reaching the macOS desktop. This payload will not function for devices that have already been enrolled, it should only be used with devices that will be enrolled via ADE.
1. In the existing FileVault profile (containing the Filevault Recovery Key Escrow payload), add the "FileVault" payload.
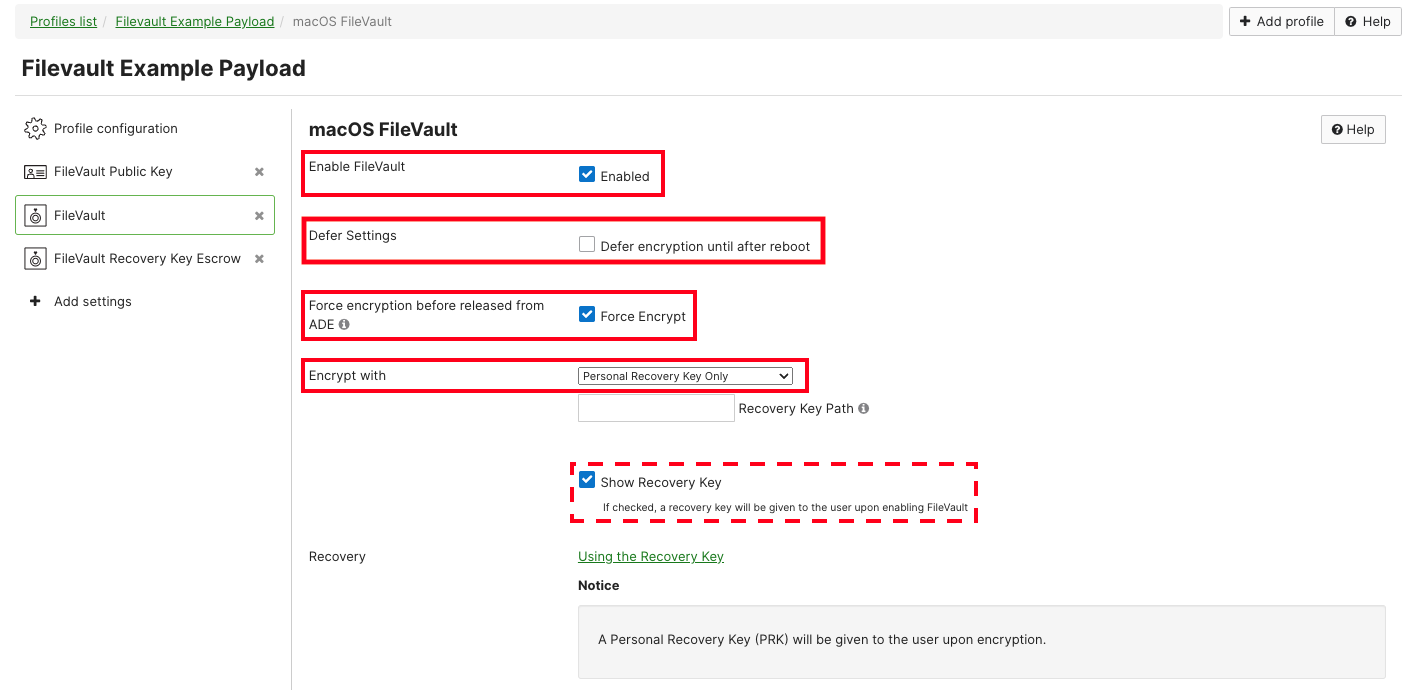
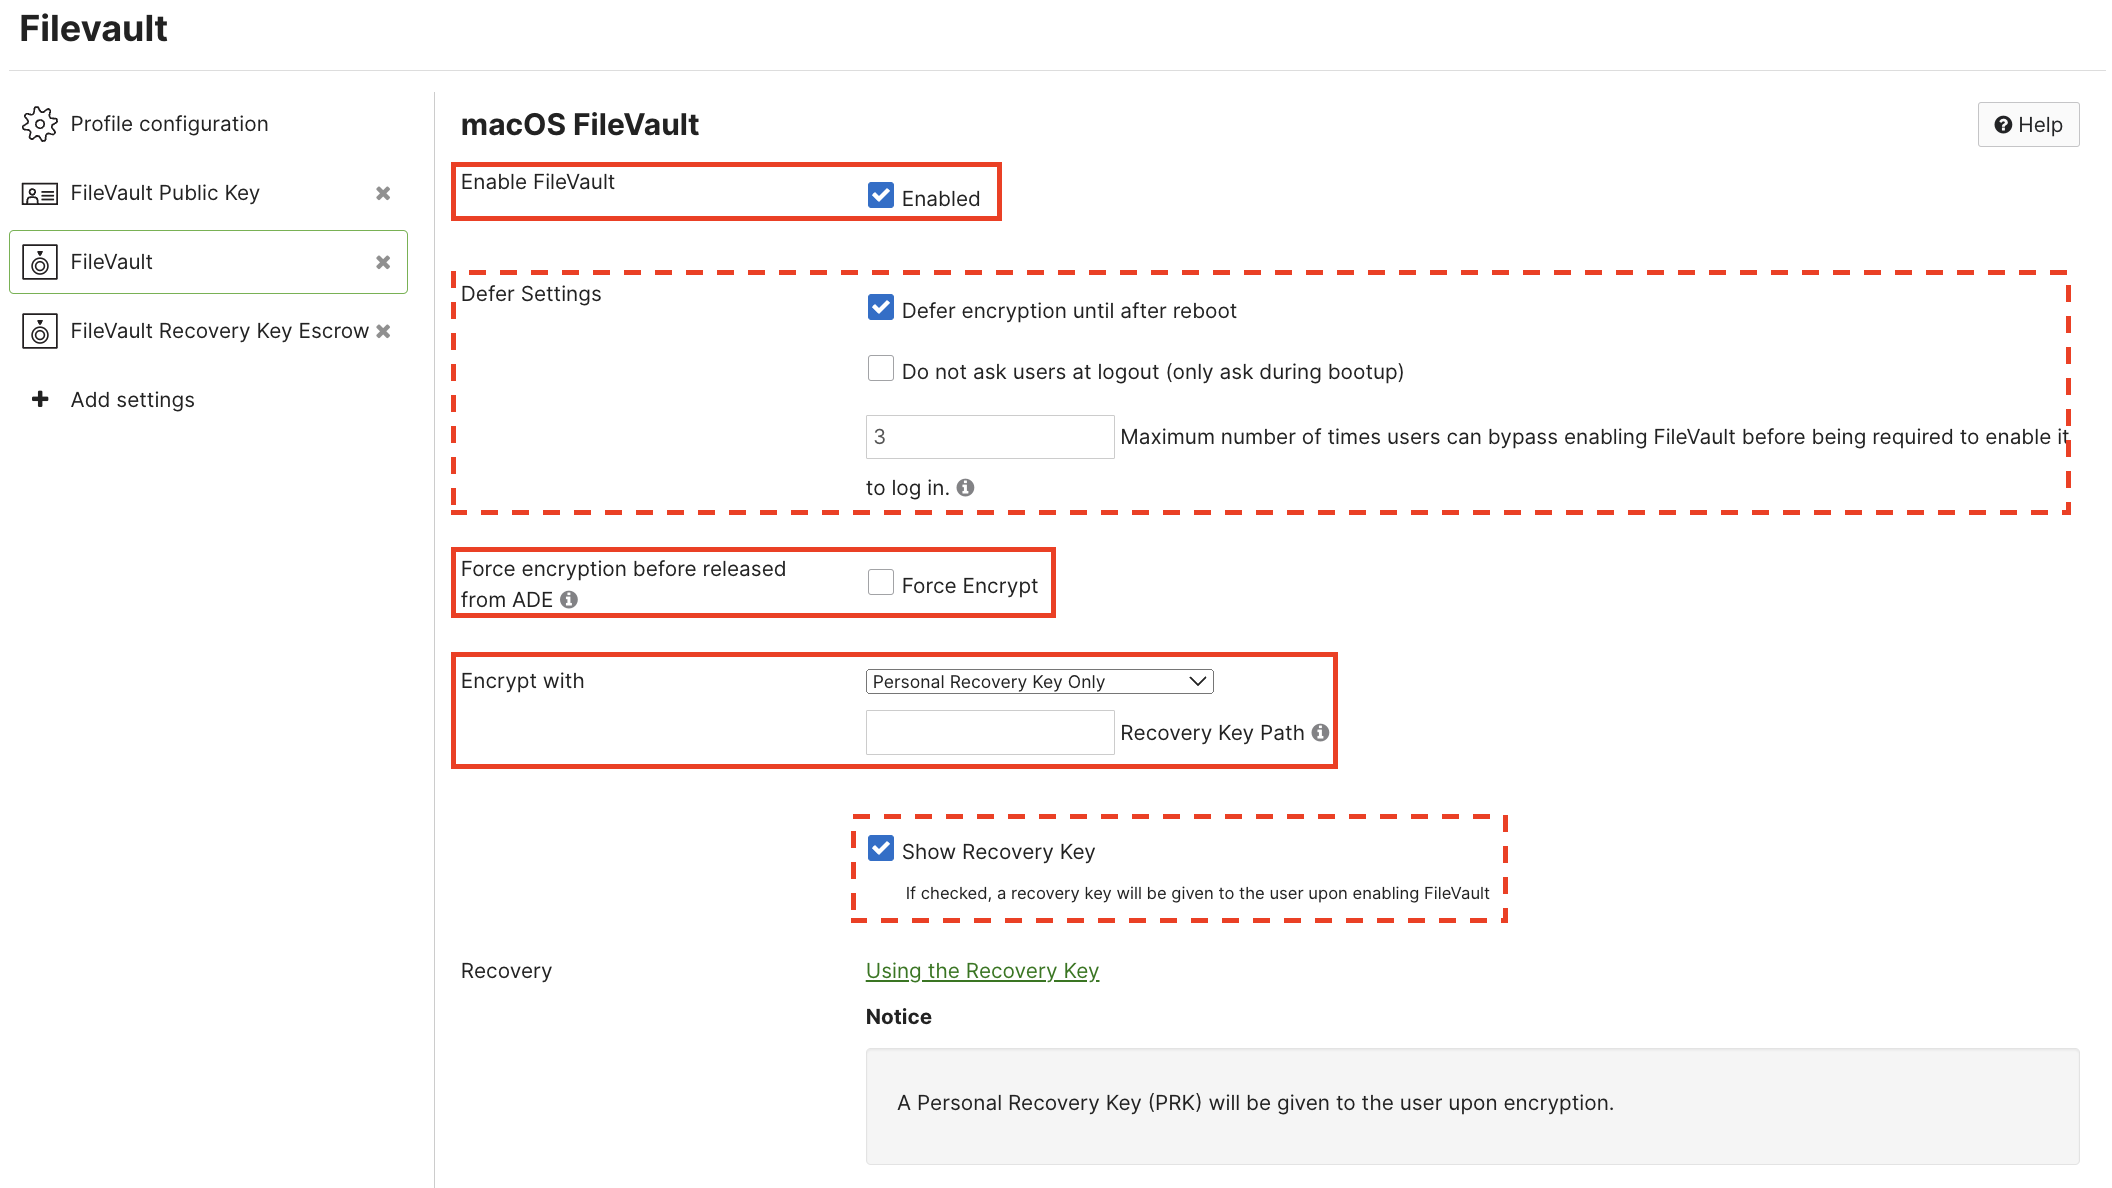
2. Configure the payload as seen below:
a. Ensure that "Enable FileVault" is set to "Enabled".
b. The "Defer Settings" option should remain unchecked.
c. Ensure that "Force encryption before released from ADE" is checked.
d. "Encrypt with" should be set to "Personal Recovery Key Only". "Recovery Key Path" is not needed.
e. Optionally, set the "Show Recovery Key" option. This will allow the end user to see the recovery key once FileVault is enabled.
3. Ensure that the device has an ADE payload assigned which includes the "await device configured" option. This ensures that the FileVault payload is installed before the device finishes setup assistant.

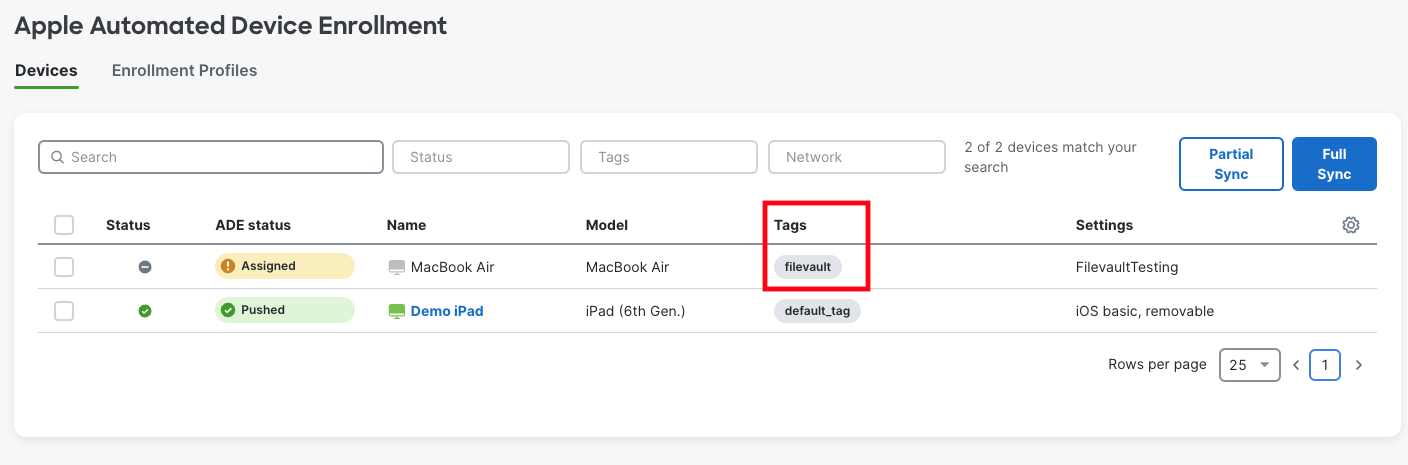
4. The FileVault configuration must be scoped to the device before the device begins the ADE enrollment process. Devices in Apple ADE can be tagged within the Systems Manager > ADE page.
FileVault Configuration for Non-ADE or Existing Enrollments
This configuration allows Systems Manager to enable FileVault on devices that have already been setup.
1. In the existing FileVault profile (containing the FileVault Recovery Key Escrow payload), add the "FileVault" payload.
2. Configure the payload:
a. Ensure that "Enable FileVault" is set to "Enabled".
b. Select whether to defer enablement until reboot. When unchecked, the device will prompt the user to enable FileVault immediately, if the user rejects this prompt, payload installation will fail. Dashboard will retry installation at 24 hour intervals until accepted. When checked, the payload can be installed at any time, users will be prompted to enable FileVault on next reboot, and additional options are presented:
i. "Do not ask users at logout" suppresses prompts when logging out of the machine (users will only be prompted during operating system bootup).
ii. A maximum deferral value can be entered to force FileVault enablement after a specified number of user deferrals.
c. Ensure that ""Force encryption before released from ADE" is unchecked.
d. "Encrypt with" should be set to "Personal Recovery Key Only". "Recovery Key Path" is not needed.
e. Optionally, set the "Show Recovery Key" option. This will allow the end user to see the recovery key once FileVault is enabled.
3. The FileVault payload must be scoped to desired devices using matching tags.
Payload Verification
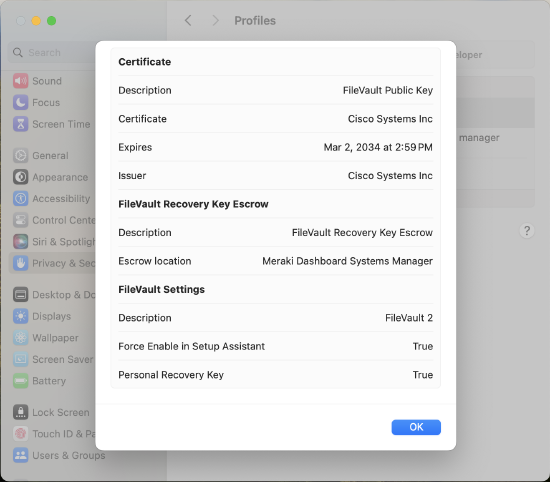
When the payload is installed on the target device, it can be viewed on the system in the "System Settings" application. Navigate to "Privacy & Security > Profiles > Filevault" to see the configuration:

Exposing the Personal Recovery Key in Dashboard via Escrow Recovery Key
Meraki Systems Manager Dashboard can display the device's personal recovery key if it is needed for any reason (for example, resetting a local admin password via system recovery mode on Apple Silicon devices).
To expose the personal recovery key, find the device in Systems Manager > Clients. Click on the device and find the FileVault section within the Live Tools.
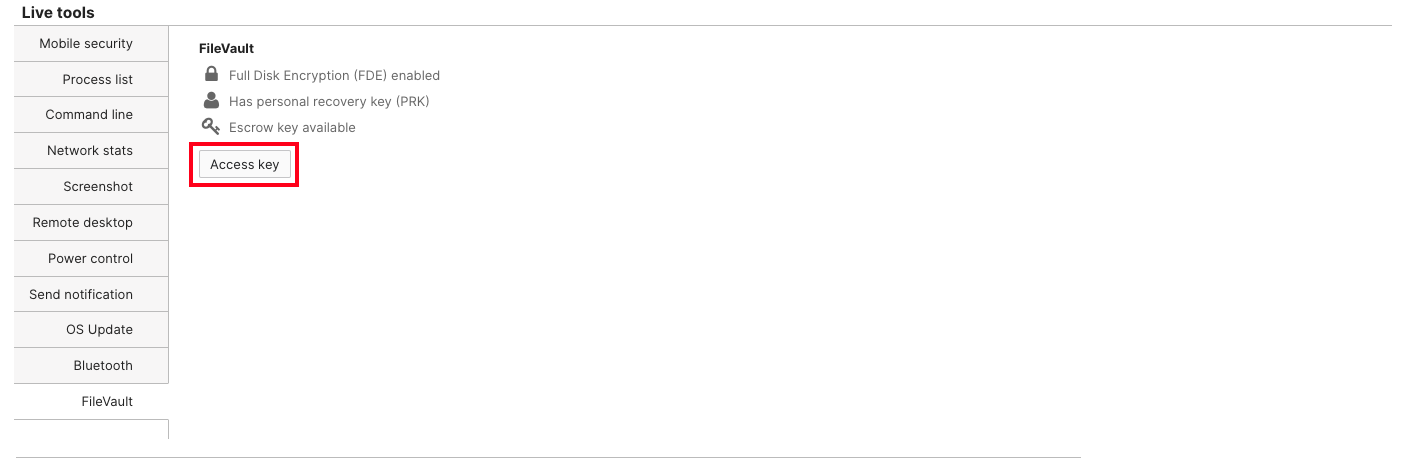
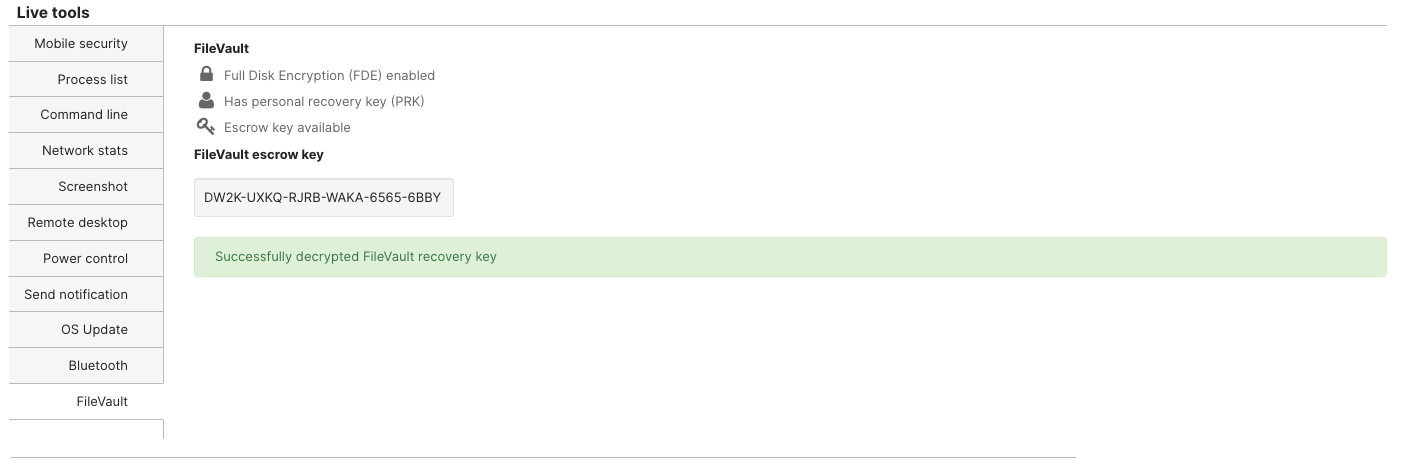
Press on "Access Key" and then upload the private key certificate (commonly a .pem file) used in the public/private key setup of the initial Escrow Recovery Key profile setup. The device's Personal Recovery Key is now displayed in Dashboard.
Institutional Recovery Key (Deprecated)
Institutional recovery keys are no longer fully supported on modern macOS devices. This information is being provided for reference where Institutional Recovery Key configurations were previously used. Please reference the Apple support document Set a FileVault recovery key for computers in your organization.
Meraki is committed to providing an inclusive experience for our customers. The following section contains language that does not adhere to our standards for inclusivity. We are working with our partners to replace it.
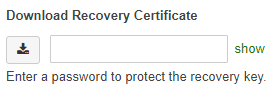
An Institutional Recovery Key (IRK) is a certificate that can be used to encrypt and decrypt a device. To download the IRK, create a password to protect it and hit the download button on the right. This password will only protect the key once, which means if the password is lost or forgotten the key will need to be re-downloaded and protected with another password.
Decrypting Devices using the Institutional Recovery Key
Once the key has been downloaded (it is a .p12 file) safely store the key. In the event the key is lost or corrupted, the benefit of using an IRK is that the key itself is stored in Dashboard and can be re-downloaded at any point.
Aside from downloading the recovery certificate, Meraki also stores the Institutional Recovery Key on the Organization > MDM page of Dashboard. Again this key is used to unlock a device encrypted by Meraki via FileVault. 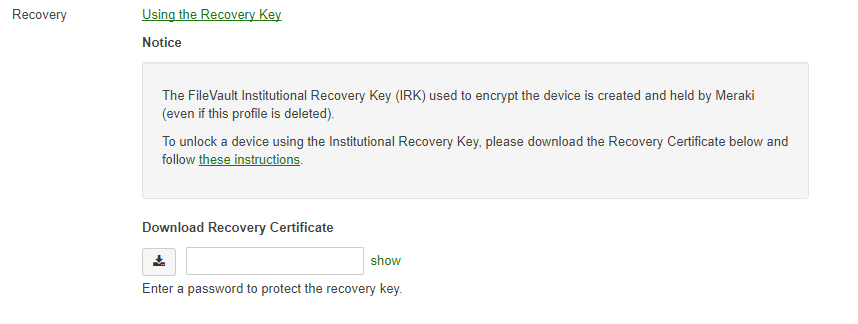
To decrypt a device:
- Find the IRK that was originally downloaded or download it from Dashboard. This file will be called FileVaultMaster.p12.
- Open up Keychain Access on an OS X machine (Applications > Utilities > Keychain Access).
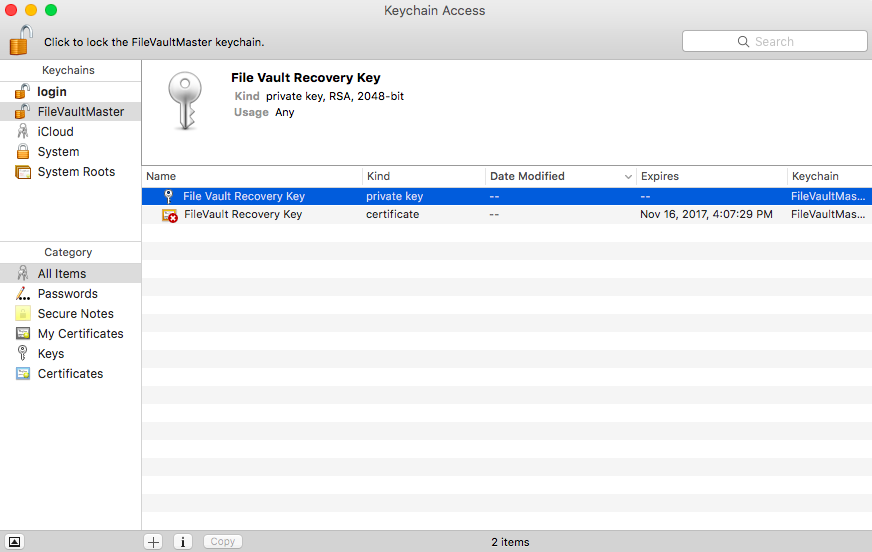
- Create a new Keychain named FileVaultMaster (Keychain Access > File > New Keychain). Once a keychain is created, drag and drop the FileVaultMaster.p12 file into the keychain. Two "File Vault Recovery Key" items should appear, one that is a private key and another that is a certificate.
- Next make a copy of your FileVaultMaster.keychain file.
- On the client Mac, start up from macOS Recovery by holding Command-R during startup.
- If you don't know the name (such as Macintosh HD) and format of the startup disk, open Disk Utility from the macOS Utilities window, then check the information Disk Utility shows for that volume on the right. If you see ”CoreStorage Logical Volume Group” instead of ”APFS Volume” or ”Mac OS Extended,” the format is Mac OS Extended. You will need this information in a later step. Quit Disk Utility when done.
- Connect the external drive that contains the private recovery key.
- From the menu bar in macOS Recovery, choose Utilities > Terminal.
- If you stored the private recovery key in an encrypted disk image, use the following command in Terminal to mount that image. Replace /path with the path to the disk image, including the .dmg filename extension:
hdiutil attach /path
Example for a disk image named PrivateKey.dmg on a volume named ThumbDrive:
hdiutil attach /Volumes/ThumbDrive/PrivateKey.dmg - Use the following command to unlock the FileVault master keychain. Replace /path with the path to FileVaultMaster.keychain on the external drive. In this step and all remaining steps, if the keychain is stored in an encrypted disk image, remember to include the name of that image in the path.
security unlock-keychain /path
Example for a volume named ThumbDrive:
security unlock-keychain /Volumes/ThumbDrive/FileVaultMaster.keychain - Enter the master password to unlock the startup disk. If the password is accepted, the command prompt returns.
Continue as described below, based on how the user's startup disk is formatted.
Feel free to reference these instructions from Apple as well.
APFS Formatted Device
If the startup disk is formatted for APFS, complete these additional steps:
- Enter the following command to unlock the encrypted startup disk. Replace "name" with the name of the startup volume, and replace /path with the path to FileVaultMaster.keychain on the external drive or disk image:
diskutil ap unlockVolume "name" -recoveryKeychain /path
Example for a startup volume named Macintosh HD and a recovery-key volume named ThumbDrive:
diskutil ap unlockVolume "Macintosh HD" -recoveryKeychain /Volumes/ThumbDrive/FileVaultMaster.keychain - Enter the master password to unlock the keychain and mount the startup disk.
- Use command-line tools such as
dittoto back up the data on the disk, or quit Terminal and use Disk Utility.
Mac OS Extended (HFS Plus)
If the startup disk is formatted for Mac OS Extended, complete these additional steps:
- Enter this command to get a list of drives and CoreStorage volumes:
diskutil cs list
- Select the UUID that appears after “Logical Volume,” then copy it for use in a later step.
Example: +-> Logical Volume 2F227AED-1398-42F8-804D-882199ABA66B - Use the following command to unlock the encrypted startup disk. Replace UUID with the UUID you copied in the previous step, and replace /path with the path to FileVaultMaster.keychain on the external drive or disk image:
diskutil cs unlockVolume UUID -recoveryKeychain /path
Example for a recovery-key volume named ThumbDrive:
diskutil cs unlockVolume 2F227AED-1398-42F8-804D-882199ABA66B -recoveryKeychain /Volumes/ThumbDrive/FileVaultMaster.keychain - Enter the master password to unlock the keychain and mount the startup disk.
- Use command-line tools such as
dittoto back up the data on the disk. Or quit Terminal and use Disk Utility. Or use the following command to decrypt the unlocked disk and start up from it.diskutil cs decryptVolume UUID -recoveryKeychain /path
Example for a recovery-key volume named ThumbDrive:
diskutil cs decryptVolume 2F227AED-1398-42F8-804D-882199ABA66B -recoveryKeychain /Volumes/ThumbDrive/FileVaultMaster.keychain