Cisco Secure Connect - Meraki MX IPSec Tunnel
Please note that Auto VPN is the go-to way to connect to Cisco Secure Connect but for certain scenarios if there is any need to connect a Meraki site to Secure Connect via IPSec, below config should be used.
Prerequisites
The Meraki MX requires MX 15.12+ firmware, on which users are able to configure the Non-Meraki VPN Peer with the two following Umbrella requirements:
- Choose IKE version type on each Non-Meraki VPN Peer. When choosing IKEv2, the "Local ID" field will be enabled. The User FQDN info needs to be added into this field.
- On IPSec policies, choose "Umbrella" preset policy.
Configuration
To establish an IPSec tunnel to Umbrella, configurations must be made on both Umbrella Dashboard and Meraki Dashboard.
Umbrella Dashboard
From Meraki dashboard navigate to Secure Connect > Identities & Connections > Network Tunnels. This shoudl open Umbrella dashboard Deployments > Network Tunnels page. Select Add.

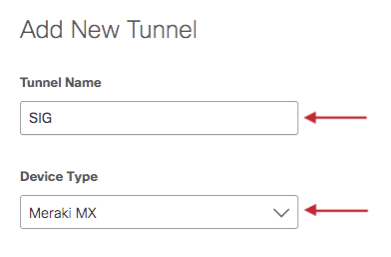
Name the tunnel and select Device Type > Meraki MX.
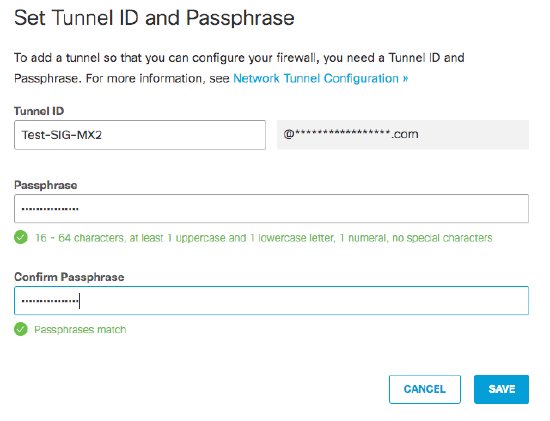
Set the Tunnel ID and Passphrase. This will be entered as the Local ID (User FQDN) and preshared secret in the Meraki dashboard.
Select Service Type as Secure Internet Access or Private Access. For Private Access you can specify Preferred Primary Data Center. Specify IP Address Ranges reachable behind the tunnel. For more information related to tunnels please visit Network Tunnel Configuration.
Maximum Transmission Unit (MTU) Size
Umbrella does not support the reassembly of fragmented IPSec traffic or IP packets for internet traffic. Thus, when a network device sends fragmented IPSec or IP packets to Umbrella, Umbrella drops the fragmented packets. IPSec tunnels for Secure Internet Access must have an MTU no larger than 1280 bytes. Fragmented packets in underlay or overlay are dropped.
After setting the Tunnel ID and Passphrase, a confirmation prompt will be displayed, allowing you to copy and paste the Tunnel ID and Passphrase to Local ID (User FQDN) and Preshared secret in the Meraki dashboard.

Meraki Dashboard
Navigate to Security & SD-WAN > Configure > Site-to-site VPN and configure Type as Hub (Mesh). Select desired subnets to participate in VPN.
In the Security & SD-WAN > Configure > Site-to-site VPN > Non-Meraki VPN peers section, select Add a peer.

Please Note that to use the specific network TAG when building this kind of tunnel to the site, for example here is using SIG. By default if you have ALL Networks, it will create third party IPSEC tunnel to rest of the orgs which will not be an intended result and can bring an OUTAGE.
For the Non-Meraki VPN peers fields:
- Name: Provide any sample name for the tunnel
- Public IP: You will find this IP address in the article at https://docs.umbrella.com/umbrella-user-guide/docs/cisco-umbrella-data-centers
- Local ID: You will get Tunnel ID string from Umbrella dashboard once you have completed creating a Network Tunnel.
- Private subnets: This will always be 0.0.0.0/0 when redirecting all internet bound traffic into the tunnels. For Private Access, one can include only the private IP pools defined for Remote Access or Branch networks that should have access to these private applications behind this tunnel.
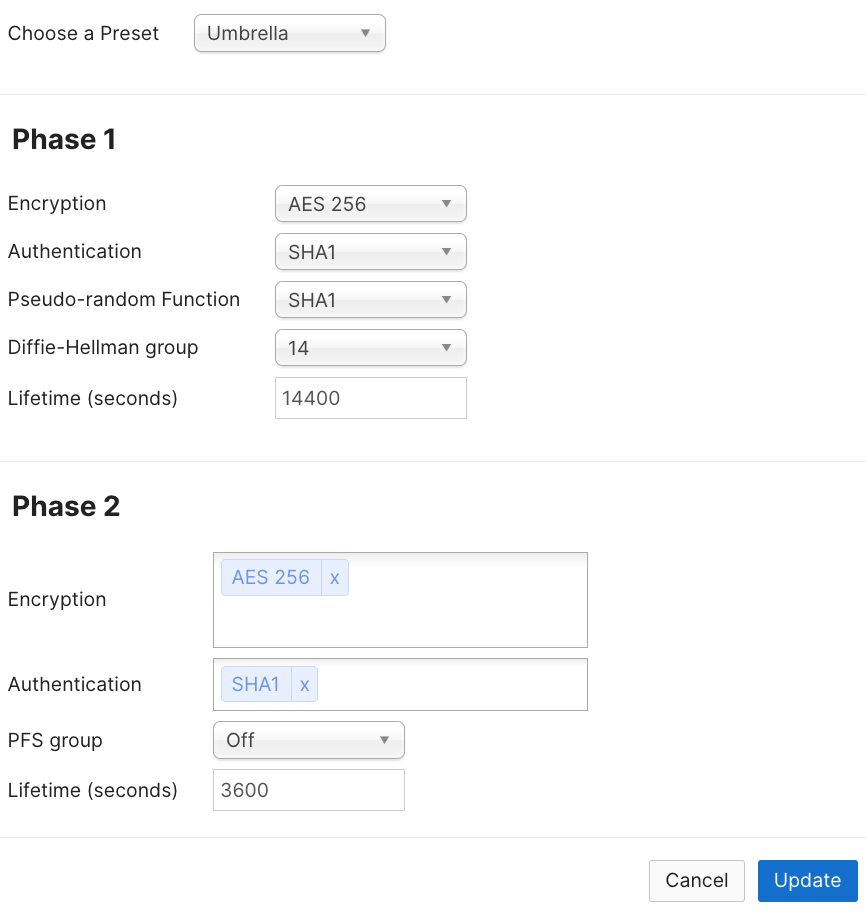
- IPSec policies: Choose Preset of “Umbrella”. This will populate all of the IPSec tunnel parameters necessary for Umbrella connectivity.
- Preshared secret: You will get this string from Umbrella dashboard once you have completed creating a Network Tunnel Identity using PSK.
- Availability: You will add the Tag here that you had defined earlier for the MX appliance that will be building the tunnels to Umbrella cloud. If you want the configuration to apply to all networks, you can use the All option.
Verification of the Umbrella IPSec parameters can be viewed by selecting Umbrella
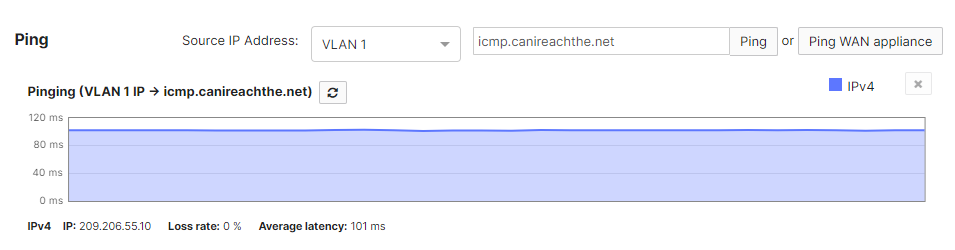
Lastly, you will have to generate interesting traffic through the tunnel in order for the Umbrella dashboard to reflect active tunnel status. To generate interesting traffic, simply source pings from a VPN-participating VLAN (navigate to Security & SD-WAN > Monitor > Appliance Status > Tools) to a destination IP address that would take the IPSec tunnel route.
Meraki dashboard displaying an active Umbrella SIG IPSec tunnel (Security & SD-WAN > Monitor > VPN Status) should look like the following:

Umbrella Dashboard displaying an active IPSec tunnel to Meraki MX (Deployments > Network Tunnels) should look like the following:

Validation
To validate traffic being sent to over the tunnel to SIG vs traffic not being sent over the tunnel we can connect to a network on a VLAN that is participating in tunnel and one that is not to observe the difference.
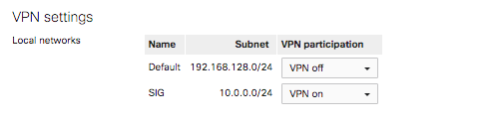
For this test we used the below configuration where the Default VLAN1 is not participating in VPN and the SIG VLAN10 is participating. This configuration can be viewed under Security & SD-WAN > Configure > Site-to-site VPN.
Using a Wireless capable MX68CW two SSIDs were created. One on VLAN1 and the other on VLAN10.
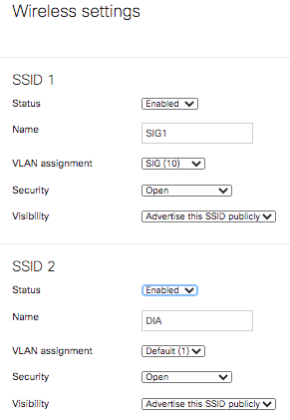
When a device connects to the SSID SIG1, it receives an IP on VLAN10.
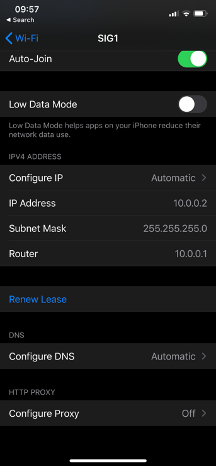
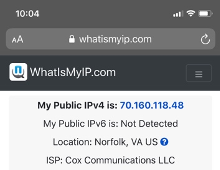
When the device accesses the Internet, the traffic will have a NAT address from Umbrella.
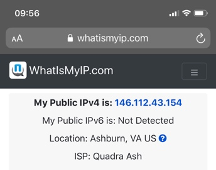
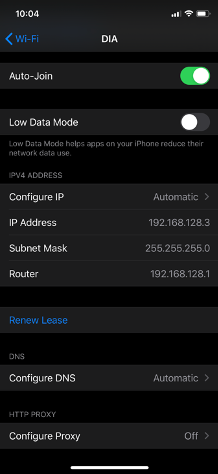
When a device connects to the SSID DIA, it receives an IP on VLAN1.
When the device accesses the Internet, the traffic will have a NAT address from the MX Internet Interface.