
Adaptive Policy and Cisco ISE
Overview

The purpose of this document is to give a quick overview of how to use Cisco's Identity Services Engine (ISE) to assign security group tags (SGTs) to clients.
Adaptive Policy leverages SGTs for endpoint classification, identity propagation, and policy enforcement. Even though Adaptive Policy's actual policy lives and breathes in the dashboard, Cisco ISE can be utilized to dynamically assign SGTs to clients based on a number of conditions, such as device profile, posture, user, machine, and more. This is all done through the use of RADIUS and the AV pair for security group tags.
ISE SGT Creation
Within Cisco ISE, SGTs need to be created to allow for assignment to rules within the authorization policies. If this is a brand new install of ISE and there is no pre-existing TrustSec configuration, the following configurations can be implemented to get started:
For pre-existing TrustSec installs that want to leverage ISE to send already-created SGTs, this section can be skipped and the guide can be continued starting with the section titled: Adaptive Policy Group Tag (SGT) Creation in the Dashboard
Starting with ISE 3.2 Patch 1, there is a native integration within ISE to sync Adaptive Policy groups (SGTs), custom ACLs (SGACLs), and policies from TrustSec into the dashboard using dashboard APIs. Please refer to this Cisco documentation.
When synchronizing Cisco Identity Services Engine (ISE) to the Meraki Dashboard, policies that have the default Security Group Tag (SGT) configured as both the source and destination must be excluded from the sync process. This configuration is not supported by Meraki and would cause integration errors if not filtered out. The default SGT groups are Infrastructure (2) and Unknown (0).
Enabling Manual SGT Number Assignment (Optional)
To make sure there is flexible configuration of SGT name to number assignment in ISE, it is easiest to disable automatic number assignment so that it is end-user configurable.
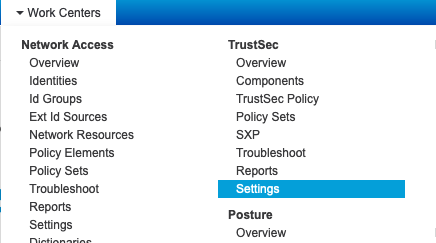
- Navigate to Work Centers > TrustSec > Settings
- Scroll down to "Security Group Tag Numbering" and select "User Must Enter SGT Numbers Manually" and click "save"

Configuring Security Group Tags for Authorizations
To create SGTs that are assignable in the authorization rulesets:
- Navigate to Work Centers > TrustSec > Components

- Next, select "Add" in the menu to add a new SGT

In this menu, SGTs can be created and named according to their purpose. The name is locally significant to ISE at this time, and is not used in the RADIUS AV pair, however for sanity's sake, it should match the Adaptive Policy group name and number in dashboard.
- Fill out the Name / Select an icon (significant to ISE UI only) / Tag Value and click "Submit"

Adaptive Policy Group Tag (SGT) Creation in Dashboard
Adaptive Policy global administration in the dashboard is located in Organization > Configure > Adaptive policy and groups in the Groups menu.

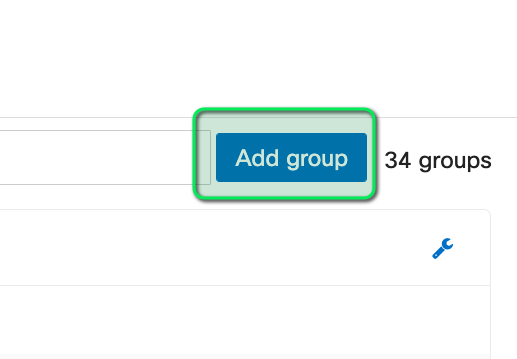
1. Creating an Adaptive Policy Group (SGT) in the dashboard is as simple as clicking the "Add group" button:
2. Next, fill out the fields ( Name, SGT Value, Description, and Policy Object Binding, if needed )

3. Click Review changes and then Submit
This function needs to be performed in both ISE and the dashboard so both sides match the required SGT values.
Cisco ISE Network Devices and Ruleset Configurations
Once the tag has been created in both Cisco ISE and the dashboard, rules can be configured in Cisco ISE to send the SGT as a RADIUS attribute to a supported Meraki MR or MS390. These can be combined with any other supported attribute, such as VLAN-ID or session timeout. For the sake of brevity in this document, these combined examples will be omitted.
Network Devices and Groups
Meraki devices need to be configured as RADIUS clients within Cisco ISE before ISE will allow authentication requests to be processed. This can be done in a couple of ways, including setting a default network device, or configured specific devices and groups for use within ISE. There are a number of ways to group devices in ISE including device type, location, etc, that will not be covered in this documentation. To configure a Meraki device in ISE, perform the following configurations:
- Navigate to Administration > Network Devices and Groups > Network Devices

- Select "Add"

- Fill out the device details. This once again can be filled out to be very granular down to a specific set of device IP address(es), specifying location (which can be used as a conditional match in ISE), and device type, which can also be used as a conditional match in ISE. In this example, the bare minimum of Name, IP info, and The RADIUS Shared Secret that will be used is filled out.

- Click "Submit"
At this point, the endpoint/s is/are configured and will be able to be successfully processed by Cisco ISE.
Policy Sets
Within Cisco ISE there is a concept of Policy Sets. These are collections of policies that are utilized by creating condition matches on the initial authentication request. These condition matches can be fairly complex, however some of the easiest methods of sorting requests are by using network access device filters like location, device-type, or even criteria like the SSID the request is coming from. If no filter is matched, the traffic will go through the default policy set. This is often used for initial deployments or a proof of concept. For this document the default policy will be used.

Creating a ruleset to send back an SGT and optionally other data
- To create a rule in the default ruleset, click the right arrow here:

- Click the Authorization section of the policy set here:

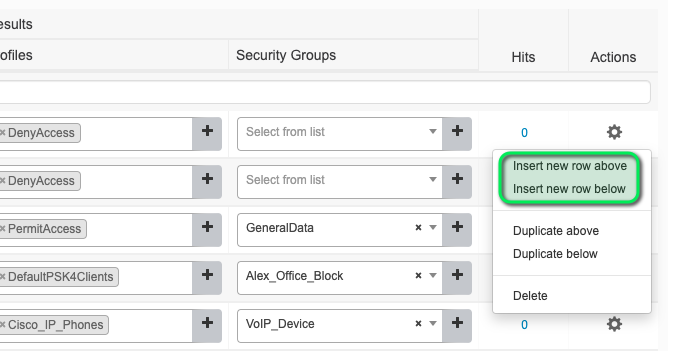
- Next, a new rule can be created. However before creating a new rule, take note that the rules are processed in a top-down fashion. The most specific rules should be up top (where the match is extremely specific to the authentication request) and the least specific match should be toward the bottom. To create a new rule, click the sprocket to the right of a rule and choose "Insert new rule above" or "Insert new rule below," being cognizant that the choice can affect other authentication requests depending on the specificity of the rule:
- Now we will create a rule that matches a domain authenticated wired 802.1X request using the following conditions:

- Next we will click "Use" at the bottom. Once the "Use" button is clicked, we will be returned to the rule list with our new rule in the list, however there is no "Results Profile" or "Security Groups" selection made.

- To configure an SGT in the response as well as other attributes, such as VLAN 300, we can use a configured result profile of VLAN 300 and select an SGT value in the security groups list. For this demonstration, the VLAN300 "Result" profile is used (the "Result" profiles are configured under Policy > Policy Elements > Results > Authorization Profiles), and the SGT of ExampleTag as created above.

- Once this is complete, click "Save" below to install the configuration
MS Access Policy Configuration and Application
To perform 802.1X authentication on an MS switch port, please follow our MS Switch Access Policies (802.1X) documentation.
Note: In the dashboard, you can assign either an access policy or a static tag, not both. If you are using RADIUS to assign policy, ensure that the RADIUS server is always sending back a SGT value. If RADIUS does not respond with an SGT, the switch will attempt to match the client's IP to an IP to SGT map. If one is not present, the switch will assign the client to a value of 0.
MR WPA2-Enterprise Configuration
To perform WPA2-Enterprise authentication with MR, use the following configuration guide in our Configuring RADIUS Authentication with WPA2-Enterprise documentation.
One thing to note with MR that is different than MS: you CAN apply a default tag to the SSID and override it with a RADIUS response.
Monitoring and Troubleshooting
There are two key places to monitor the outcomes of an 802.1X authentication, including the dashboard and within Cisco ISE.
Cisco ISE
To monitor the authentication and authorization status in Cisco ISE, navigate to Operations > RADIUS > Live Logs. This is where all authentication and authorization traffic hits the server and is displayed in an easy-to-read format.
As seen in the following screenshot, we have a wired dot1x client matching the rule created in the previous configuration where the VLAN ID sent back was 300, and the tag of 100 (ExampleTag). In this screenshot, there are two line items created for a single authorization. The green highlighted is the authorization rule hit and the subsequent blue highlighted line is the session that is started for that authentication.

To see more details on the authentication request, clicking the Details icon will open a new link to an in-depth review of the authentication and authorization process.
The Dashboard
Within the dashboard, authentication details can be seen under the specific network device's event logs, as well as the current state of the client under the interface details on MS and the summary data on MR.
MS
To check the Adaptive Policy group assignment on MS, navigate to Switching > Monitor > Switches > then choose the appropriate switch port.
Here you can see the currently connected clients, their IP addresses, and other relevant info, including the Adaptive Policy group:

MR
Navigate to Wireless > Monitor > Access points > then choose the appropriate AP.
Here you can see the connected client and a number of other relevant bits of data, including the Adaptive Policy group here:

Additional Adaptive Policy Resources
For additional information on Adaptive Policy, refer to the following links:
Adaptive Policy Overview
Adaptive Policy Configuration Guide
Adaptive Policy for MX/Z Platforms
Adaptive Policy MS Configuration Guide
Adaptive Policy MR Configuration Guide
Adaptive Policy Telemetry