
Managing Multiple Sites with Meraki Go
Overview
Meraki Go allows for a single account/e-mail address to be used to manage multiple sites. Managing multiple sites is a way to consolidate a business's hardware from multiple physical locations into a single Meraki Go account. The terminology used to describe multi-site setups is as follows:
- Company: The name of the business or group the Meraki Go hardware belongs to.
- Site: A particular location within the aforementioned Company which has Meraki Go hardware.
- Administrators of a company can manage all sites within said company.
Any Meraki Go Company can manage up to 5 Sites. Once 5 sites exist within a company, no further sites can be created for that company.
Why use Multi-Site?
- Use a single account/e-mail address to manage multiple separate Meraki Go deployments.
- Allows Site-to-Site VPN for participating GX50s in multi-site.
- Any GX50 sites in a company can be connected via VPN.
- Reduces overhead for managing multiple Meraki Go deployments.
What about Multi-Company?
Managed Service Providers (MSPs), partners, installers, or any other group that installs Meraki Go can also manage multiple companies. There are two ways to manage multiple companies:
- Have an administrator of another Meraki Go company add you as an additional administrator. This will allow for a Company selection to occur prior to login to manage a particular company.
- Use the Create Company tool from the web app settings menu

- Fill out the new company form, and click Create Company
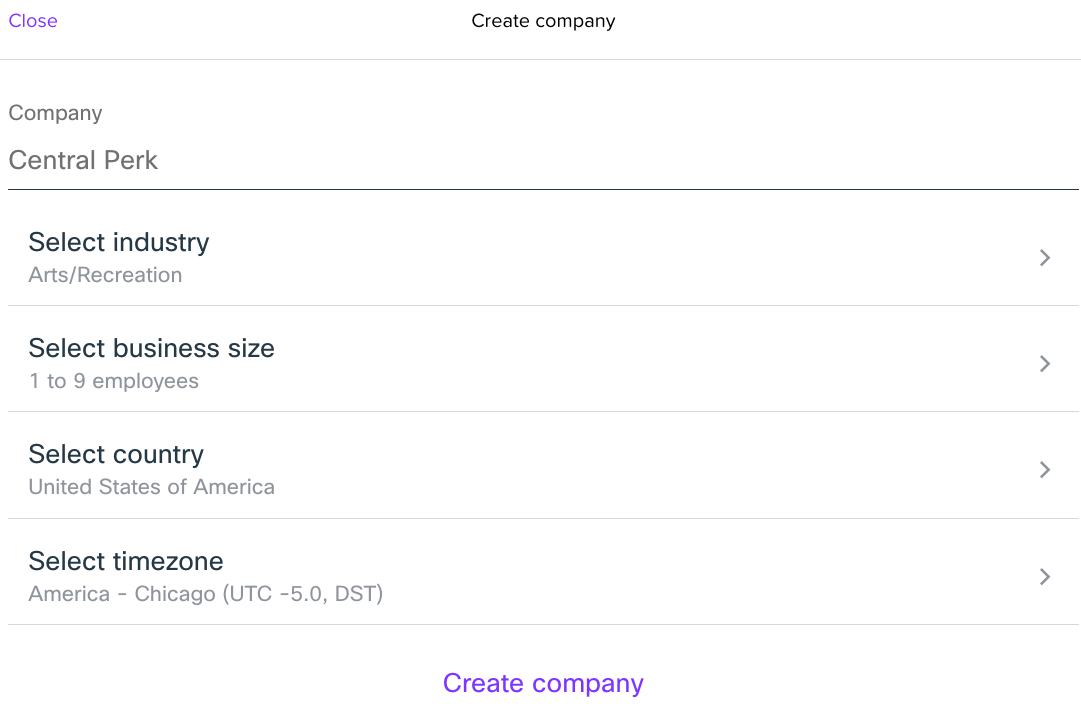
- Fill out the new company form, and click Create Company
Note: Create Company is only available in the Meraki Go web app.
Setting up Multi-Site
Upon registering a new account, a Company is created as a result. By default, the first site is named after the company. For example, if a new account is registered with the company name "JJ's Diner", the first site is also called "JJ's Diner". New sites can be quickly created from the settings menu, and removed if they are no longer in use.
Create New Site
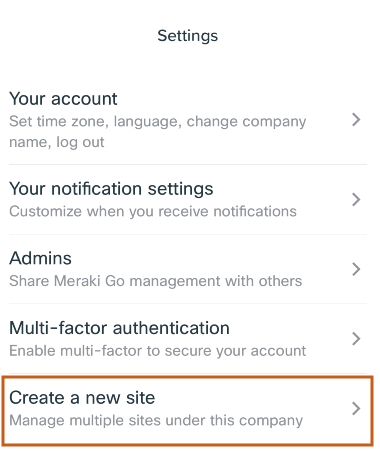
- Open the app and navigate to Settings pane, and scroll to the Account section.
- Select Create a new site
- A new prompt will appear asking for a site name, as well as a list of current sites for the company
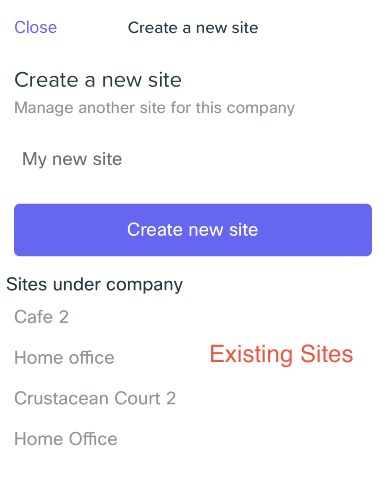
- Click Create new site and instruction on how to access the new site will be given.
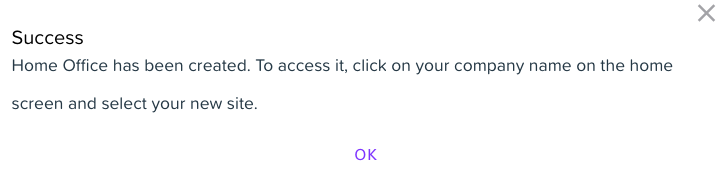
- There is now a new company site ready for Onboarding and adding new hardware.
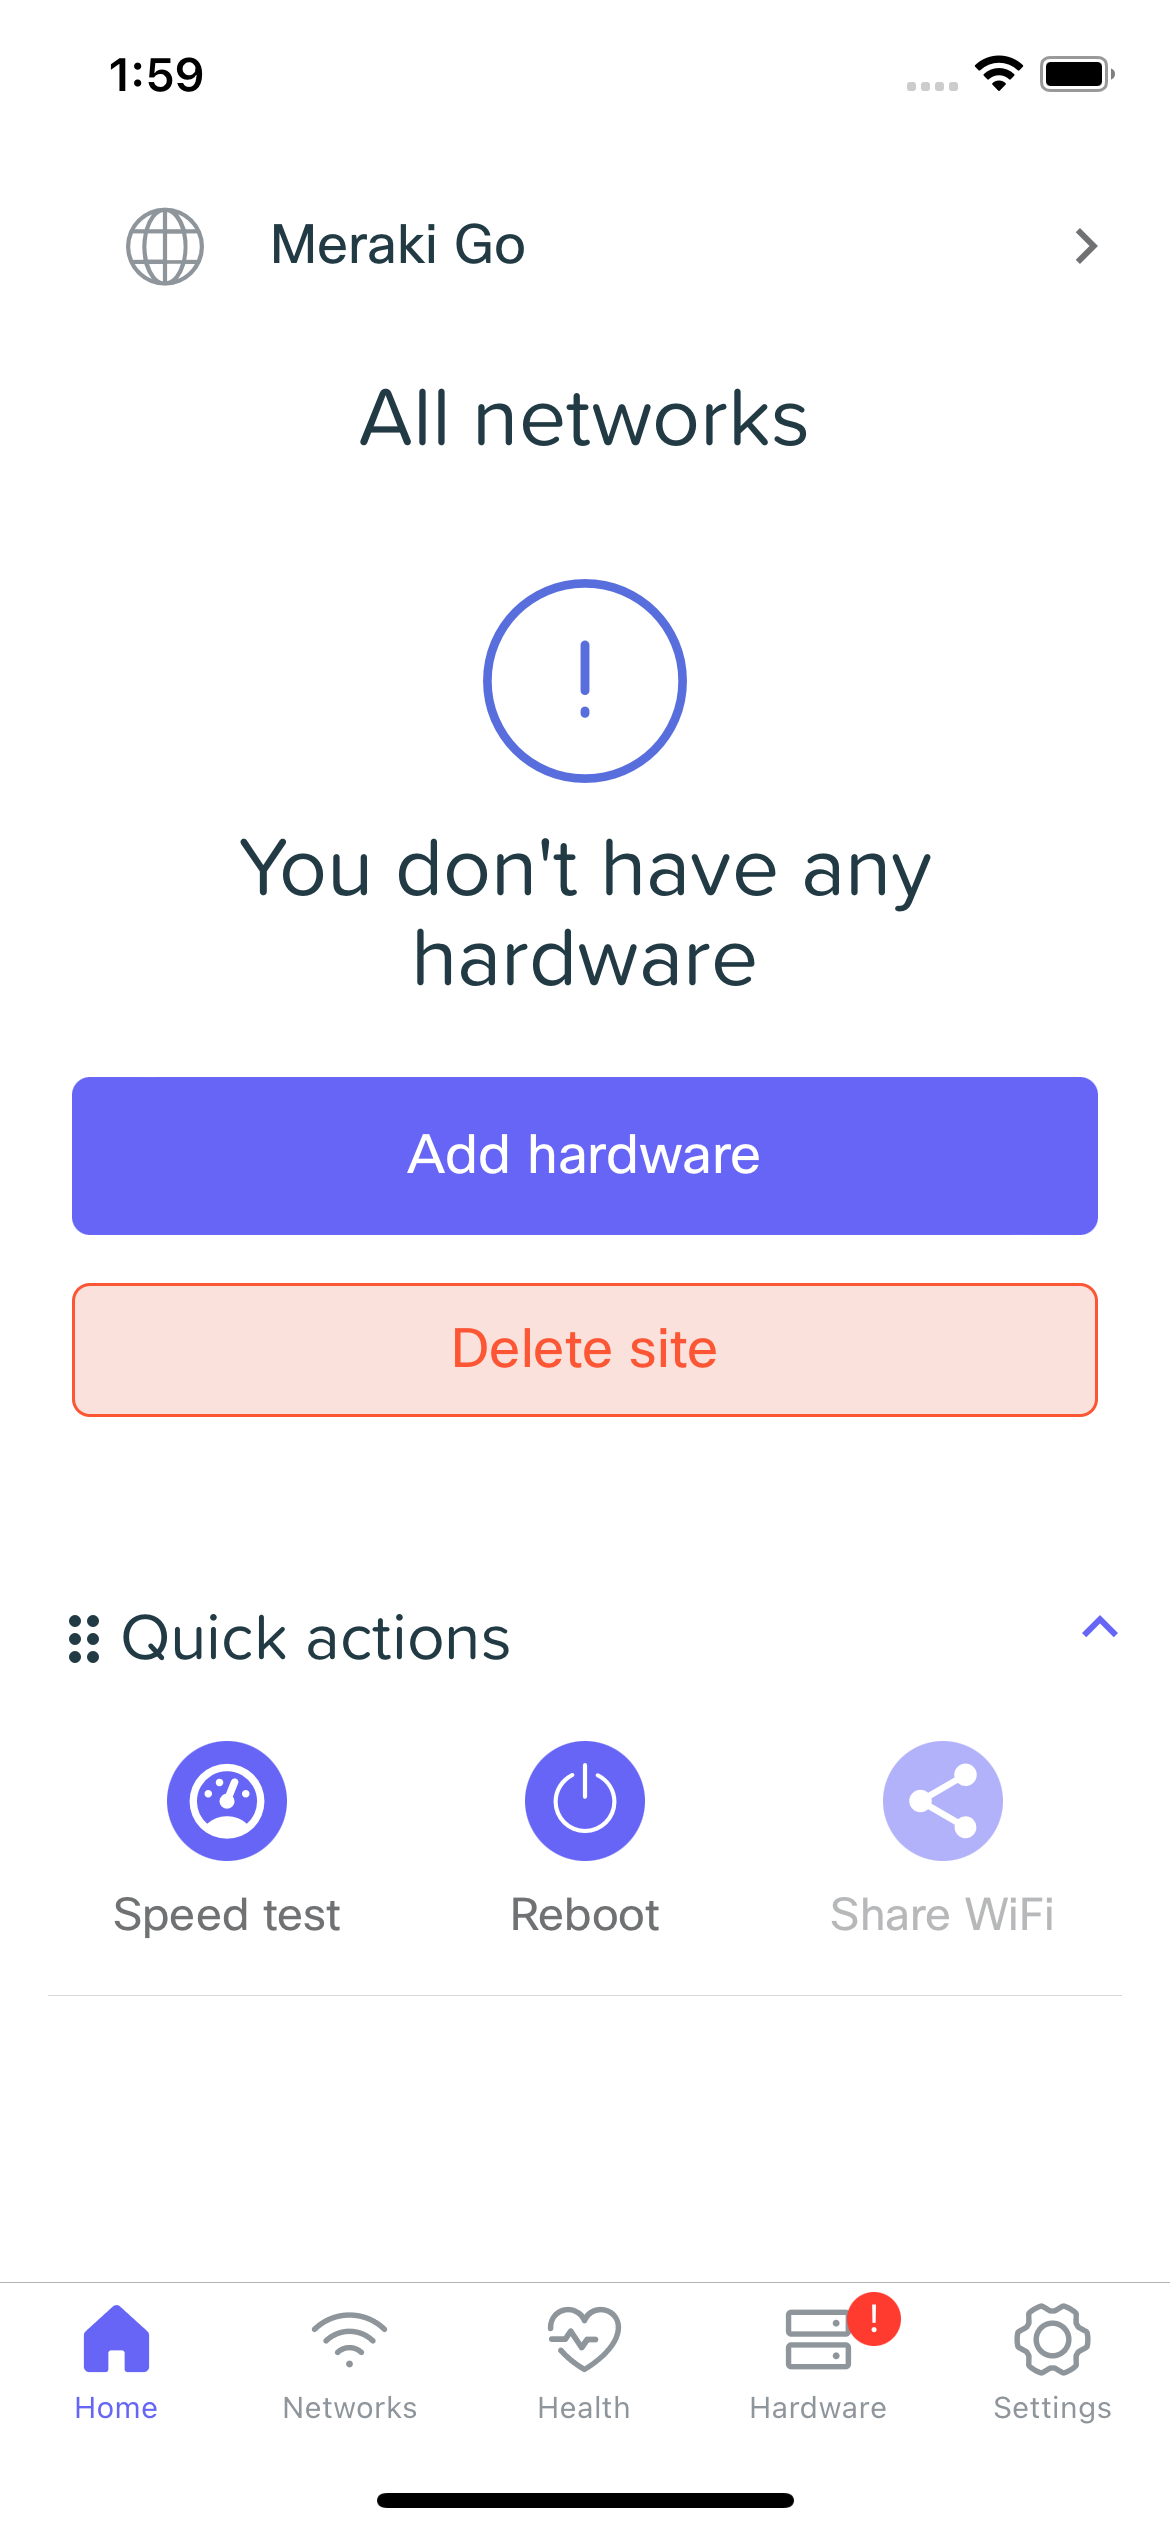
Delete a Site
If a site is no longer required, the steps to delete a site are as follows:
- Remove any hardware associated with the site.
- Navigate to the hardware tab, and select each piece of hardware and remove it (Documentation).
- Navigate back to the home screen where a Delete Site option is now presented for the empty site:
Delete Meraki Go Company and Account
Have you made your Go account by mistake, or are no longer using your current account? If for any reason you need to delete your account, you can do so from the Settings > Account section by tapping Delete This Company:
To successfully delete an account, the following requirements must be met:
- No hardware can be associated with the Meraki Go account - be sure to remove all hardware.
- No extra administrators can be associated with this Meraki Go account - be sure to delete all additional administrators.
- If a license is present on the account, it must be moved or invalidated. Please contact support for assistance handling a license if the location must be deleted.