The Access Point Status page is viewable from the Access Point list at Wireless > Access Points. Click on any access point to view the Access Point Status Page. The Access Point Status Page contains the following information:
- Identifying information (such as serial number, model, tags, and location)
- BSSID details for each SSID and current radio configuration (such as bands, channels, channel-width, and transmit power)
- Configured IP address information (IP address, address assignment method, default gateway, and DNS servers assigned to uplink)
- The public IP address that is currently being used to communicate with the Meraki Cloud
- A link to the network's Topology page (for combined networks only)
- Link to the access point Event Log
- Configuration status information indicating whether the configuration of the access point is up to date
- Configured firmware information indicating whether the access point is on the latest available production firmware, and a link to the page where an update can be performed or scheduled if one is available
By clicking Edit configuration, you can edit the name, notes, tag, and location information for the MR device. You can also remove the device by clicking Remove from this network.
The BSSID details window has Enabled and Broadcasting columns. These columns reflect the current SSID configuration from Wireless > Configure > Access Control and SSID availability using tags from Wireless > Configure > SSID Availability. The columns do not represent the individual selected bands in Wireless > Configure > Radio Settings > General > Band Selection.
The BSSID will show enabled on all bands if it is configured to broadcast on at least one band in Wireless > Configure > Radio Settings > General > Band Selection and is enabled in Wireless > Configure > Access Control.
The Broadcasting column changes to "No" depending on the tags and scheduling used in Wireless > Configure > SSID Availability.
For example, this access point is only configured to broadcast on 5 and 6 GHz in Wireless > Configure > Radio Settings > General > Band Selection. However, "Meraki SSID" is broadcasting on at least one band and Wireless > Configure > SSID Availability > Per access point availability is set to Enabled on all access points.

Live Tools
Live tools on the Monitor > Access Points page can provide important information and assist with troubleshooting. The Live tools will be supported on both Cloud Managed Access Points and Catalyst Access Points that are joined to a WLC that is in Cloud-Managed Hybrid Operating Mode.
IOS XE 17.18.1 is required for AP Live Tools.
To use Live Tools, select the access point of interest from the Monitor > Access points page. This article is an overview of the available services associated with this feature.
-
Current clients
-
Ping
-
ARP table
-
Traceroute
-
Throughput
-
Blink LEDs
-
Reboot APs
-
Splash pages
Learn more with these free online training courses on the Meraki Learning Hub:
Sign in with your Cisco SSO or create a free account to start training.
Summary Tab
Current clients
The Current clients tool loads automatically by default and shows the number of clients connected, data usage for the AP in total and per user, as well as how well and how long the user has been associated. You may also ping each currently connected client.
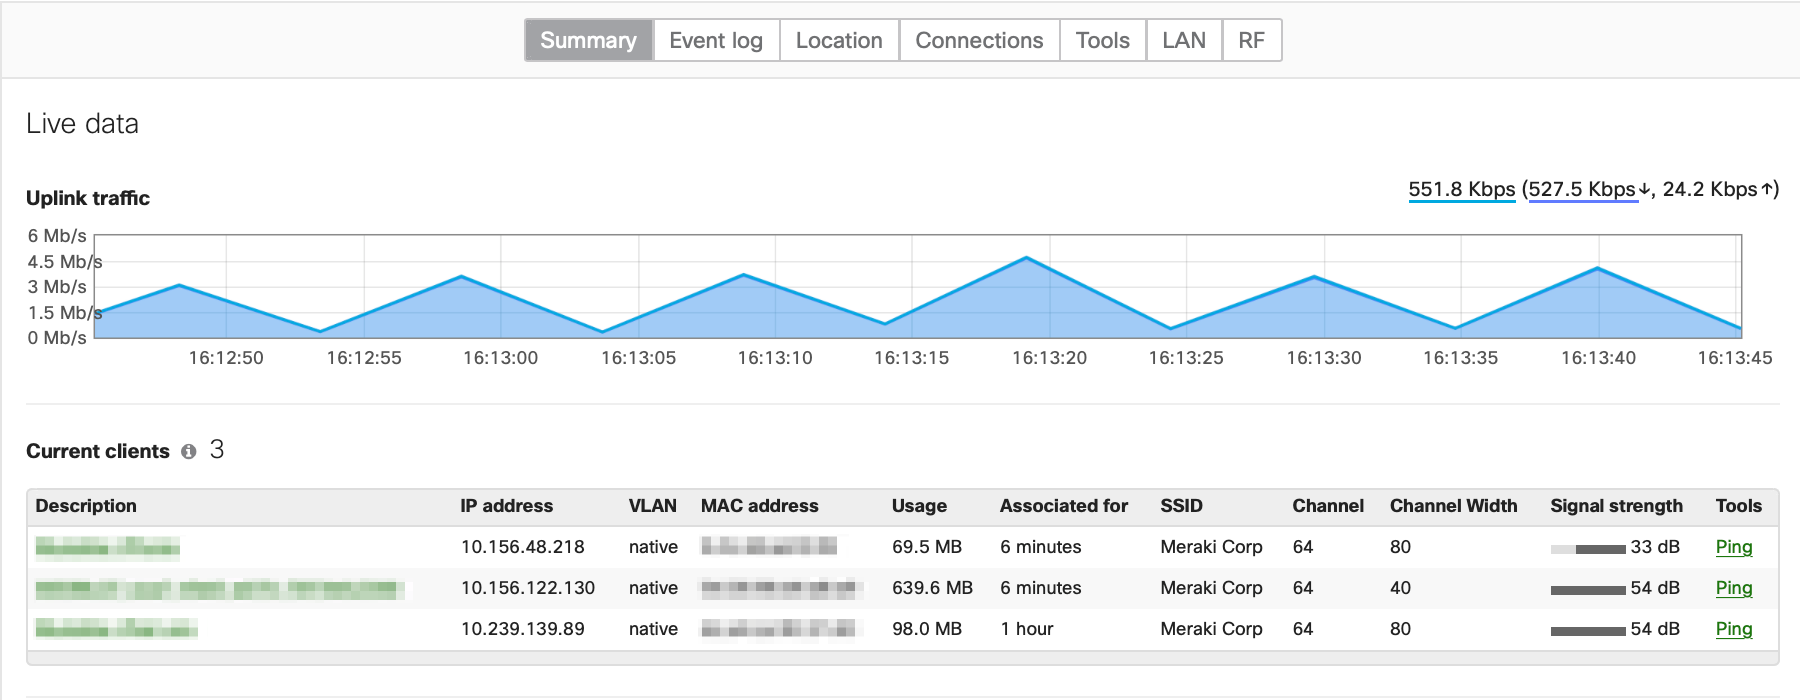
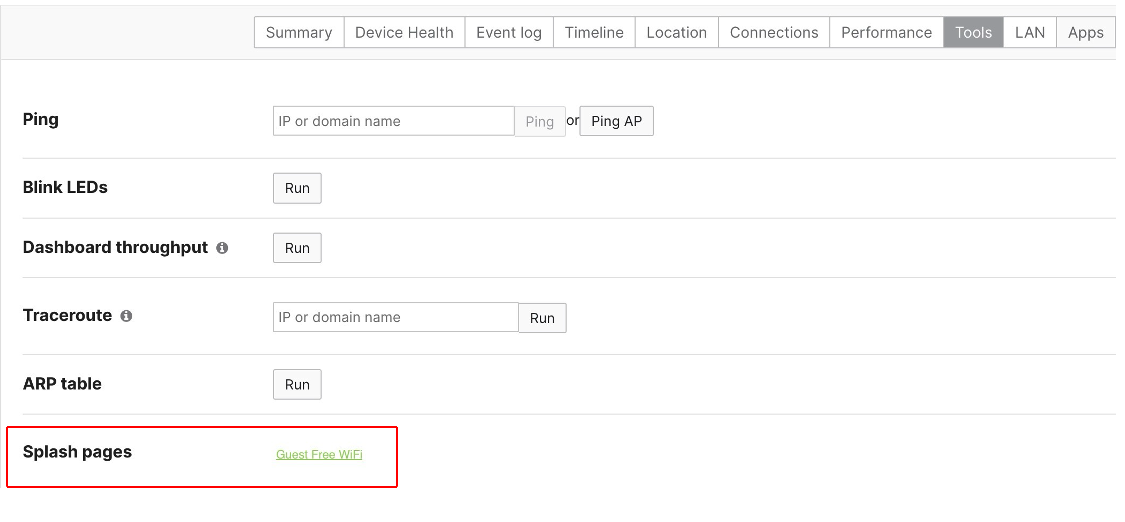
The following tools can be accessed by navigating to the Tools tab of the MR's status page.

Run a Ping test to any client that is connected wirelessly to the AP or to any client that should be reachable over the wired network. You can also run a ping test from Meraki dashboard to the AP by clicking Ping AP.

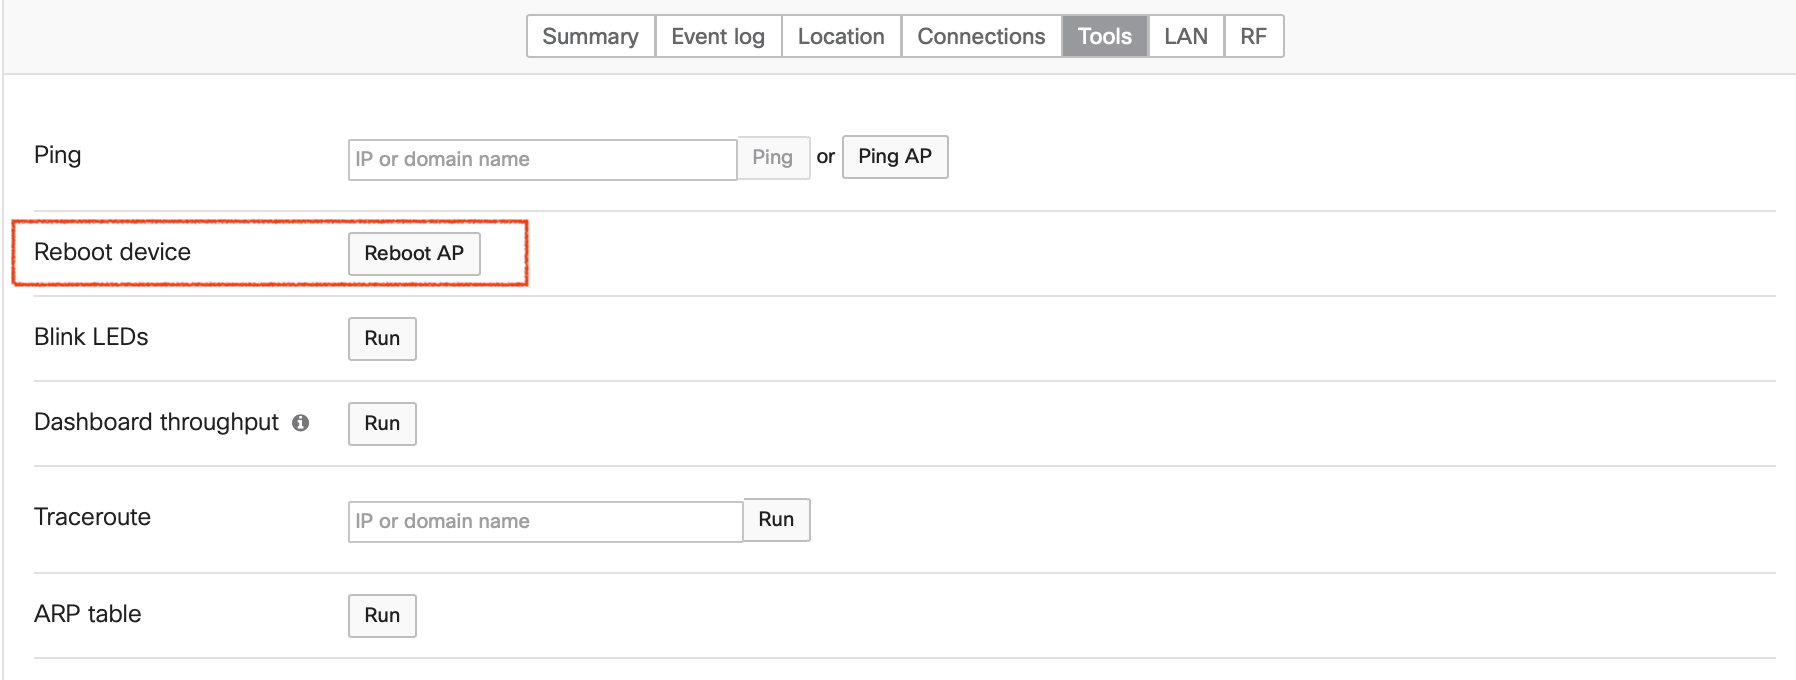
Reboot Device
If the AP is checking into the cloud and you would like to perform a reboot without unplugging the device you can click on Reboot AP to reboot the device.
Blink LEDs
This tool helps find the AP. Also, if you are running in Dark Mode where the LEDs are not on, this tool will blink the LEDs so that you can see if the device is functioning or not. This tool flashes all the LEDs on the device in unison

Note: For some MR models (e.g., MR45/MR46), the LED may take up to 60 seconds to stop blinking when this operation is suspended.
Dashboard throughput
This tool allows a throughput test to be performed between the AP and Meraki dashboard. For more information, review the article on the Throughput live tool.
Note: This is not meant as a tool to test the overall throughput available from an AP to the Internet.

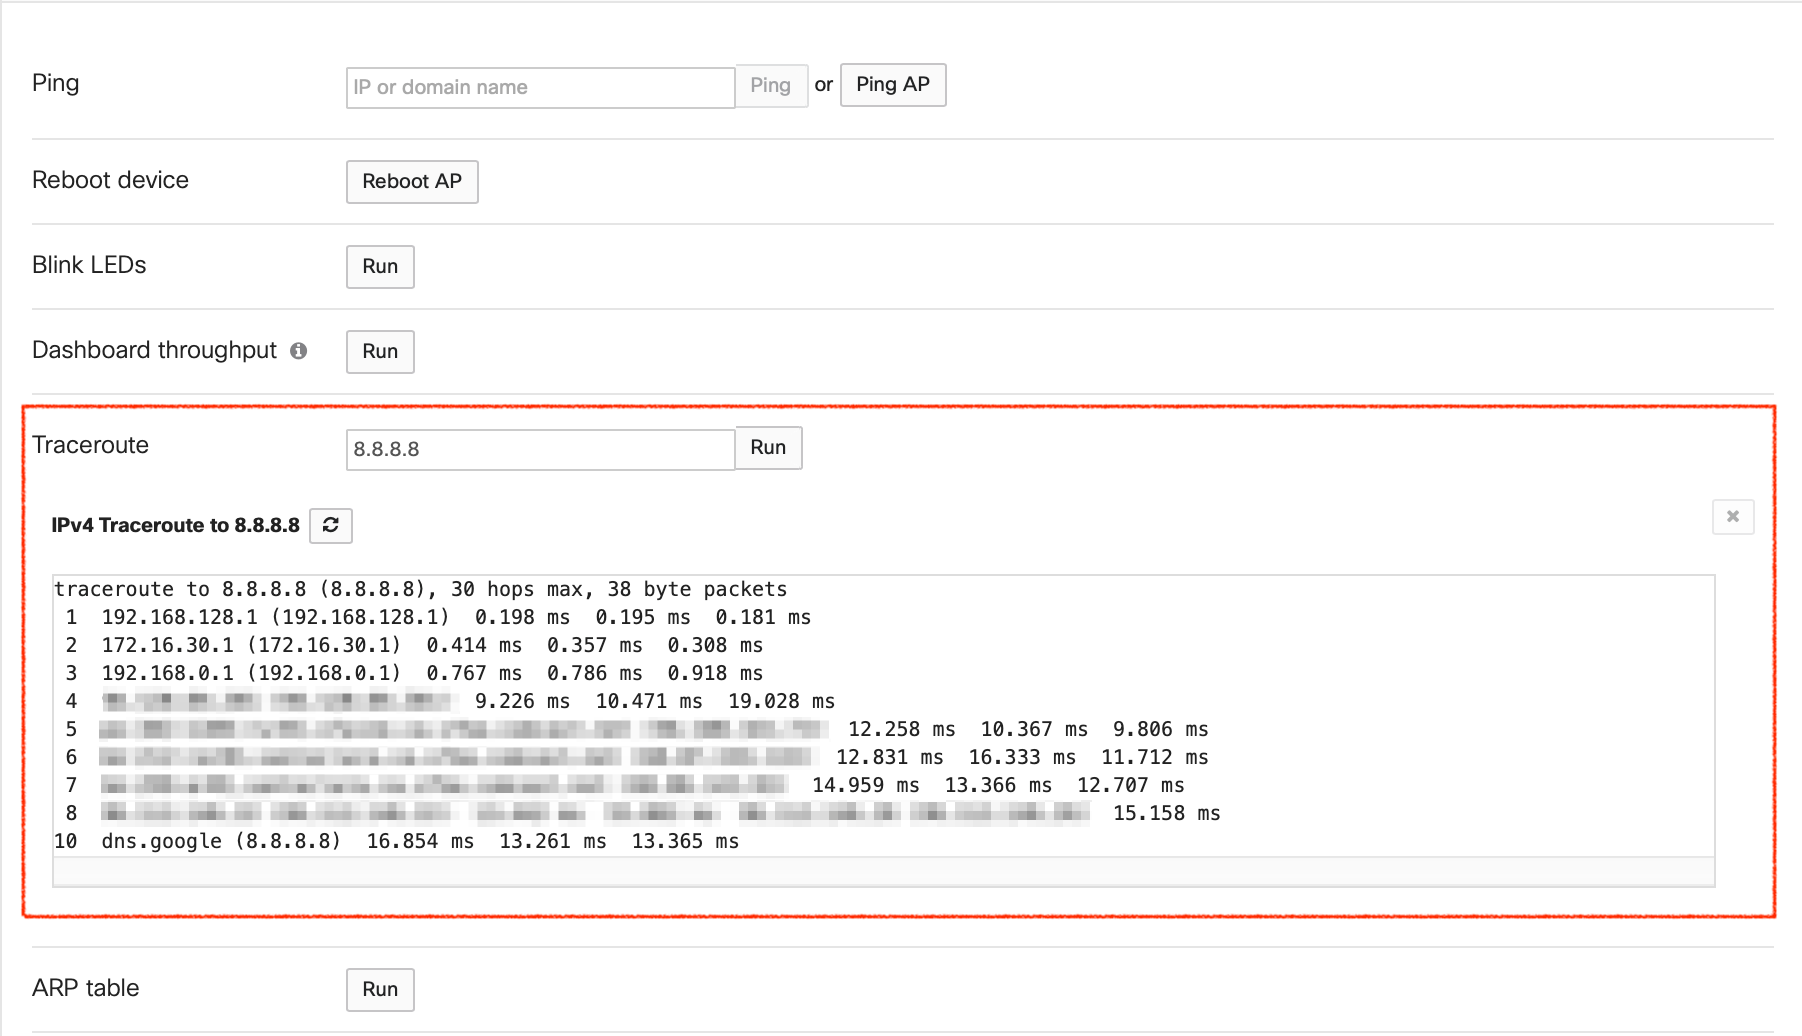
Traceroute
Run a traceroute from the AP to any host upstream. This lets you know the route information from the AP to the specific host. Learn more about using traceroute here .
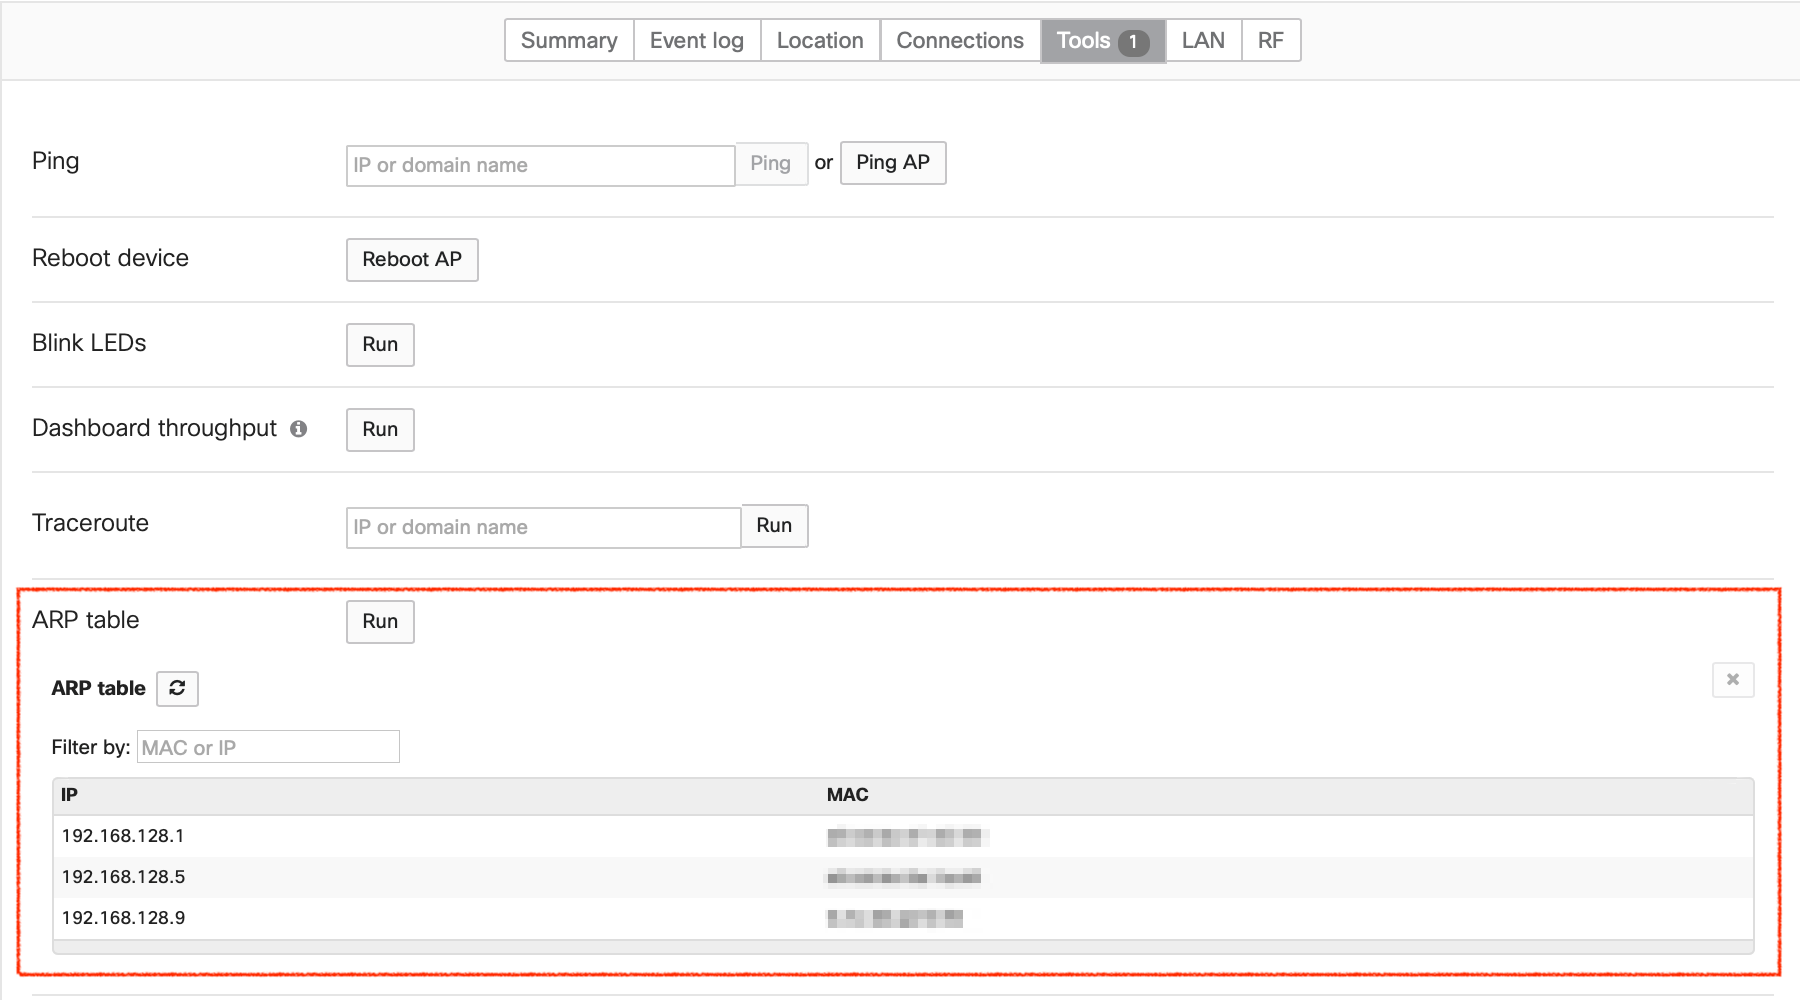
ARP table
The ARP table live tool can be used to view the AP's ARP table. This will display a list of IP addresses and the MAC addresses they are mapped to.
Splash Pages
The Splash Pages tool will allow the admin to verify functionality of the configured Splash Pages for the Access Point that is currently selected. This will simulate the client experience and can be used to verify Splash operation directly from Dashboard. Please note that if there are no Splash profiles assigned to this Access Point, no Splash Pages to test will be present. Clicking any of the Splash pages hyperlinks will open the splash page in a new tab in your browser.
These tools will only work with APs that are online and communicating with the Dashboard. If you are trying to use one of these tools and they are taking a long time to load, this can be due to a few reasons:
-
If the AP is currently working at capacity due to large number of clients or data passing through the device, these tools will take time to load because the AP’s resources are taxed
-
If the AP is having problems connecting to the cloud controller, these tools will either not load or load slowly. Learn more about troubleshooting this here .
-
If there is a problem on your local lan that is impeding traffic or your connection is slow, this can cause long load times as well.
Learn how to troubleshoot interference issues in the following articles:
Meraki for Events and high density deployments
Tools for Troubleshooting Poor Wireless Performance
Common Source of Wireless Interference


