
MR 28.X Firmware Release - Supported IPv6 Features
MR Live Tools
Please refer to Using the MR Live Tools for more information about the IPv4 version of these tools.
Ping
The Ping tool supports both IPv4 and IPv6 addresses as well as hostnames. If a provided hostname resolves to both an IPv4 and IPv6 address, the AP will perform a ping test to both IP addresses.

Traceroute
Traceroute tool supports both IPv4 and IPv6 addresses as well as hostnames. If a provided hostname resolves to both an IPv4 and IPv6 address, the AP will perform a traceroute test to both IP addresses.

MR Uplink IPv6 Configuration Options
Cisco Meraki access points can be configured with IPv6 address on the management interface using one of the following methods:
-
Stateless Address Autoconfiguration (SLAAC)
-
Static IPv6 address assignment via Meraki dashboard or MR local status page
Note: MR access points can connect to the Meraki dashboard in dual-stack (IPv4/IPv6), IPv4-only, and IPv6-only networks. However, it is recommended to use dual-stack IPv4/6 in your networks with MRs for full functionality until we archive the full parity between IPv4 and IPv6 features.
Stateless Address Configuration (SLAAC)
An MR access point will perform these steps to configure an IPv6 address on the management interface:
-
Once AP boots up, it will generate a link-local address using the EUI-64 process.
-
MR will perform a Duplicate Address Detection (DAD) on its link-local address by sending a Neighbor Solicitation (NS) to the Solicited Node Multicast address it generates from its link-local address. A corresponding event will be logged to the Event log if there is a conflict.
-
An MR will use this unique link-local address as a source address to send a Router Solicitation (RS) to the all-routers multicast address of ff02::2.
-
The IPv6 router on the link receives the Router Solicitation (RS) and responds with a Router Advertisement (RA) sourced from its own link-local address, and targeting either the link-local unicast address of the requesting MR or the all-nodes multicast address ff02::1.
-
The Router Advertisement (RA) message includes various information. At a minimum, it should consist of the global IPv6 prefix, prefix length, and IPv6 DNS servers (this means that the upstream device sending the RA should be configured to support RDNSS per https://tools.ietf.org/html/rfc8106). In addition, MR will use the link-local address of the router it received the RA from as an IPv6 default gateway.
Note: The prefix length received in the RA must be between /1 and /64.
-
An MR will combine the received global prefix with its EUI-64 formatted MAC address to form a global unicast IPv6 address used to route traffic to external destinations like the Meraki Dashboard.
-
An MR will perform a DAD on its global unicast address. A corresponding event will be logged to the Event log if there is a conflict.

Static IPv6 Address Assignment via Dashboard
For static IPv4 options, please refer to Static IP Assignment on a Cisco Meraki Access Point - Cisco Meraki
If you would like to configure an MR access point with a static IPv6 address, please follow the steps below.
Note: This method requires that the AP is an active gateway. It also means that the AP needs to be online in the Meraki dashboard and have either an active IPv4 address received via DHCP lease, a static IPv4 address, an IPv6 address configured via SLAAC or a statically configured IPv6 address. This method does not work for devices acting as repeaters.
-
Browse to dashboard.meraki.com and log in to the Meraki dashboard.
-
Navigate to Wireless > Monitor > Access Points and click the name of the AP you would like to configure.
-
On the device status page, click the Edit icon to the right of the current IPv6 information to expand the configuration for that device.

Note: The prefix length you configure must be between /1 and /64.
-
Input the appropriate IPv6 information and click the "Save" button.

As soon as the AP updates its configuration to include the new static IPv6 address, it will attempt to use that address on the network. If the AP cannot reach the configured default gateway on this static assignment, it will fail back to SLAAC. Please inspect the static IPv6 configuration and the VLAN configuration used on the network if this happens.
Note: If you specify a VLAN in the static IPv6 configuration, AP will send its management traffic with an 802.1Q tag for that VLAN. Please ensure that upstream devices tag the return management traffic appropriately.
Static IPv6 Address Assignment via Local Status Page
-
DNS requests to IPv4 and IPv6 servers for ap.meraki.com's A record should be intercepted and receive "10.128.128.126".
-
DNS requests to IPv4 and IPv6 servers for ap.meraki.com's AAAA record should be intercepted and receive "fd0a:9b09:1f7:200::126".
-
HTTP requests to both of these addresses should show the ap.meraki.com page.
-
The page should display the client's IPv4/IPv6 address, depending on which IP version was used to reach the web page.
-
Connect to the Access Point and open the Local Status Page.
Note: The local status page may be accessed in the following ways:
-
Global unicast IPv6 address of the MR (management IPv6 address)
-
Predefined link-local address fd0a:9b09:1f7:200::126
-
ap.meraki.com
-
On this page, click on the Configure tab.
-
The page should now prompt for login credentials. If local login credentials were configured via Meraki dashboard, please use these credentials. Otherwise, the default login is the device's serial number as the username and a blank password.
-
On the Configure page, input the new static IPv6 information under “IPv6 Assignment”, then click Save.

Note: The link-local address option will only work if the client is on the same segment and connected to the MR. Remember to use brackets [] in your web browser when specifying IPv6 addresses.
Layer 3 IPv6 Firewall Rules
Please refer to MR Firewall Rules for IPv4-only L3 firewall configuration options.
MR access points support outbound layer three firewall rules with destination IPv4 and IPv6 addresses. Please follow the steps below to configure IPv4/IPv6 L3 rules:
-
Navigate to Wireless > Configure > Firewall & traffic shaping
-
Select an appropriate SSID from the dropdown at the top of the page
-
Click the “Add new” button
-
Specify a Policy (Allow/Deny), IP version (IPv4/IPv6), Protocol (TCP, UDP, ICMPv4, Any). Destination (IPv4 or IPv6 address), Destination port, and Rule description
-
While in the edit mode, you can add to the following:
-
Add more rules by clicking the “Add new” button
-
Reorder already configured rules using the icon with two parallel lines on the left of each rule
-
Add a new rule above or below the selected rule using the menu with three dots on the right of each rule
-
-
Once done, click “Finish editing” or click “Cancel” to cancel changes.
-
Save Changes at the bottom of the page.

Note: It’s only allowed to specify one IPv4 or IPv6 address per the “destination” field.
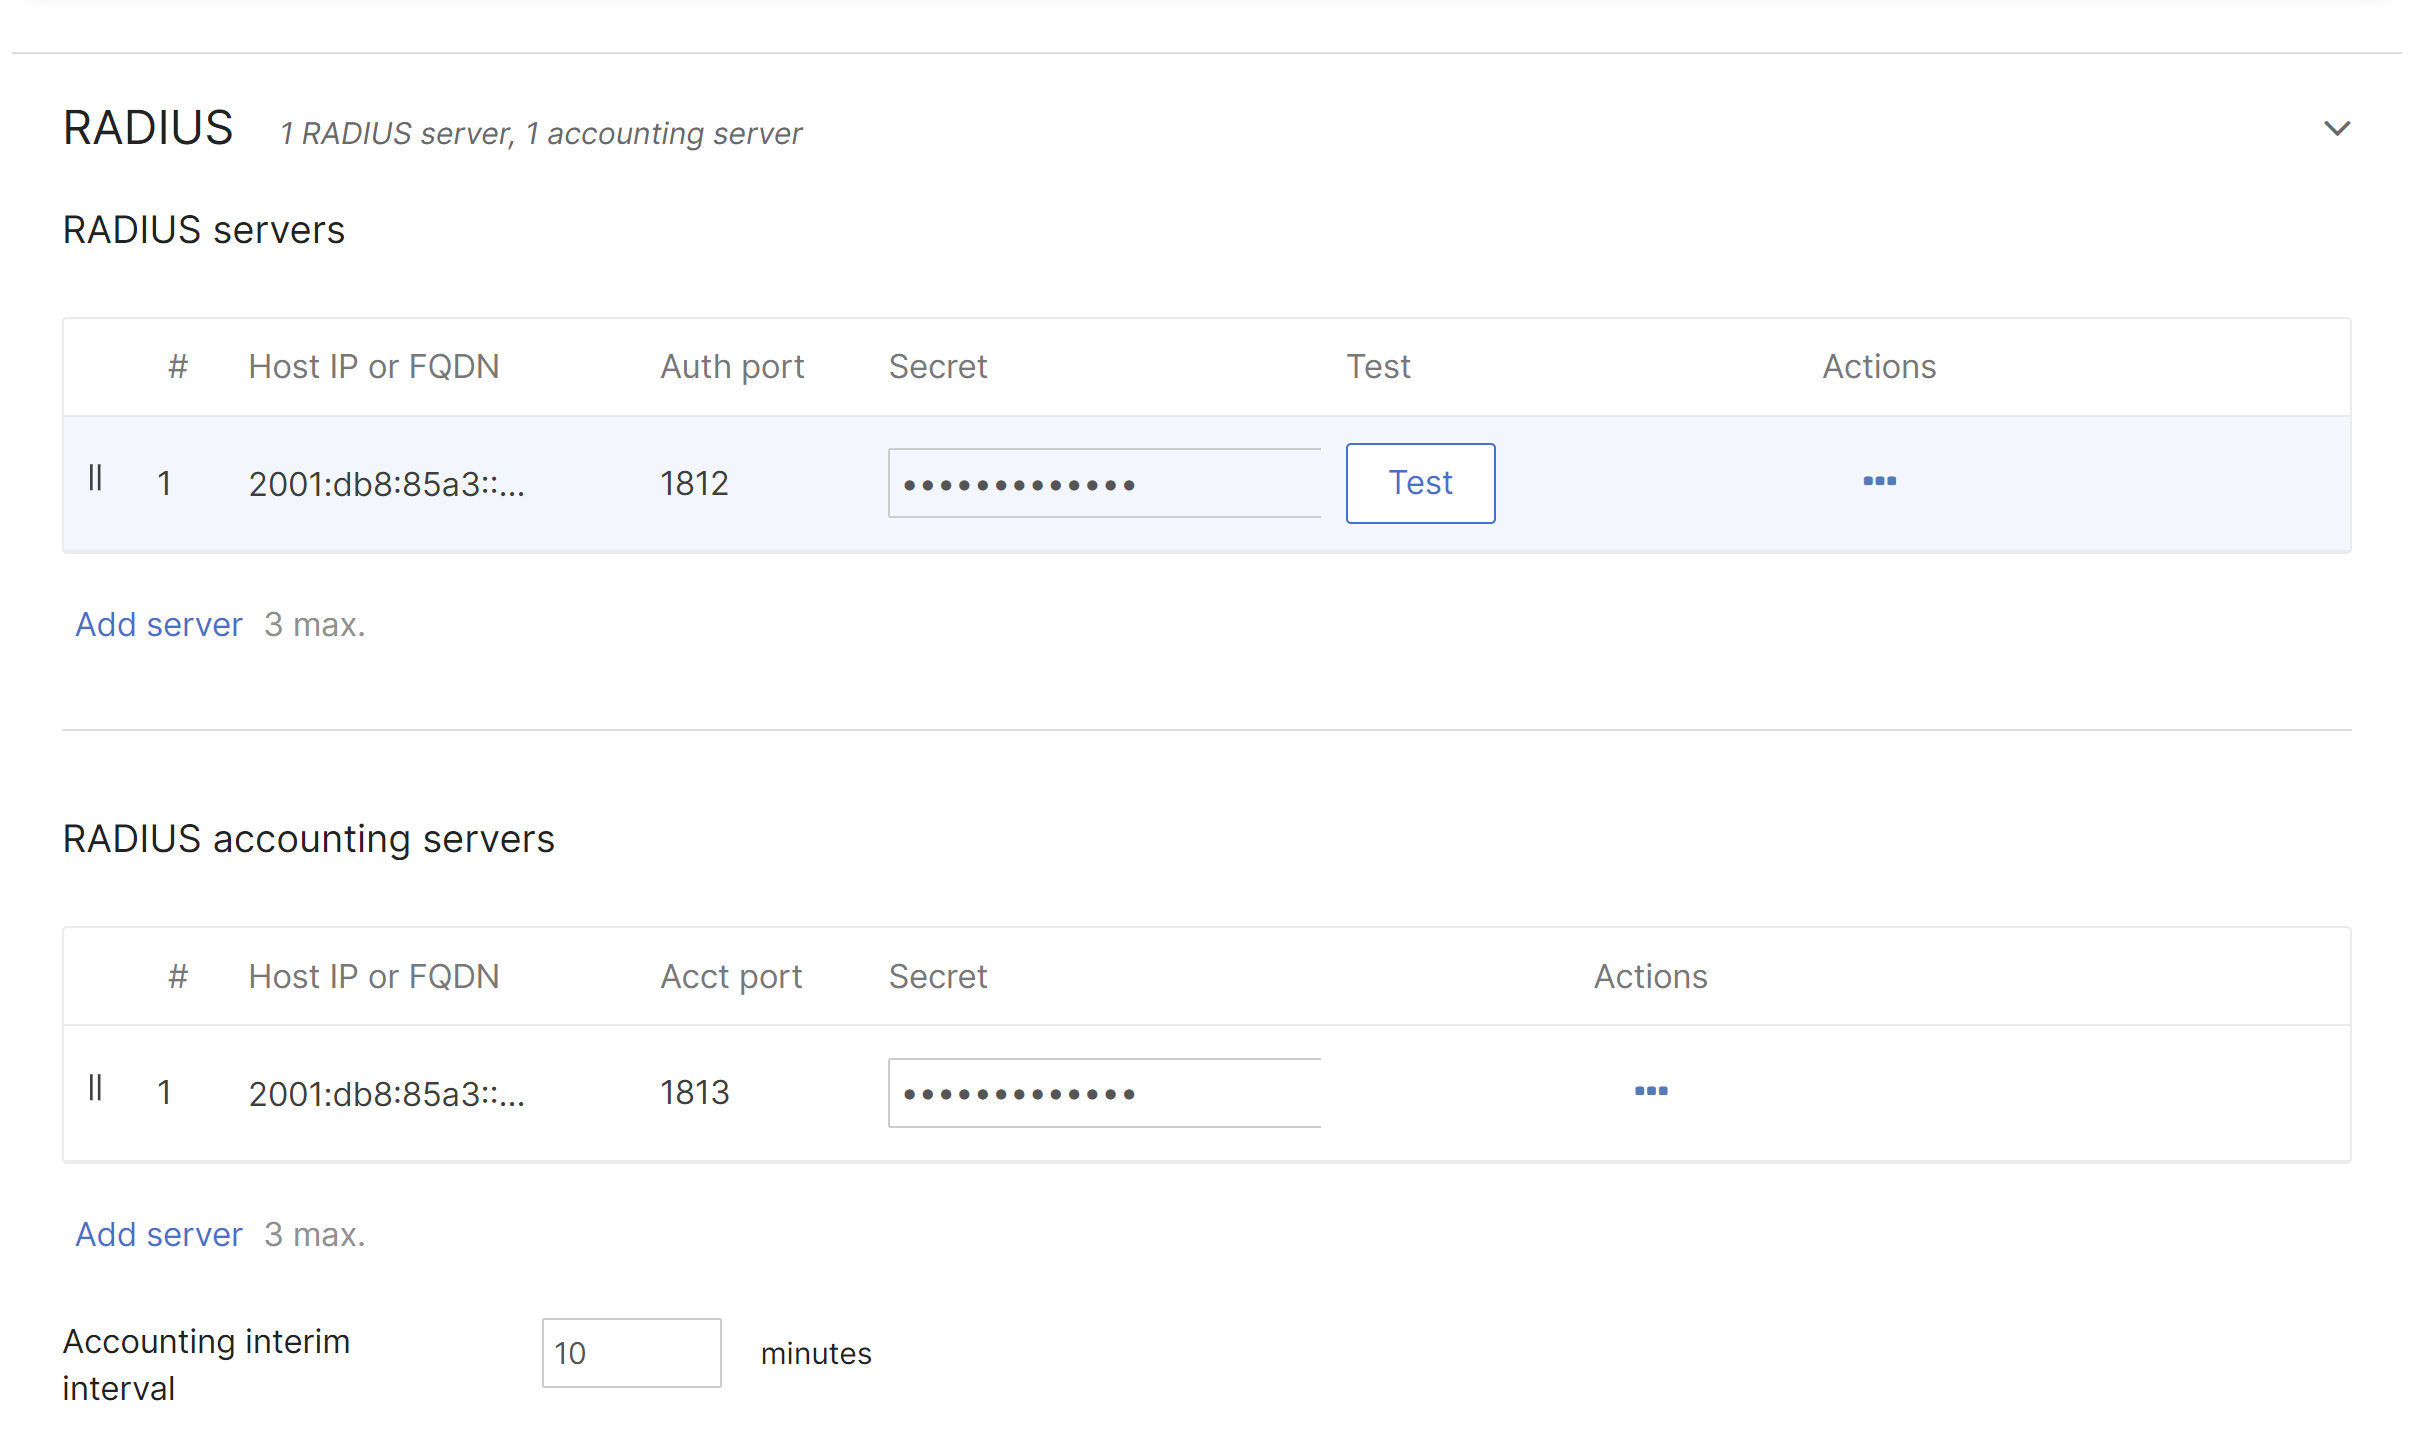
IPv6 RADIUS Support
All enterprise RADIUS authentication types support IPv4 and IPv6 addresses as well as FQDNs.
-
Navigate to Wireless > Configure > Access Control
-
Select an authentication type in the Security section that include RADIUS (for example, Enterprise with my RADIUS server
-
Add IPv6 address or FQDN of a RADIUS server in the RADIUS section
-
Configure other settings as needed and save changes on the bottom of the page
Please refer to Configuring RADIUS Authentication with WPA2-Enterprise to learn more about RADIUS.
LDAP over IPv6
LDAP IPv6 servers are supported for Splash sign-on.
For more information abound Splash sign-on with LDAP please refer to Configuring Splash Page Authentication with an LDAP Server


Walled Garden IPv6 Support
If you would like to configure IPv6 address ranges for the walled garden navigate to Wireless > Configure > Access control, select an appropriate option under the Splash page, and set IPv6 ranges under Advanced splash settings.
RA and DHCPv4/DHCPv6 Guard Support
Router Advertisement (RA) guard (IPv6) and DHCP guard (IPv4 and IPv6) can be enabled on the Wireless > Firewall and Traffic shaping page. These security features can block clients from issuing RAs and giving DHCPv4 or DHCPv6 leases. Additionally, allowed IPs can be specified if needed.
DHCP Guard has the following options:
-
Enabled: block clients from issuing DHCP lease
-
Disabled: allow clients to issue DHCP leases
-
DHCP allowed servers (both IPv4 and IPv6 addresses are accepted)
Router Advertisement (RA) Guard has the following options:
-
Enabled: block clients from issuing RAs
-
Disabled: allow clients to issue RAs
-
RA allowed router (IPv6 addresses are accepted)

Active Directory over IPv6


SNMP polling via their IPv6 LAN address of MR access points
MR access points can be polled via IPv6 uplink address over SNMP.
Note: SNMP polling via their IPv6 LAN address of MR access points refers to the capability of IPv6 reachability over SNMP and not the support for IPv6-MIB.
Example:
snmpwalk -v2c -t 10 -c meraki12345 udp6:[IPv6 address of the AP]

IPv6 Event Types in the Event Log
Clients IPv6 addresses appear in the Event log.

Syslog over IPv6
Note: Currently, you can only set up IPv6 Syslog servers in wireless-only networks and not combined networks.

Syslog output example:

Meraki Health IPv6 Support
The Client History tab supports IPv6 event types (DHCPv6, DNSv6, RADIUSv6)
Here is an example of RADIUSv6 server failure captured by Meraki Health:
