
MV Low Voltage Power Adapter (LVPA) Installation Guide
Overview
The Cisco Meraki LVPA converts low voltage (12/24V) power supplies into PoE, allowing users to upgrade from analog to IP easily. Disconnect the twin power cables from an analog camera and connect them to the accessory terminals in any order. Leave the coaxial cable in the wall; it will no longer be used. Video data transmits wirelessly from the camera to a local computer or through the Meraki cloud for remote viewing. For details on enabling wireless video transmission, see the MV Wireless Configuration Guide.
Package Contents
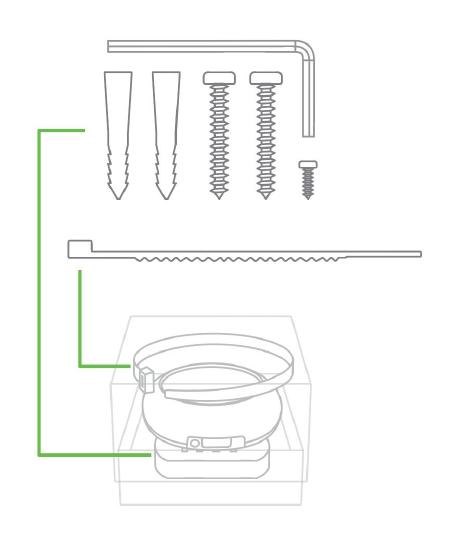
In addition to the low voltage 12VDC/24VAC input PoE injector, the following are provided:
- Phillips head wall mounting screws
- Wall screw anchors for masonry (brick, concrete)
- Torx key and security screw
- Zip tie
Pre-Install Preparation
You should complete the following steps before going on-site to perform an installation.
Configure Your MV Wireless Settings
Prior to deploying your MA-PWR-MV-LV, pre-stage your Meraki MV so that it is running the latest firmware and has it's wireless settings properly configured. Instructions on this process can be found here.
Installation Instructions
Each MA-PWR-MV-LV comes with an instruction pamphlet within the box. This pamphlet contains detailed step by step guides and images to assist in the physical install of the power injector. A pdf of the pamphlet can be found here.
The installation instructions are as follows:
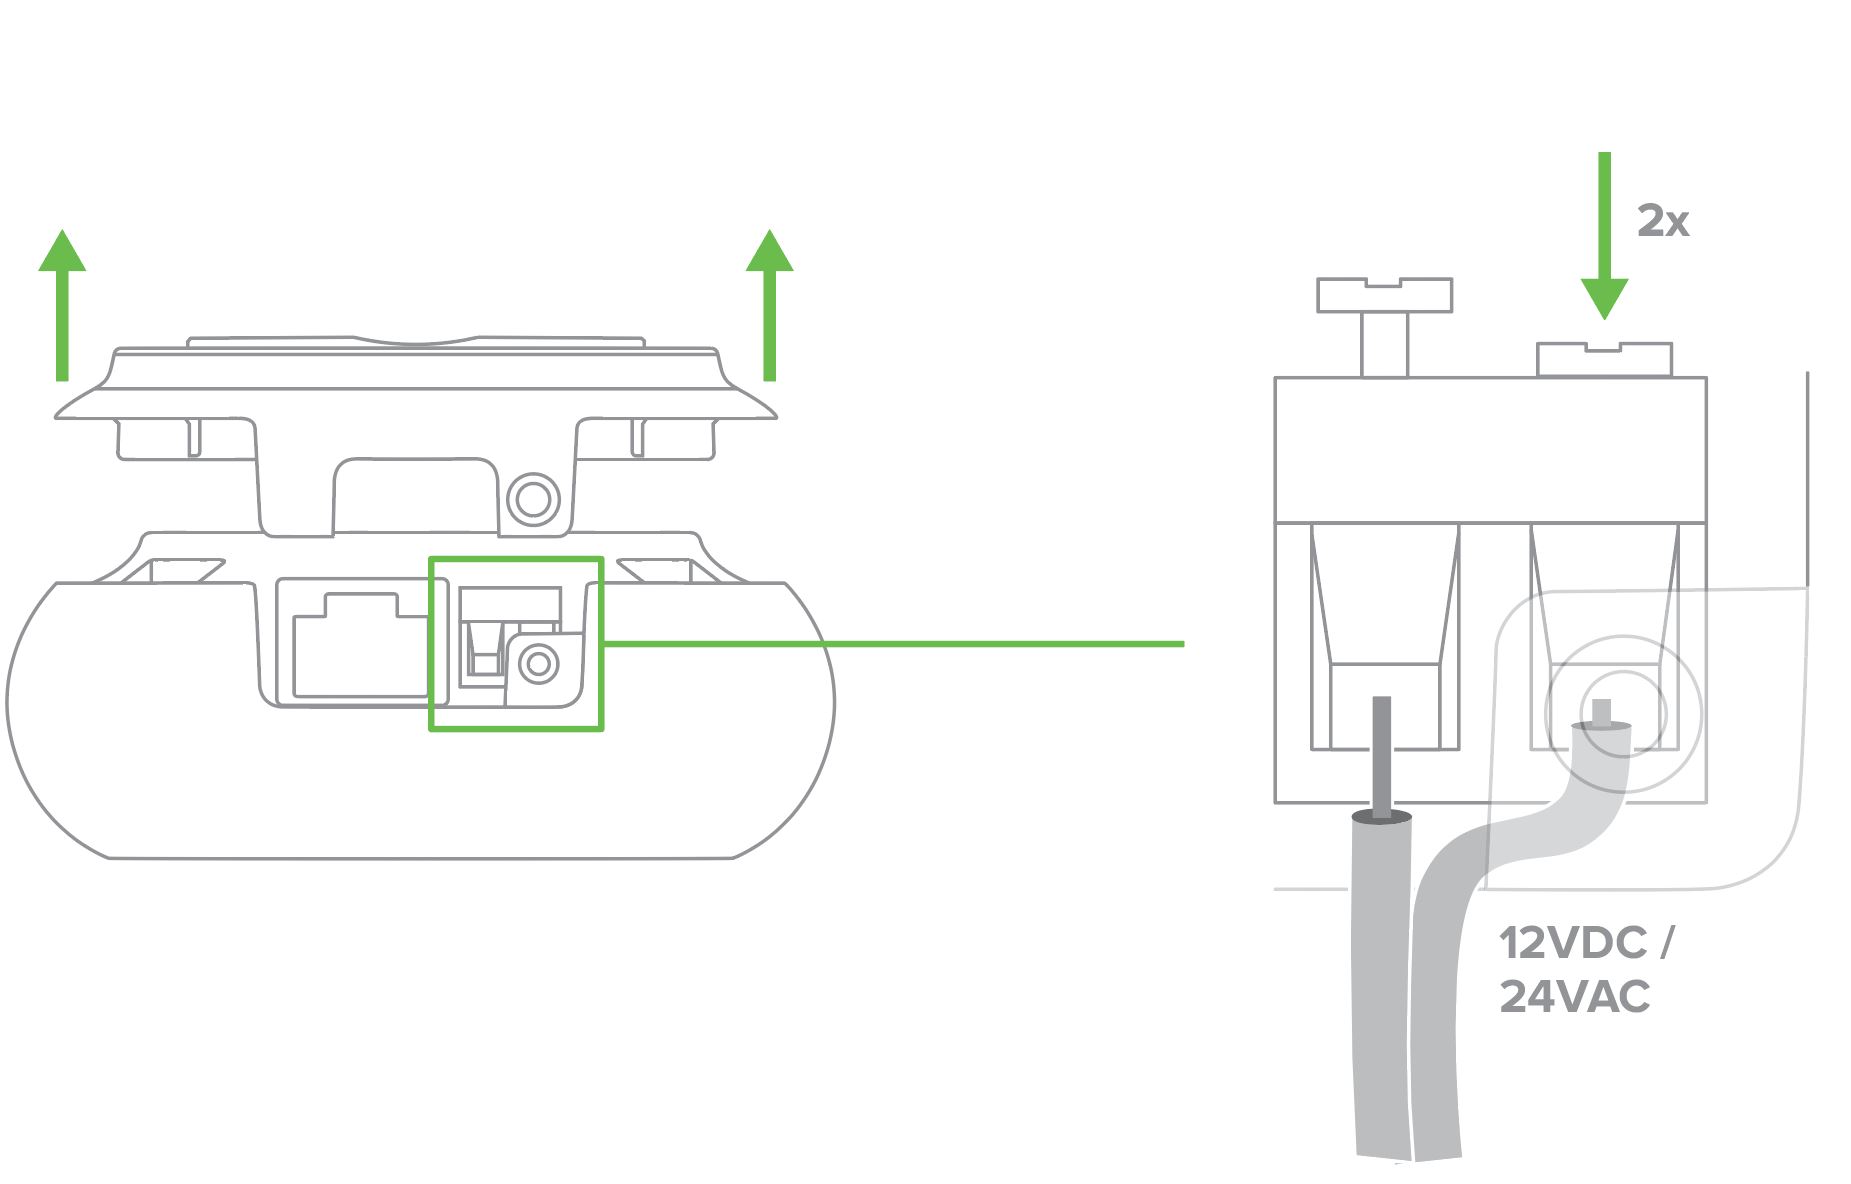
- Remove the back plate from the power injector utilizing a lever action. Plug in the input 2-wire 12VDC/24VAC. Secure the 2-wire power cables by screwing them into their terminals with a flathead screwdriver.
TheMAPW -MV-LV terminal blocks are dual polarity.
Do NOT plug the MA-PWR-MV-LV into 110v/220v mains! The power injector accepts input power of 24Vac @ 2.2amps or 12Vdc @ 2.75amps
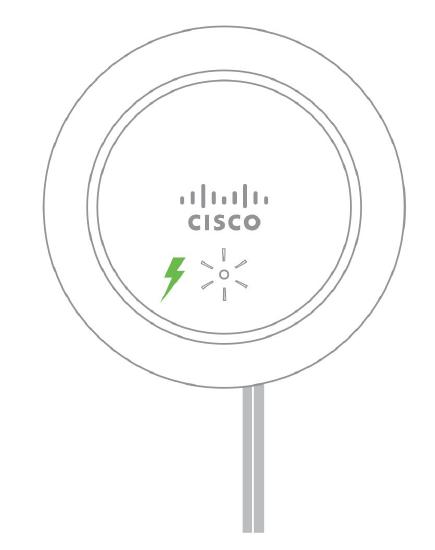
- Verify that the power injector is receiving power by checking the LED indicator is white.
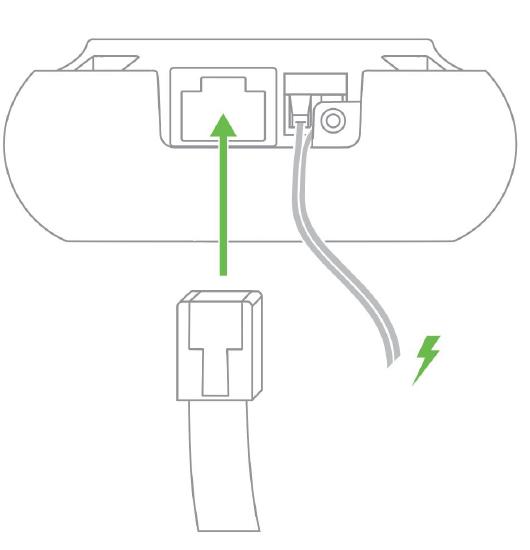
- Plug in the ethernet cable that will be used by the Meraki MV.
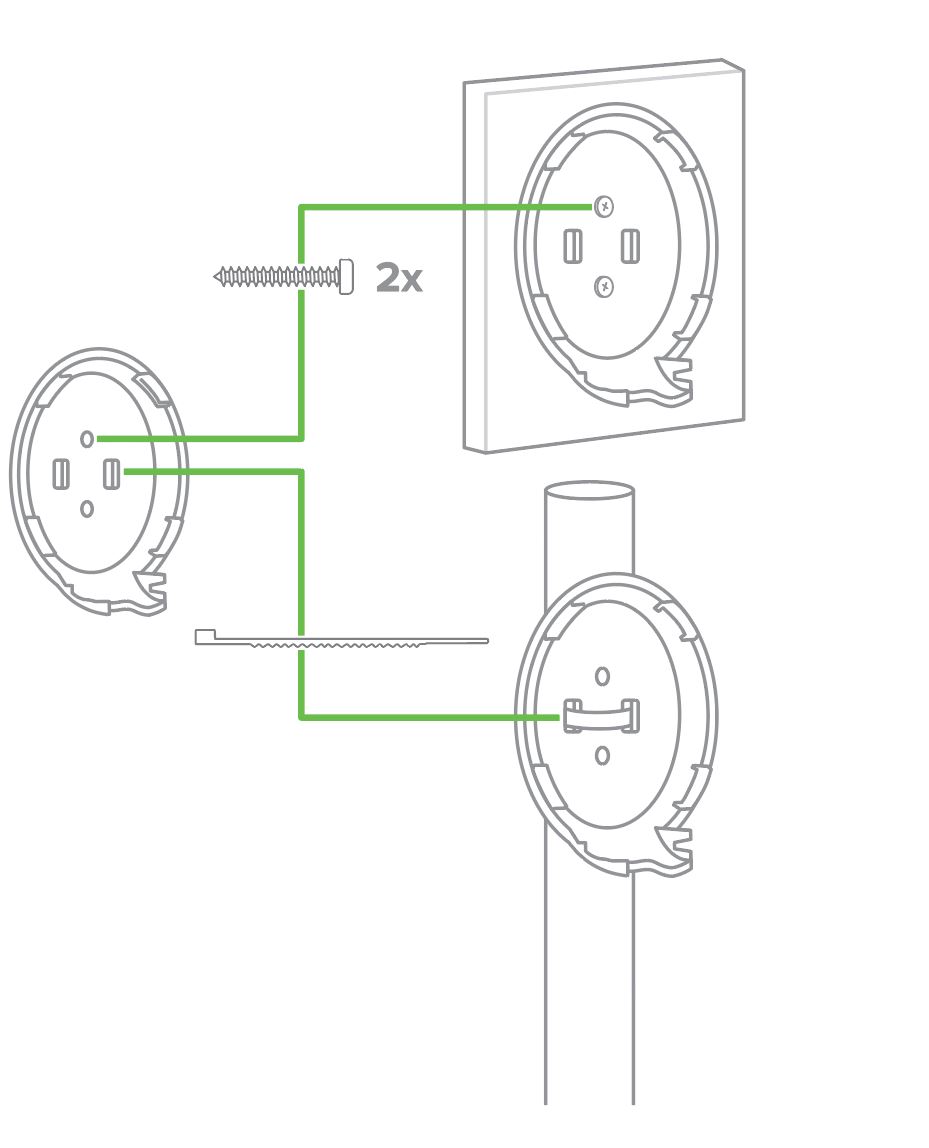
- When working with a flat surface, screw the MA-PWR-MV-LV back plate directly to the wall with the provided wall mounting screws. In a pole deployment, utilize the provided ziptie to secure the back plate to the pole.

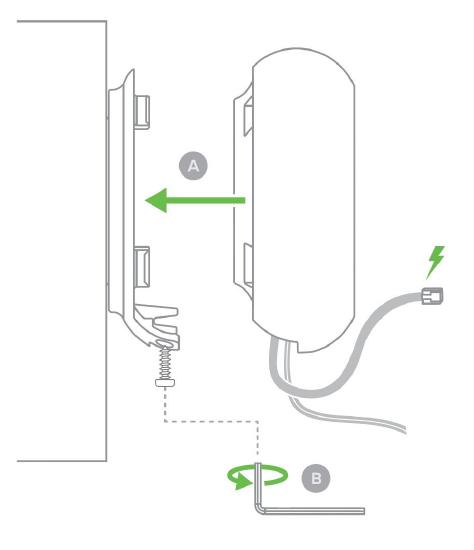
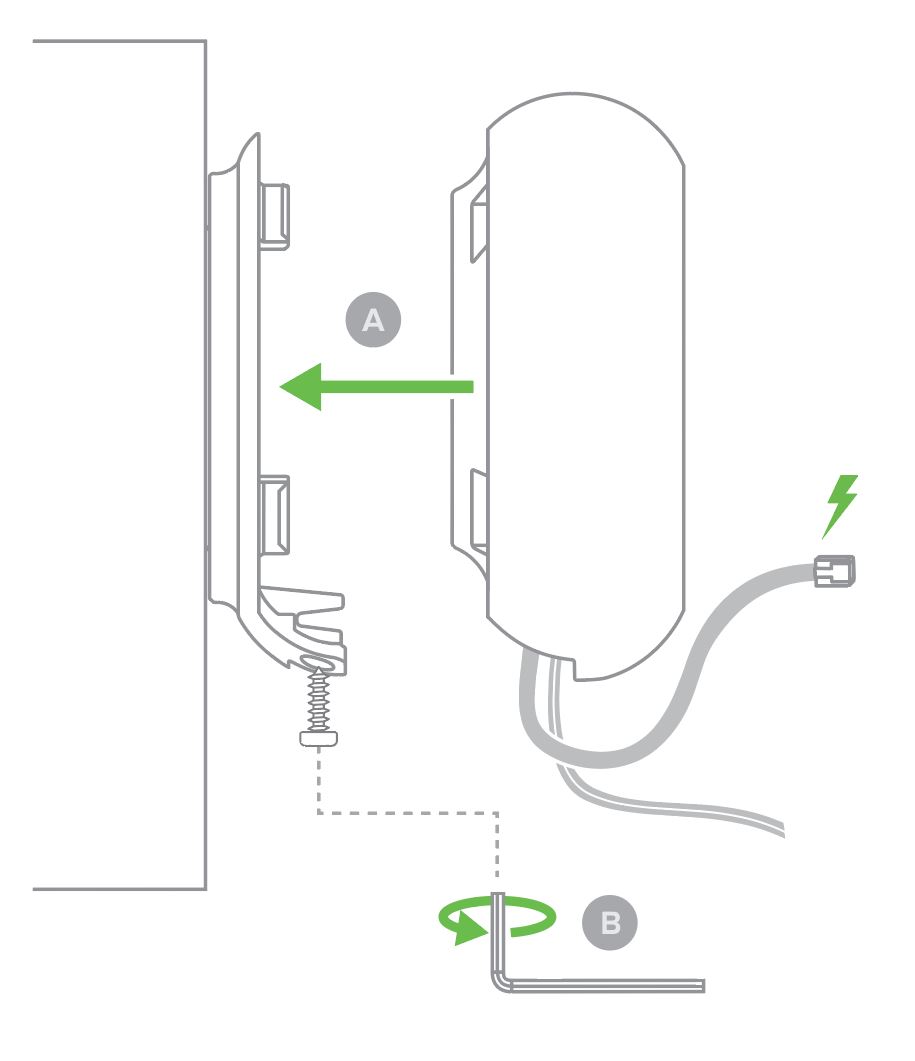
- Attach the power injector back to its back plate by applying slight pressure so that it will clip into place. Utilizing the provide torx key and security screw, secure the injector to its back plate.
- Plug the camera into the ethernet cable and verify that it is receiving power by checking it's LED.
Cabling Considerations
Keep cable distance in mind when deploying the MA-PWR-MV-LV. Here are some important points to note:
- In typical deployments, it is common to find 18 AWG/1.02mm diameter for the 2-wire power cables. Higher gauge conductor size will result in much shorter cable runs.
- 24Vac runs will always provide greater cable distance than 12Vdc
- A Meraki MV power draw can be between 7W to 24W based on the model