Best Practices in Viewing MV Video
Introduction
This article explains best practices for viewing video on MV cameras. It covers how to use digital zoom, keyboard shortcuts, and how to jump between timestamps.
Access free online training courses on the Meraki Learning Hub.
Motion Search
Use Motion Search to quickly find and view video. For instructions on using Motion Search, read this article.
Navigation
You can navigate to different timestamps in several ways.
Timeline Bar
- The green bar corresponds to availability of video recording.
- When a Cloud Archive license is applied to the camera, an additional blue bar shows cloud archive availability
- Click any point on the timeline bar to go to that timestamp
- You can navigate forward and backward in time by:
- Clicking and dragging the timeline bar
- Using a touchpad to scroll forward and backward while hovering over the timeline
- Click the left or right arrows that appear when you hover at either end of the timeline
- You can expand or limit the time range on the timeline bar by:
- Using the "+" or "-" buttons to the right of the timeline

- When the upper bar is green, it confirms that footage has been recorded by the camera for the corresponding period
- When the bottom thin bar is green, it confirms that the Timeline Bar has loaded all the relevant events for the corresponding period
Motion Events on the Timeline Bar
When interacting with these motion event blocks on the timeline, we provide ease-of-navigation information in a number of ways.
Zoomed Out (>2hr on timeline): Motion Event Blocks
When zoomed out beyond a 2hr view for the timeline, the motion event blocks are shown for up to a range of two weeks. Zooming into a 2hr or less region on the timeline will make the motion event blocks interactive, as discussed in the following section.
Zoomed In (<=2hr on timeline) : Interactive Motion Event Blocks with Motion Intensity
When you are zoomed in to see two hours or less on the timeline, you can see individual motion blocks (shown here in orange) that correspond to motion events. These are the same events that show up as Motion Search results. These motion event blocks are also colored with a gradient that represents the overall intensity of motion observed for that event.
On each motion bar, you can see:
- Event time - When did the event occur?
- Event duration - How long did it occur?
- Event intensity - How much of the frame did it cover?
- Motion Recap image summarizing the event (Read more for: What is a Motion Recap image?)
Motion Recap images appear only on second generation cameras without Restricted Bandwidth Mode enabled.

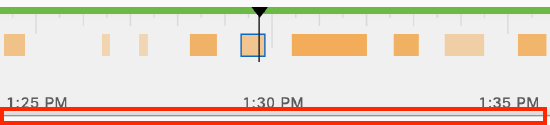
Blue Bar indicating Current Highlighted Motion Event
Whenever you hover over a motion event block OR the associated Motion Recap event while doing Motion Search, both will be highlighted in blue to easily locate.

.png?revision=2&size=bestfit&width=400&height=249)
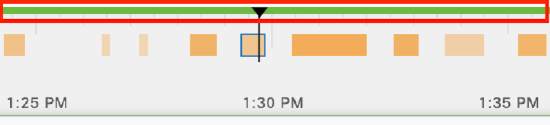
Blue Bar Outline indicating Last Selected Motion Event
Whenever you select a motion event block OR the associated Motion Recap event, both will be highlighted in dark blue to easily locate, even when playback continues beyond.

.png?revision=2&size=bestfit&width=400&height=250)
Grey Bar indicating Motion Events that do not meet Motion Search Criteria
When you perform a motion search, all events that meet the search criteria (region of interest, sensitivity, event length, and filtering for events with people) will show as orange. However, any motion events that do not meet this criteria will show as grey motion event bars.

Day Selector (with Natural Language Processing)
You can select the date in this calendar here, or type a time period using natural language. Examples of natural language are:
- "5pm yesterday"
- "2 hours ago"
- "last Friday"

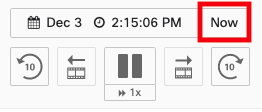
"Now" Button
Quickly view the current timestamp by clicking on the "Now" button.
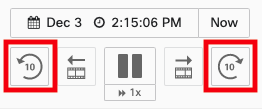
Rewind / Forward Ten Seconds
Note that you can only use these buttons on stored video.
Rewind / Forward One Frame
You can only use these buttons on stored video. When the video is paused, you can move forward or backward by one frame at a time.
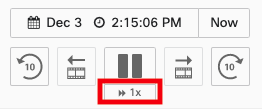
Increase Playback Speed
You can click this button during local streaming to increase the playback speed to 0.5x, 1x, 2x, or 4x.
Keyboard Shortcuts
- Spacebar - Toggles between play and pause
- Left arrow key - back one frame
- Right arrow key - forward one frame
- Hold left arrow key - play backwards
- Hold right arrow key - play forwards
- 1 key - Play at 1 x playback speed
- 2 key - Play at 2 x playback speed
- 3 key - Play at 4 x playback speed
Poor upstream network performance and inefficient client-side system resources can lead to choppy playback of video when utilizing keyboard shortcuts
It is important to note that pressing 3 key will increase the playback speed but this is not officially supported. Using this speed may not provide fluid playback or continuous video display.
Playback speed increases will increase the bandwidth required per camera by the playback speed multiplier. For example a camera at ‘Enhanced Quality’ settings will go from 765kbps to 1530kbps. Importantly this also includes the video wall bandwidth usage and could lead to a bandwidth requirement of up to 18460kbps for a video wall of 12 cameras at 2x playback speed. Caution should be taken to prevent saturation of small WAN links.
When increasing the playback speed this will decrease the number of simultaneous streams the camera can concurrently support. For example playing back video at 2 x playback would count as supporting two 1 x playback speed streams from the camera.
Instant video access
Cameras running firmware version MV 5.2 or newer can now stream video a few seconds from current time. This is available in single camera view on Vision Portal and Mobile App

Digital Zoom
You can use your scrollbar or mouse to zoom in and out of the video. When using the MV32 fisheye, zooming in will automatically switch the video to a dewarped view, after which you can zoom in up to 8x as in any MV.
For more information on digital pan-tilt-zoom (DPTZ) on fisheye cameras, refer to this article.