Vision Portal Integrations: Access Control
Introduction
You can now view physical access control events linked to your cameras in the Meraki Vision Portal.
Meraki Vision is a portal for viewing cameras focused on core physical security tasks. It lets you easily switch between cameras to watch video, perform motion searches, and share footage. With physical access control integration, you can now also:
- Find and view events of persons trying to enter your facilities
- See and respond to monitor points for doors, windows, controllers and other hardware
- Remotely unlock doors for visitors or staff
- Navigate to key resources (users, doors, controllers) inside your physical access control system when needed
You can navigate to the portal by going to vision.meraki.com and using your Meraki dashboard credentials to sign in.

Key Features
Physical Access control integration into Vision Portal introduces these new capabilities
- See it, search it
- Access control events visible on camera timeline
- Searchable access control event activity log
- View event details for complete context
- Response in real-time
- Remotely unlock doors instantly with the click of a button
- New events are shown in real-time using Webhooks
- Historical events are fetched alongside video for improved investigations
- Simplicity at scale
- Link your MV Camera Networks and Access Control Solution easily using our open API
- Configurable for the entire Organization
- Pair one or more cameras to each door
- Toggle on/off certain features (with more to come!)
Tour of the Interface
Default Vision Portal Experience
In the Vision Portal, use the left menu to select the MV camera network you want. Browse and select cameras to view, create and review video walls, and manage exported footage.

The left navigation pane shows a mini-map and a list of all cameras in the network. Use the search bar to enter a name or tag to find a specific camera. When you select a camera, its stream appears in a focused view on the Video Player.
The Video Actions menu at the top right allows you manage motion events, exports, and the sharing of video clips or streams.
The Video Timeline at the bottom of the Vision Portal helps you search for historical video or motion events.

Camera View With Access Control Integration Enabled
After enabling Access Control integration in the Vision Portal, use the Video Timeline to search for past Access Control events.
The Video Actions menu at the top right now includes an option to manage Access Control events. Opening the Event details drawer shows detailed information such as event description, access groups, timestamp, and more.

Navigate to Access Control > Activity log to search for and review all access control events for the selected camera.

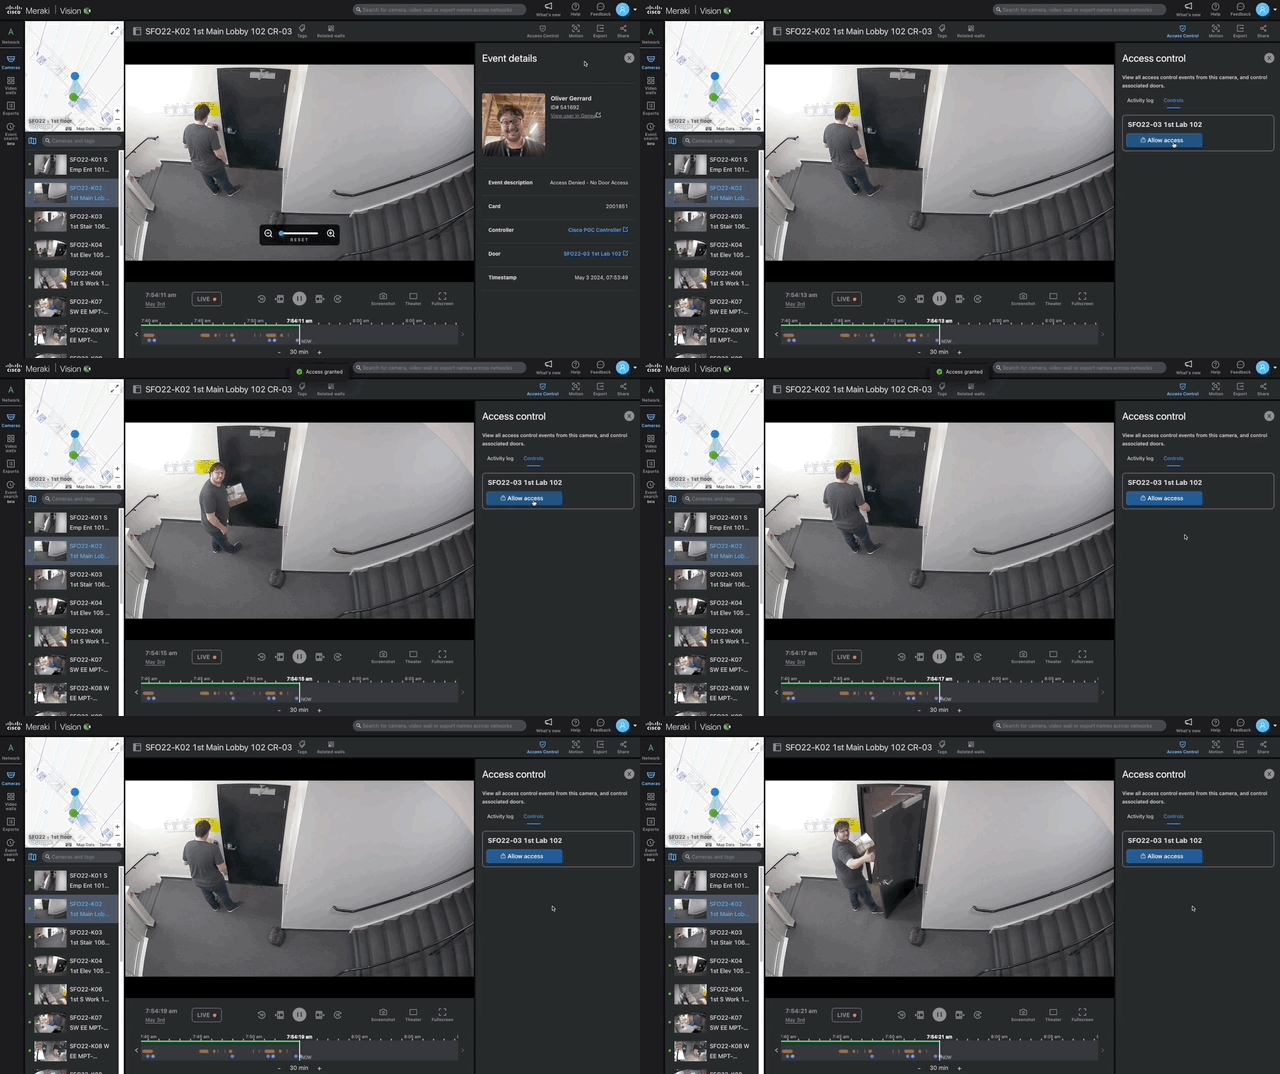
Navigate to Access Control > Controls to remotely control access to associated doors. To remotely grant access, click the Allow access action button.

How-Tos
Set Up the Integration
App Selection and API Key Registration
To get started, select the partner application inside the Organization > Configure > Integrations page.

After selecting the app, follow the setup prompts specific to each partner application. (unique to each partner application) See below for more details.
App Permissions

Permissions for access control features are adjusted within the app integration view, after adding the application..
- Read mappings of cameras to doors (required)
- Read door, user attributes, and access control events (required)
Each access control integration requires default read-only permissions for user, door, and controller access event types, though naming may vary by partner application. These permissions are displayed in a read-only state to inform administrators that this behavior applies to all Vision Portal users by default.
- Issue commands to access control devices - on/off (off by default)
Administrators can enable or disable remote door unlocking for all users with camera viewing permissions. This is a global setting and cannot be assigned to specific users or groups.
Genea Security
For additional information, see the Genea Security ecosystem partner application page in the Cisco Meraki Marketplace.
Adding the Genea Security App Integration
To access the Genea Security application details page, navigate to Organization > Configure > Integration and select it from the apps list. Click the Add button and enter your API key.


After adding the Genea Security app integration, adjust the Scope permissions and map cameras to physical security resources defined in the Genea Security application. If the list is empty, configure the Meraki Integration in Genea and map MV cameras to physical security resources. Then return to the Genea Security app integration page and click the Refresh data button to populate and verify the resource mappings.
Creating a Genea API Key
This API key must first be created inside of the Genea platform and will require at minimum the following permissions to operate correctly:

| Permission Group | Permission | Access Level |
|---|---|---|
| User Management | All | Read |
| Location Management | All | Read |
| Hardware Management | All | Read |
| Access Control Management | All | Read |
| Control Center Management | Door - Quick Grant | Full |
| Key Management | All | Read |
| Webhook Management | All | Full |
| Integration Management | All | Read |
Removing an App Integration
To remove an integration, go to Organization > Configure > Integrations and select the integration. On the configuration details page, click the Remove button in the top right and confirm the action when prompted.
This action is irreversible and will require a complete setup and configuration to use the integration again.

API Key Management Best Practices
An API key is not a unique 1:1 application mapping, and can be used by anyone with access to perform actions granted to Meraki. Avoid sharing or storing API keys in plain text, accessible locations, or through email or SMS. Use cloud-based password managers to securely manage and share API keys.
Find and Play Back Video for Access Control Events
Access control event information in Vision Portal provides greater visibility into activity within secured spaces.
Navigating Access Events on the Timeline

The camera timeline provides users with the ability to:
- Play/pause video
- Move forward/backward by frame or 10 second interval
- Adjust video playback speed (when viewing historical footage)
- Adjust the time resolution to see a window of 15 minutes, 30 minutes, 1 hour, 4 hours, 12 hours, 1 day, 3 days, or 1 week
- Adjust the visibile time period forward/backward according to the current time resolution
- Go to live to return from historical footage to the live view from the camera
- Download a screenshot
- Switch to larger viewing modes Theater or Fullscreen for improved focus
Orange bars on the timeline indicate periods of detected motion. Hover over these bars to view the motion recap image for the corresponding time.
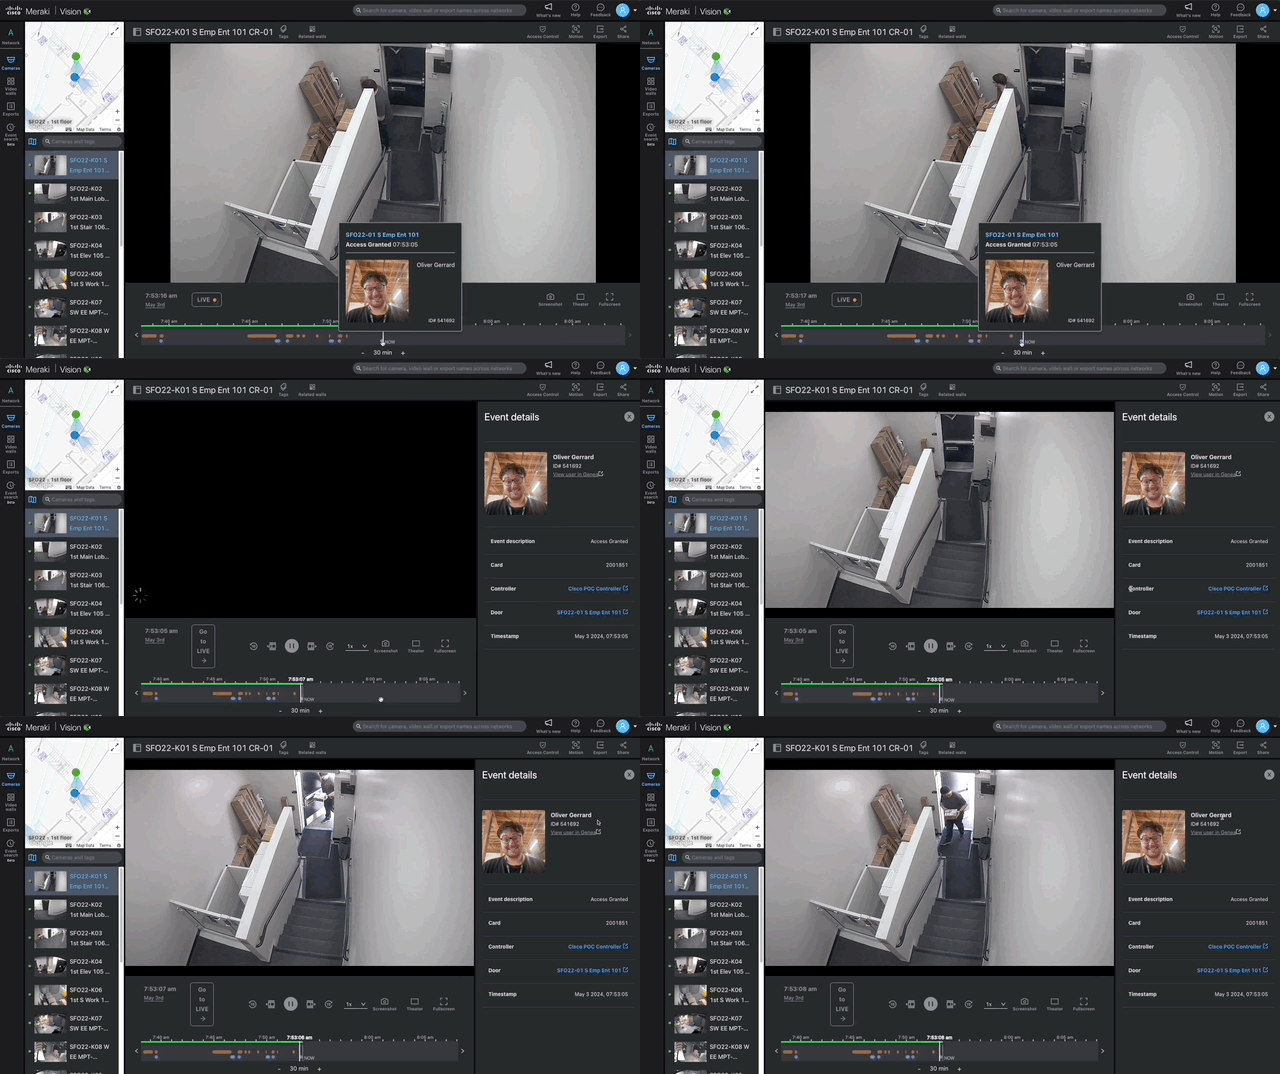
The timeline now displays access control events alongside video navigation controls and motion detection data. In the single camera view of the Meraki Vision Portal, access control events appear as blue circles below the orange bars for motion events.
Hover over these access control events on the timeline to see a quick view of the access control event information.

Access control event information may vary based on the integration partner and event type.
Clicking an access control event on the timeline opens the Event Details drawer, displaying detailed information about the event.

Viewing Access Events in the Activity Log

Access control events are displayed in the timeline and can also be reviewed in a list under the Access Control > Activity Log drawer. Users can click on events to view detailed information. Quick links to key resources such as Users, Doors, and Controllers in the access control partner's application are provided for easy review and management.
Access control event information may vary based on the integration partner and event type.
Unlock Doors Remotely

If someone needs assistance entering a facility, click the Allow Access button to remotely unlock the door. This can be used for common situations such as:
- An employee that forgot their badge
- Delivery person requiring entry to deliver mail and packages
- A maintenance worker arriving for a service call at a remote building or substation
- A parent or guardian picking up their child after hours
By having this button available inside your camera view, it is easy to review the live or historical footage and verify the person should have access before remotely unlocking the door for access into a secure location.
Managing Permissions to the Physical Access Control Features
Manage permissions for Physical Access Control features during the integration setup, as explained in the App Permissions section earlier in this document.
To administer permissions to the Vision Portal interface, see the Managing permissions to the interface section in the Vision Portal: Introduction article.
Restrictions
As of July 2024, there are a few restrictions today when configuring your Meraki Organization(s) for integration with Physical Access Control partner solutions:
- Each Organization can only have one Physical Access Control partner integration configured
- Each Organization can only link to a Physical Access Control partner integration using a single API key
- Each Organization will establish a Webhook subscription with the Physical Access Control partner integration. Each vendor may have limits on the number of Webhook subscriptions allowed. See each vendor's documentation for the maximum number of Webhook subscriptions they support
- Genea Events Webhook [limit of 5 Webhook endpoints per Customer Instance]
Provide Feedback
Use the Feedback button on the top-right corner to send Meraki your thoughts on the interface.
Have Questions?
General FAQs can be found in the MV Smart Camera FAQ article.


