Android Kiosk Mode in Systems Manager
Android devices in Device Owner Mode running Android version (6.0) and above can enable kiosk mode to lock users into one or more specific applications. Kiosk mode prevents user from accessing the home page, system settings, or any unauthorized apps. Kiosk Mode is helpful in cases like:
- Locking employees into only work applications on company-owned devices
- Preventing students from searching for answers during a test
- Preventing the accidental closure of an app
System Manager offers the ability to deploy both Google Play Apps and Private Apps into Kiosk Mode.
Note: This article covers Kiosk Mode for devices enrolled in Android Enterprise, and does not cover the Samsung Knox-specific kiosk mode.
For information on iOS Single App Mode, see this article.
Configuring Kiosk Mode for Google Play Apps
The most common use case for kiosk mode is limiting access to specific native system apps or Play Store hosted apps, which are configured in Systems Manager > Manage > Apps. This includes custom applications that have been uploaded to the Developer Play Store or custom APKs hosted in Systems Manager > Manage > Apps. To configure the Kiosk Mode payload for Google Play apps in Systems Manager:
- Navigate to Systems Manager > Manage > Settings.
- Use an existing profile, or create a new Meraki managed profile.
- Select + Add Settings > More Android > Kiosk Mode.
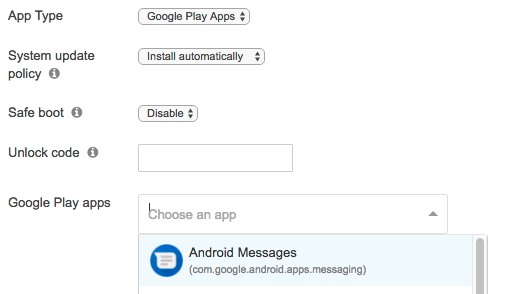
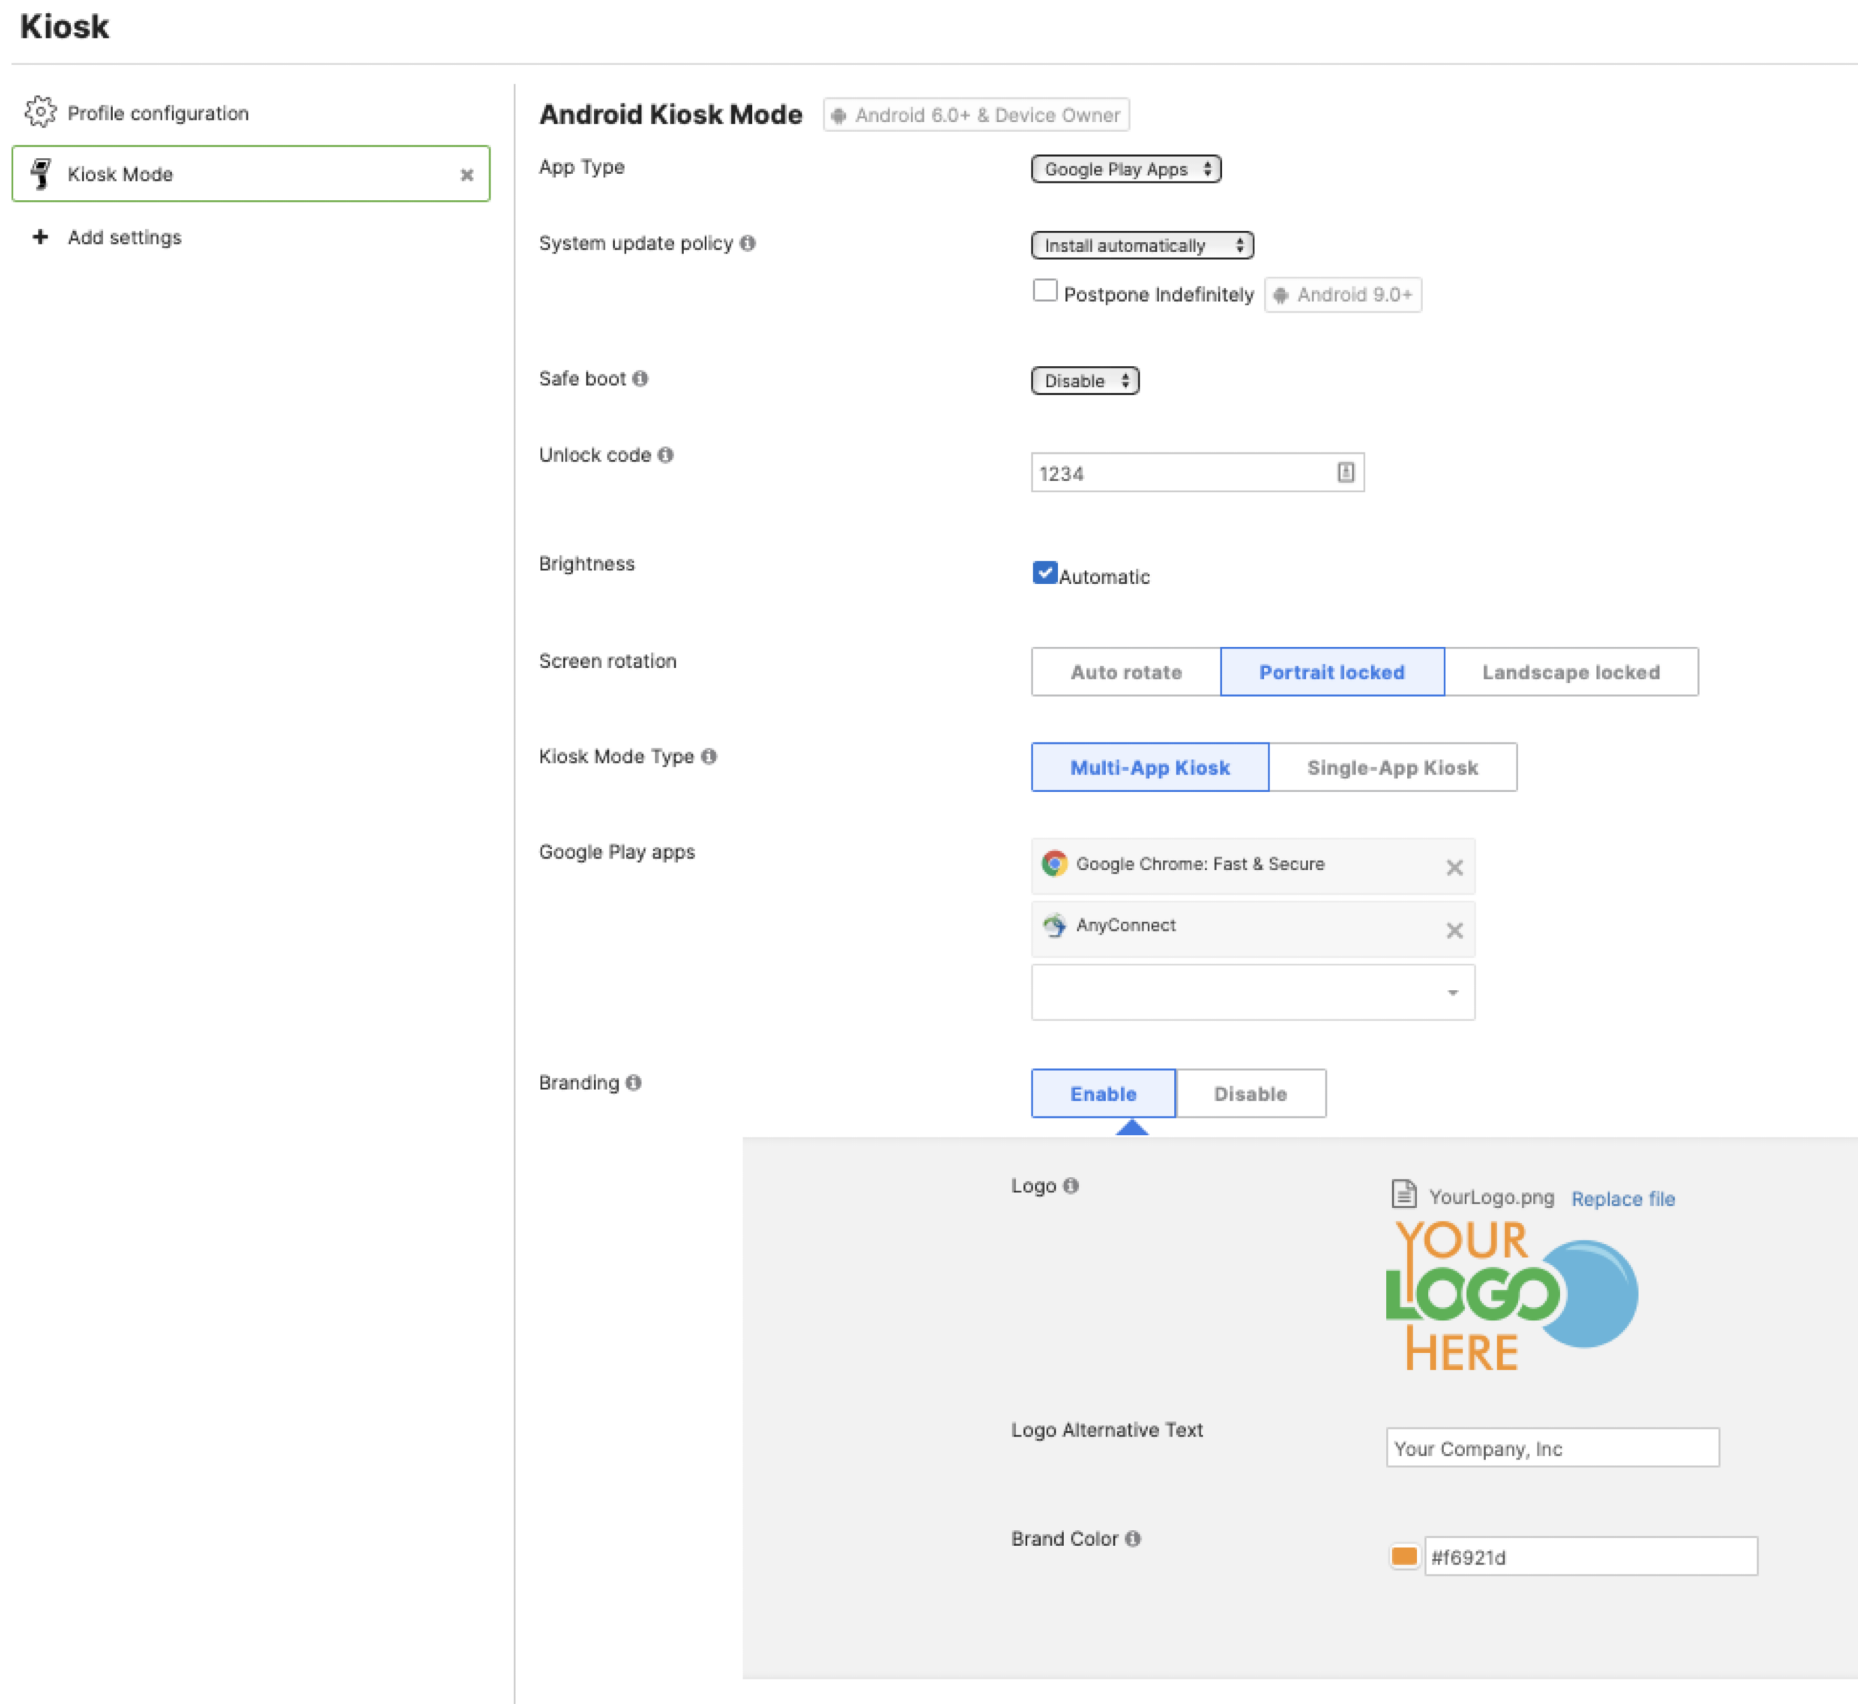
- Select App Type to be Google Play Apps.
- Specify the System update policy. This determines the device's behavior if a system OS update is available while the device is in kiosk mode.
- Choose to Enable or Disable the ability to boot the device into Safe Mode.
- Set a numeric unlock code. This number is used to unlock the device temporarily while in kiosk mode.
- From the drop-down, select the applications you want to be made available whlie in kiosk mode. Only built-in apps and Android apps configured in Systems Manager > Manage > Apps will appear in the list. If native system app isn't already listed, you can add its app identifier (e.g. com.google.example) to the list.
Note: Custom APKs uploaded on Systems manager > Apps will appear under Google Play apps.
Configuring Kiosk Mode for Custom APKs
The recommended method of deploying custom Android applications is to host them on the Developer Play Store or upload them to Systems Manager > Manage > Apps, as both options allow them to be configured as 'Play Store Apps' with app version visibility. However, Systems Manager also has the ability to lock into private apps via APK URL.
- Navigate to Systems Manager > Manage > Settings.
- Use an existing or create a new Meraki managed.
- Select + Add Settings > More Android > Kiosk Mode
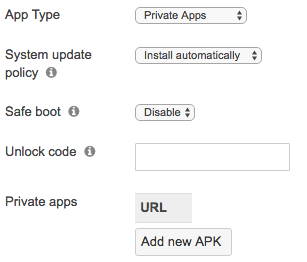
- Select App Type to be Private Apps
- Specify the System update policy. This determines the device's behavior if a system OS update is initiated while the device is in kiosk mode.
- Choose to Enable or Disable the option of booting the device into Safe Mode.
- Set a numeric unlock code. This number is used to unlock the device temporarily while in kiosk mode.
- Select Add new APK and enter the URL where the file is hosted. The APK URL field must point to the direct download link to a publicly hosted file, or an internally hosted server accessible by the end user's device.
Using Kiosk Mode
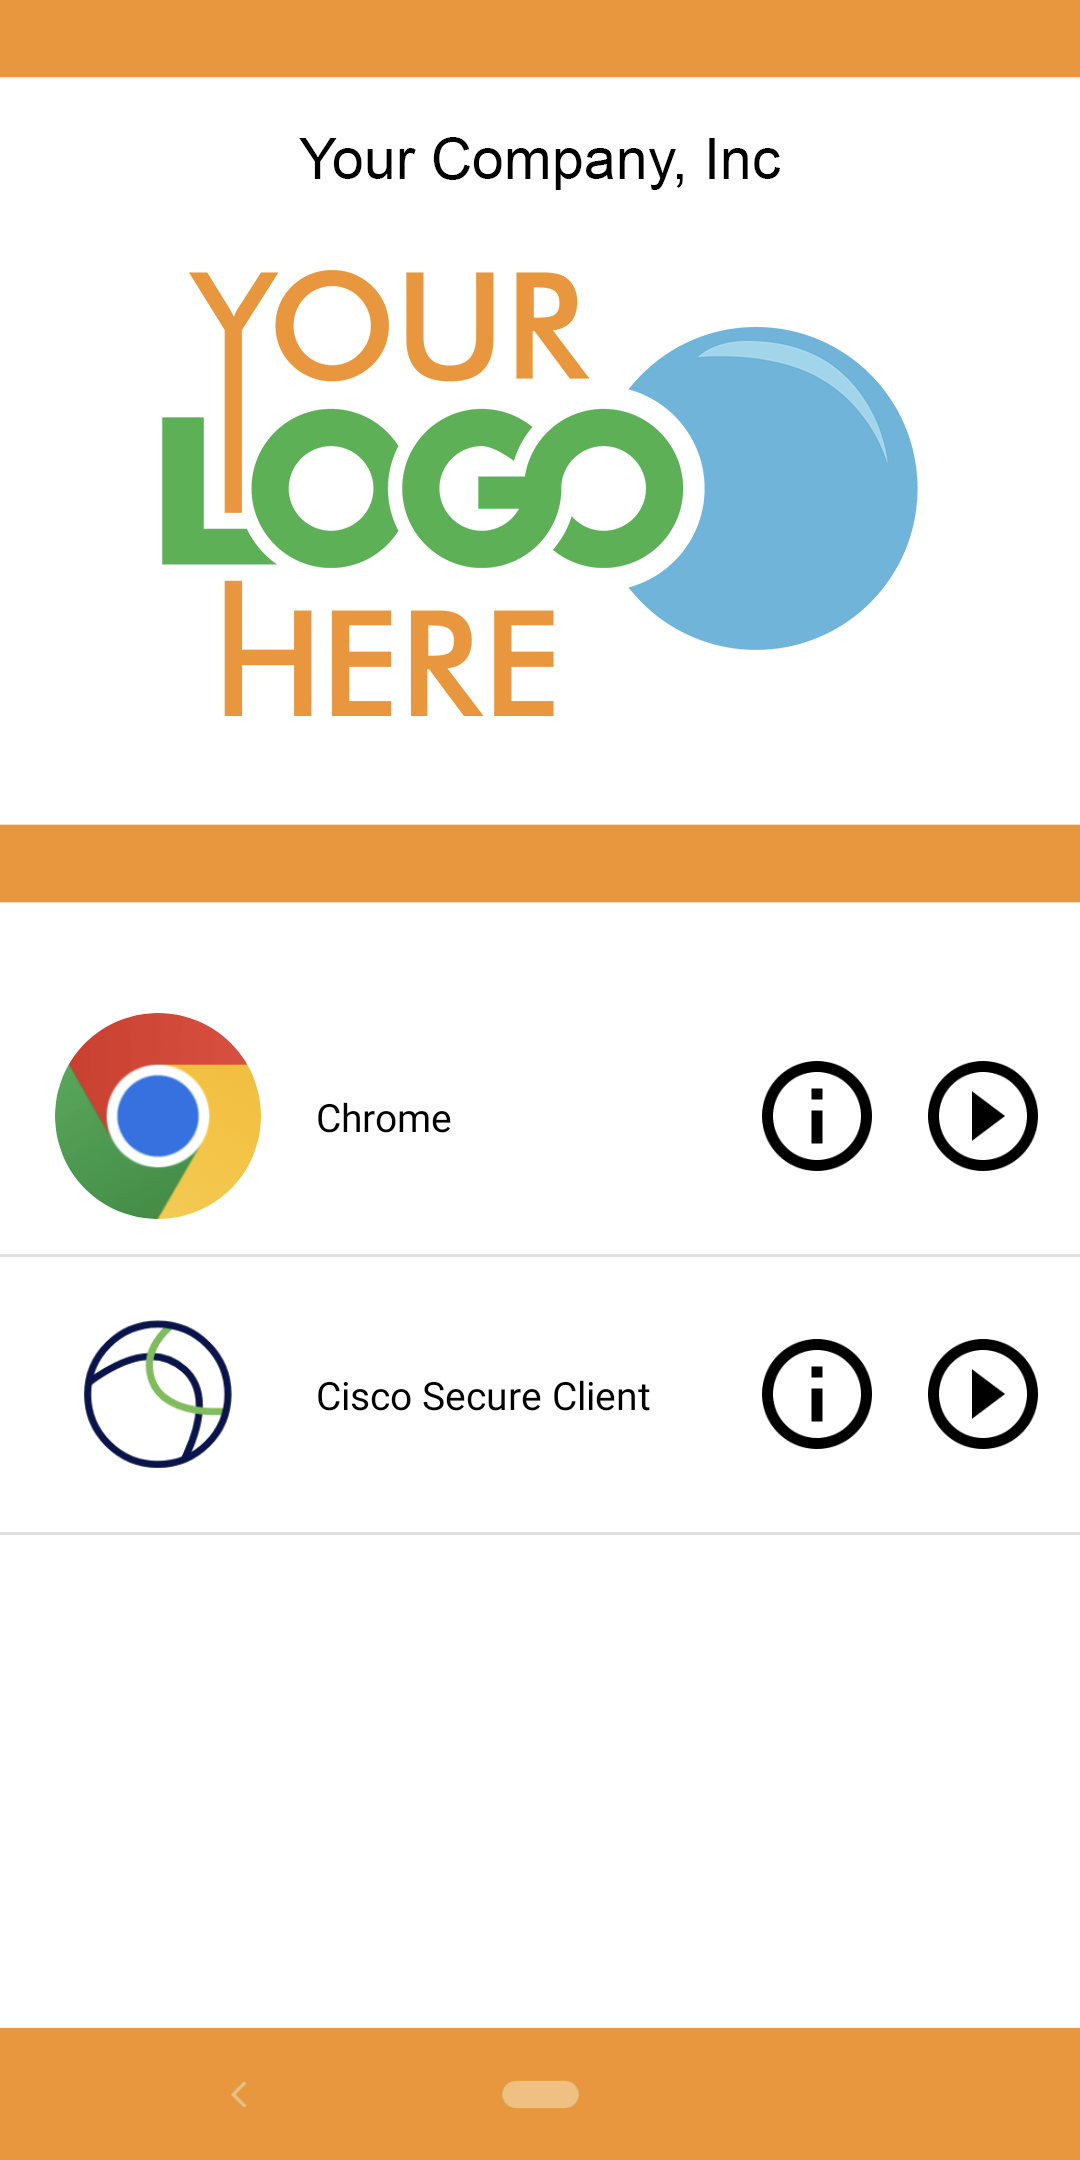
Once kiosk mode has been pushed (with Multi-App Kiosk mode enabled), your device will be locked into a screen like the following. In this example, users can switch between Webex Teams, Cisco AnyConnect, Webex Meet, Meraki Go and Meraki Dashboard applications through a launcher page, but cannot return to the device home page, access device settings, or start any other apps.
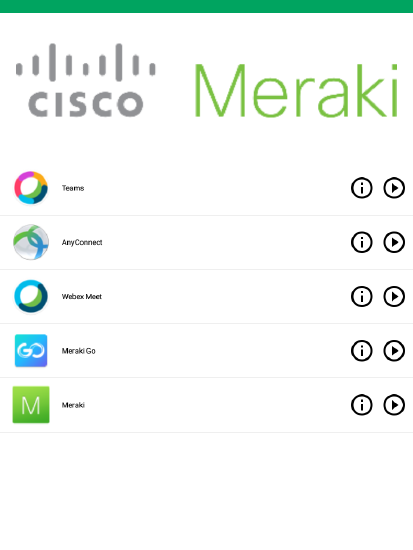
To lock the device into a single app without this custom Kiosk app launcher, enable the Single App Kiosk mode.
Custom Branding
Upload a logo, set your color hex, and set logo text. When the Mutli-App Kiosk mode is used, this custom branding is shown to give extra customizations.
Brightness
Set brightness to automatic, or from 1-100%. This allows remote changing of the device's brightness settings while it is locked in Kiosk mode.
Rotation orientation
Set rotation as automatic rotation, lock in landscape, or lock in portrait mode. This allows remote changing of the device's rotation orientation while it is locked in Kiosk mode.
Note: Smaller screen devices, such as phones, may not be possible to rotate into landscape orientation.
Unlocking a Device
In order to unlock an Android device in Kiosk Mode, unscope the profile from the device or remove the Kiosk Mode payload in Systems Manager > Manage > Settings. Alternatively, long press the banner in Systems Manager 6 times to unlock and enter appropriate unlock code to temporarily unlock the device for 15 minutes.

Re-enabling Kiosk Mode
If the profile was unscoped from the device, re-push the profile in Systems Manager > Manage > Settings to re-enable kiosk mode.
If the unlock code was used to temporarily bypass kiosk mode, follow the below steps to re-enable kiosk mode.
- Open the Meraki Systems Manager application on the device
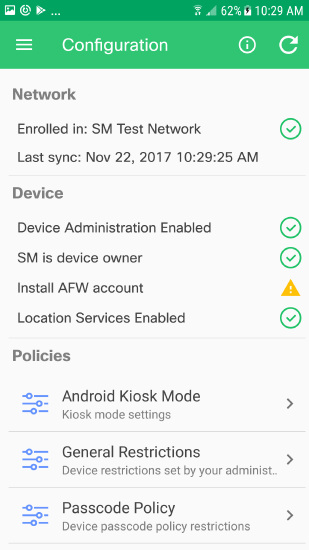
- Select the menu at the top left and navigate to Configuration
- Under Policies, select Android Kiosk Mode
- Select Launch Kiosk Mode to put the device back into Kiosk Mode