Using Umbrella Multi-org with Cisco Secure Connect
Overview
The Multi-org console is an Umbrella capability that supports the management of multiple Umbrella organizations. The configuration and management functionality is limited to DNS security and content settings only. Only existing Umbrella Multi-org customers can continue to use Multi-org with Cisco Secure Connect if they order the Secure Connect Multi-org license when purchasing Secure Connect. Customers without Multi-org cannot add the Multi-org console to their subscription.
With Multi-org, there are two types of Umbrella organizations – local organizations and the central organization. The local organizations are the ones you see listed in the Multi-org console. A central organization is not something you see in the Multi-org console. The central organization acts as a "parent" organization for all your local organizations. When an IT administrator configures centralized DNS security and content policies, they are applied to the central organization and then inherited by the local organizations, ensuring there is a common base set of policies across all organizations.
Using Multi-Org with Secure Connect
When using Multi-org with Secure Connect, there are a few important items to note.
- There is no direct integration between Secure Connect and the Multi-org console. The Multi-org console is accessed using the same URL you are currently using.
- The DNS security and content policies created prior to Secure Connect should not change when transitioning to Secure Connect. Secure Connect firewall, web, and other non-DNS security policies will need to be configured individually for each organization in the Secure Connect dashboard.
- There is a 1:1 relationship between Umbrella local organizations and a Meraki organization. (See figure below.) The central organization is not associated with a Meraki organization. The provisioning process will link one of your Umbrella local organizations to Meraki organization together to provide a seamless experience that allows you to easily go back and forth between the Secure Connect dashboard, hosted by Meraki, and the Umbrella dashboard.

Provisioning Secure Connect with Multi-Org
Automated Key Exchange
The provisioning process will link your Umbrella local organizations to Meraki organizations through the exchange of API keys (tokens). An automated key exchange process will streamline the provisioning process by automatically creating and exchanging API keys between Umbrella and the Meraki dashboard. However, this only works if no API keys have been exchanged before. If you meet any of the following conditions, you can take advantage of the automated key exchange process. Otherwise, you will need to follow the manual process:
- You do not currently have any Meraki organizations.
- You will be creating new Umbrella local organizations to be used with Secure Connect.
- The local organizations to be used with Secure Connect do not have APIs created yet.
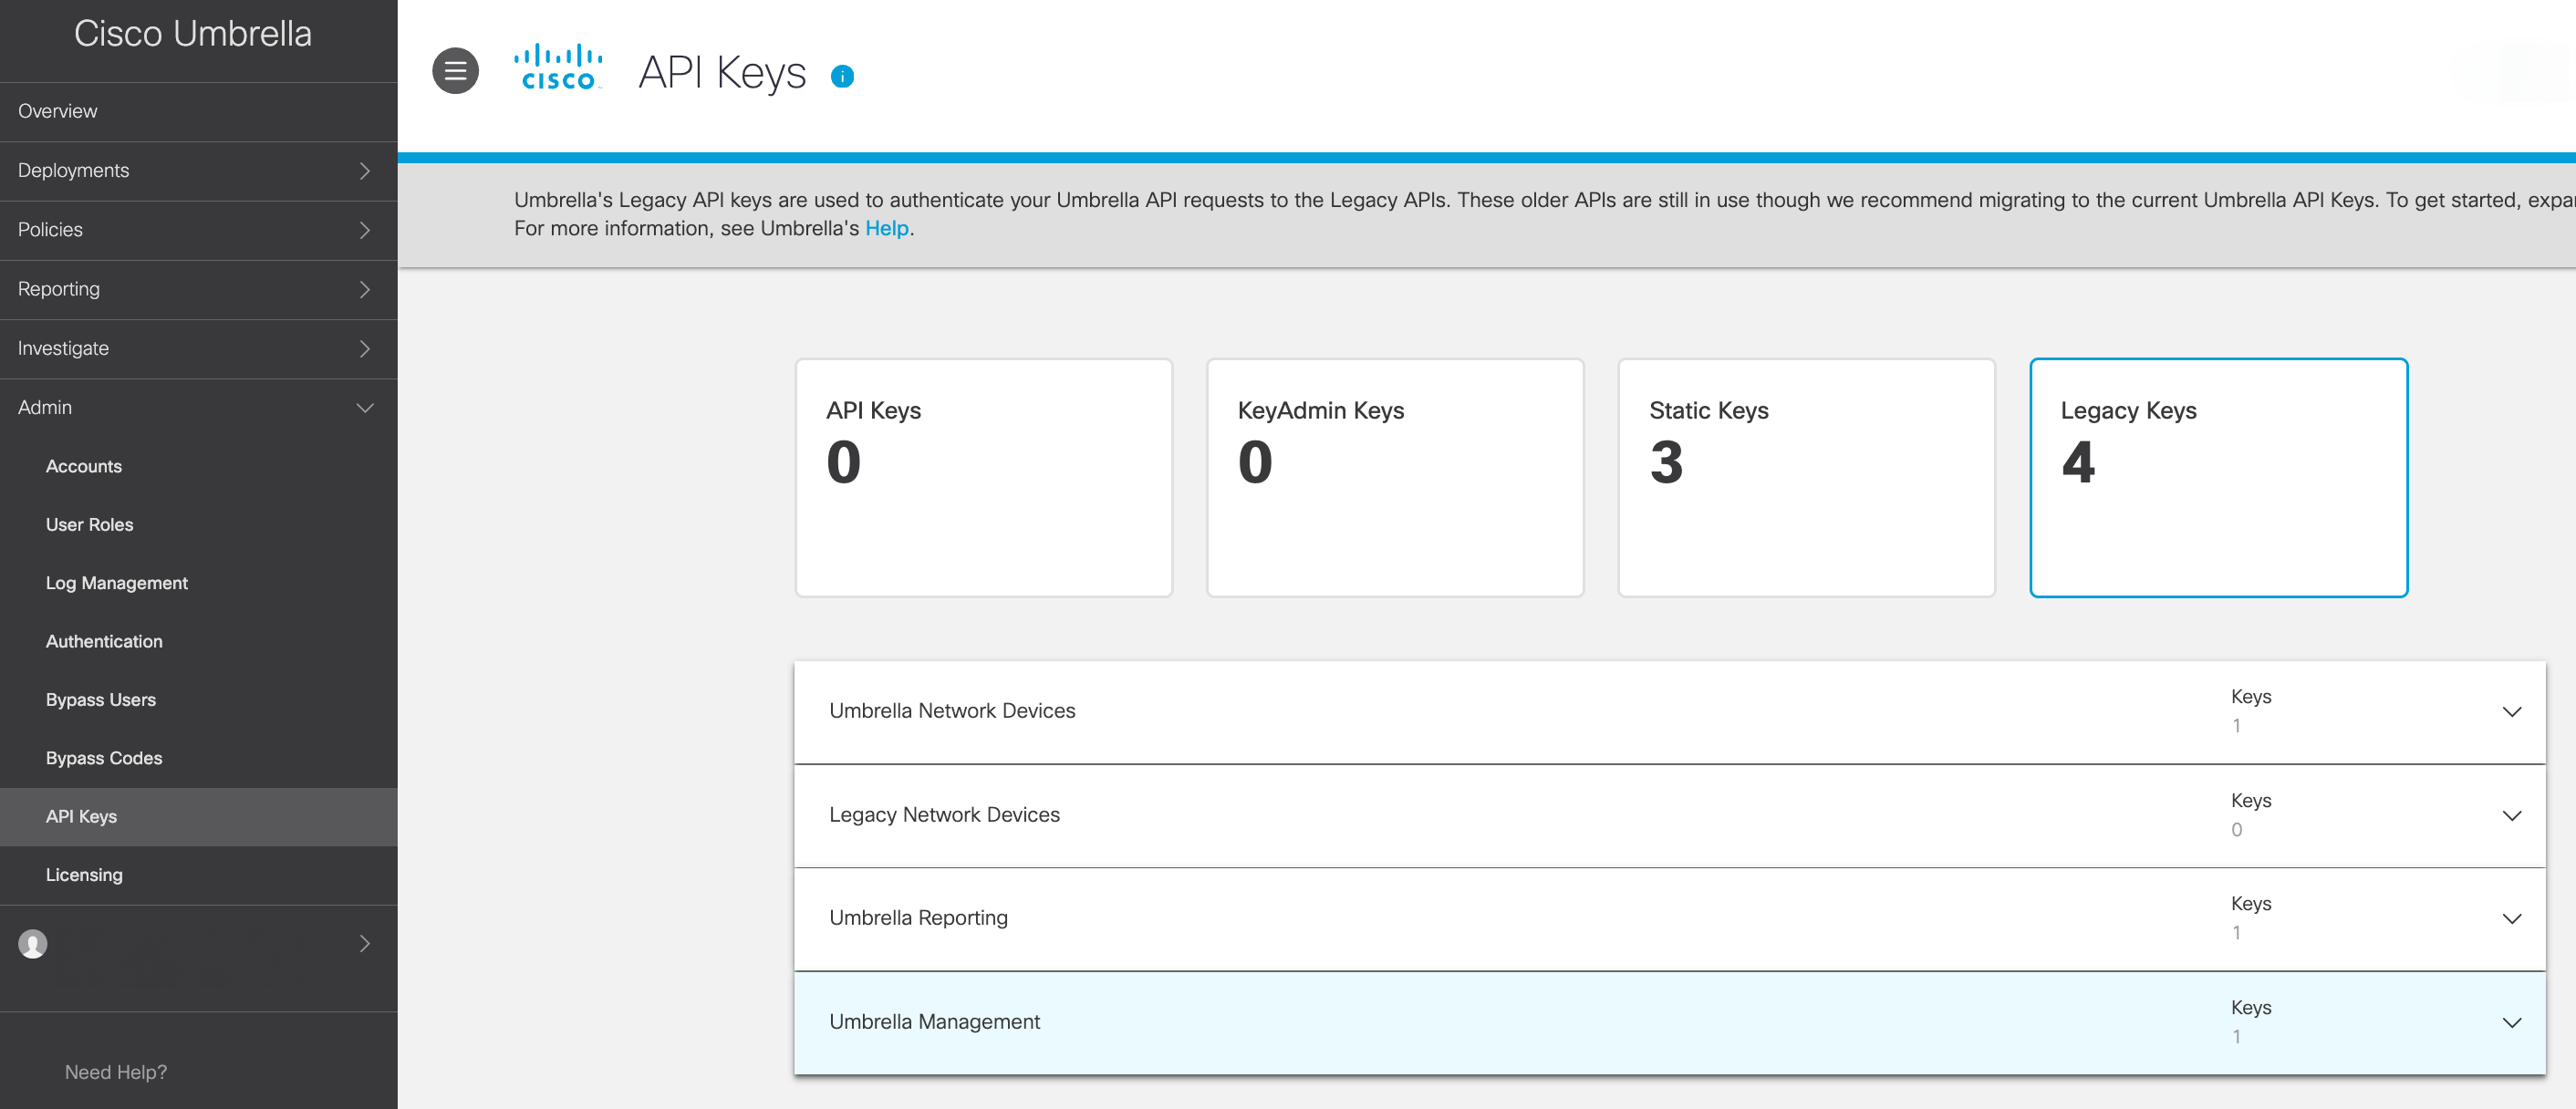
You can check to see if keys have been exchanged in Umbrella by going to Admin > API Keys and clicking on Legacy Keys. If you see 0 keys for all the following API types, then you can choose the Automated Key Exchange (see the image below).
- Umbrella Network Devices
- Umbrella Reporting
- Umbrella Management

Provisioning Steps
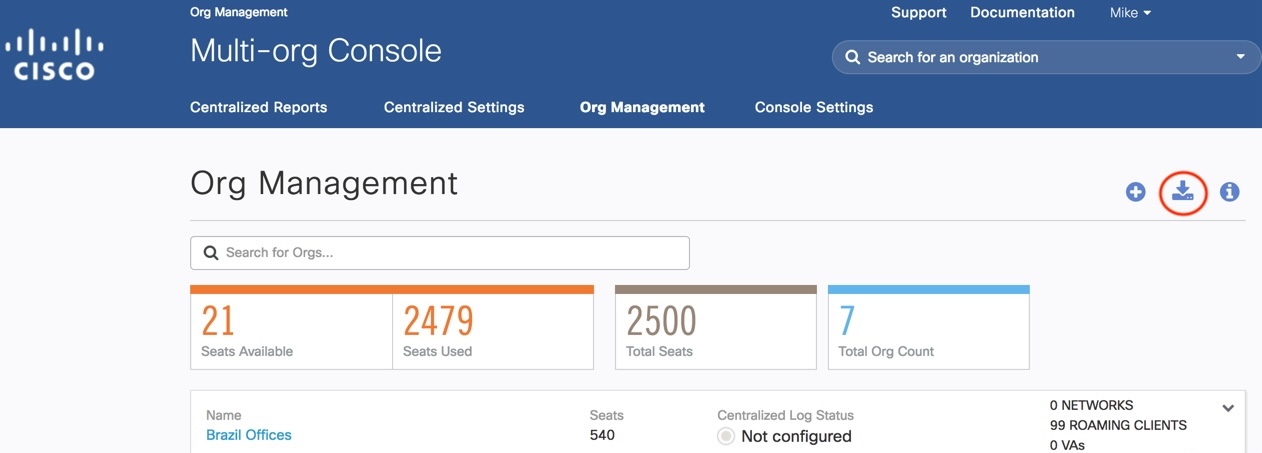
1. After you receive the Secure Connect welcome email for Multi-org customers, please go to the Multi-Org console. From the home page, go to the "Org Management" page. Click on the "download" icon located on the top right page. (See the image below.). This will download a CSV file to your device.

2. Open the CSV file with a spreadsheet application such as Microsoft Excel, Google Sheets or Apple Numbers (see the image below). We will need the information below:
- organizationID (column E) - (required)
- adminEmail (column M) - (required - Please only include one email address per organizationID.)
- Note: There may be more than one email listed. If so, please only include the email that is, or will be the administrator for the Meraki org. If there are more than one email addresses in the cell for a given local organization, the first one will be used for the provisioning process.
- Local Admin Name - (recommended)
- This information is not in the CSV file. It is recommended that you add the local admin's First Name (given name) and Last Name (family name) in the column to the right of "adminEmail" column.
- Enable Automated Key Exchange - (recommended)
- This information is not in the CSV file. It is recommended that you add this information to the file in a column to the right of "Local Admin Name" if you provided the admin name or "adminEmail" if you did not. For each local organization:
- Put a "Y" in the cell if local organization meets the requirements for Automated Key Exchange process.
- Put an "N" in the cell if:
- The organization does not meet the Automated Key Exchange requirements.
- You are unsure if that organization meets the Automated Key Exchange requirements.
- You prefer to use the manual process. (See the "Automated Key Exchange" section above to learn if you are eligible to use Automated Key Exchange process.) If this information is not provide, the manual key exchange process will be enable.
- This information is not in the CSV file. It is recommended that you add this information to the file in a column to the right of "Local Admin Name" if you provided the admin name or "adminEmail" if you did not. For each local organization:
None of the other information is need for the Secure Connect provisioning process. You may delete the other columns if you wish.

3. Please email the updated CSV file as an attachment with the following text in the subject field, "<your company or organization name> MO provisioning" to sec-con-mo@cisco.com.
4. After Cisco reviews your email, the standard Secure Connect welcome email will be sent to the local admin for each local organization.
5. Follow the instructions on the standard welcome email to setup your account for that local organization. For more information on the account setup, please visit our documentation using the links below.
Adding New Local Organizations
For local organizations created after the initial provisioning process, you will follow the same process as described above after you receive the welcome email for Multi-org customers, except please only send the new local organization information to ensure Cisco only sends a provision email for that org.
Umbrella MSSP and MSP Orgs
If the customer org is a part of an Umbrella MSSP org or MSP org, the org must be separated from the “parent” org before onboarding to Secure Connect. Please send an email to umbrella-orders@cisco.com with the subject: “Secure Connect MSP Order – Separate” and include the following information:
- Current Umbrella MSSP, MSP, or Multi Org ID (parent org)
- Current Umbrella Org ID (child org, to be removed from parent)

