
How-to Guide: Using Vision Portal Maps
Learn how to navigate sites, locate cameras, and monitor camera status using maps in the Vision Portal.
Introduction
This guide explains how to use integrated maps in Vision Portal for site navigation and camera management. By leveraging Meraki configurations, Vision Portal provides a visual interface to locate assets across your network.
- Navigate Seamlessly: Move quickly between physical sites and floors.
- Locate Assets: Identify camera placement within buildings.
- Improve Efficiency: Select camera feeds directly from a visual layout to save time.
Prerequisites
Before you can use the mapping features in the Vision Portal, ensure the following requirements are met:
- Meraki Dashboard Configuration:
- Floorplans must be uploaded to the Meraki dashboard for the specific site, and cameras must be placed on the map/floorplan within the Meraki dashboard.
- Please see the 'Using a Floor Plan or Custom Map in Dashboard' to update your floor plan or custom map.
- User Permissions:
- You must have "View" or "Admin" permissions for the specific networks you wish to see on the map.
- Asset Sync:
- Ensure the cameras are online and correctly assigned to the network being viewed.
How to use the Map in Vision Portal
| Use Case | Description | Benefit |
|
Quickly locate cameras by physical location |
The Map allows you to visually navigate sites, buildings, and floor plans to locate cameras in their real‑world positions. This is especially useful in large deployments where camera lists can be long or unfamiliar, or if you are monitoring a physical location and you are not familiar with the site. |
Faster camera discovery and improved situational awareness. |
| Understand camera health without opening individual feeds |
Camera icons on the Map visually indicate camera status (such as online or offline). You can immediately identify which cameras may need attention. |
Reduces troubleshooting time and helps prioritize operational issues. |
|
Gain Context During an Investigation |
When reviewing live or recorded video, users can reference the Map to see where the camera is located relative to entrances, hallways, or other cameras. | Improves incident response and investigation accuracy. |
Step-by-Step Instructions
- Confirming Map Visibility
- The map is the default view in Vision Portal.
- If the map has been correctly configured in the Meraki Dashboard, it will be visible immediately upon login.
- If the configuration is missing or incomplete, a message will be displayed in the main map viewing pan.
 .
. 
- ❌ - No map configured ✅ - Map configured
- Switching between maps and floor plans
- By default, the map shows all of the cameras placed on a map.
- If you have multiple maps and floor plans, you're able to use the switcher to select different floor plans or map.
- The selected floor plan will be displayed as the title of the network switcher, and will only show the cameras placed on that floor plan.
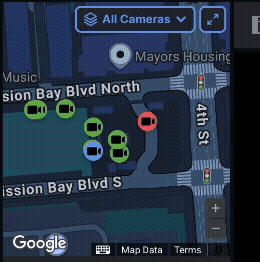
- Identify Camera Status
- The camera icons on the map are there to visually help you understand the current state:
- Green: The camera is online and recording.
- Blue: The current camera that is selected.
- Red: The camera is offline or has a connection issue.
- The camera icons on the map are there to visually help you understand the current state:
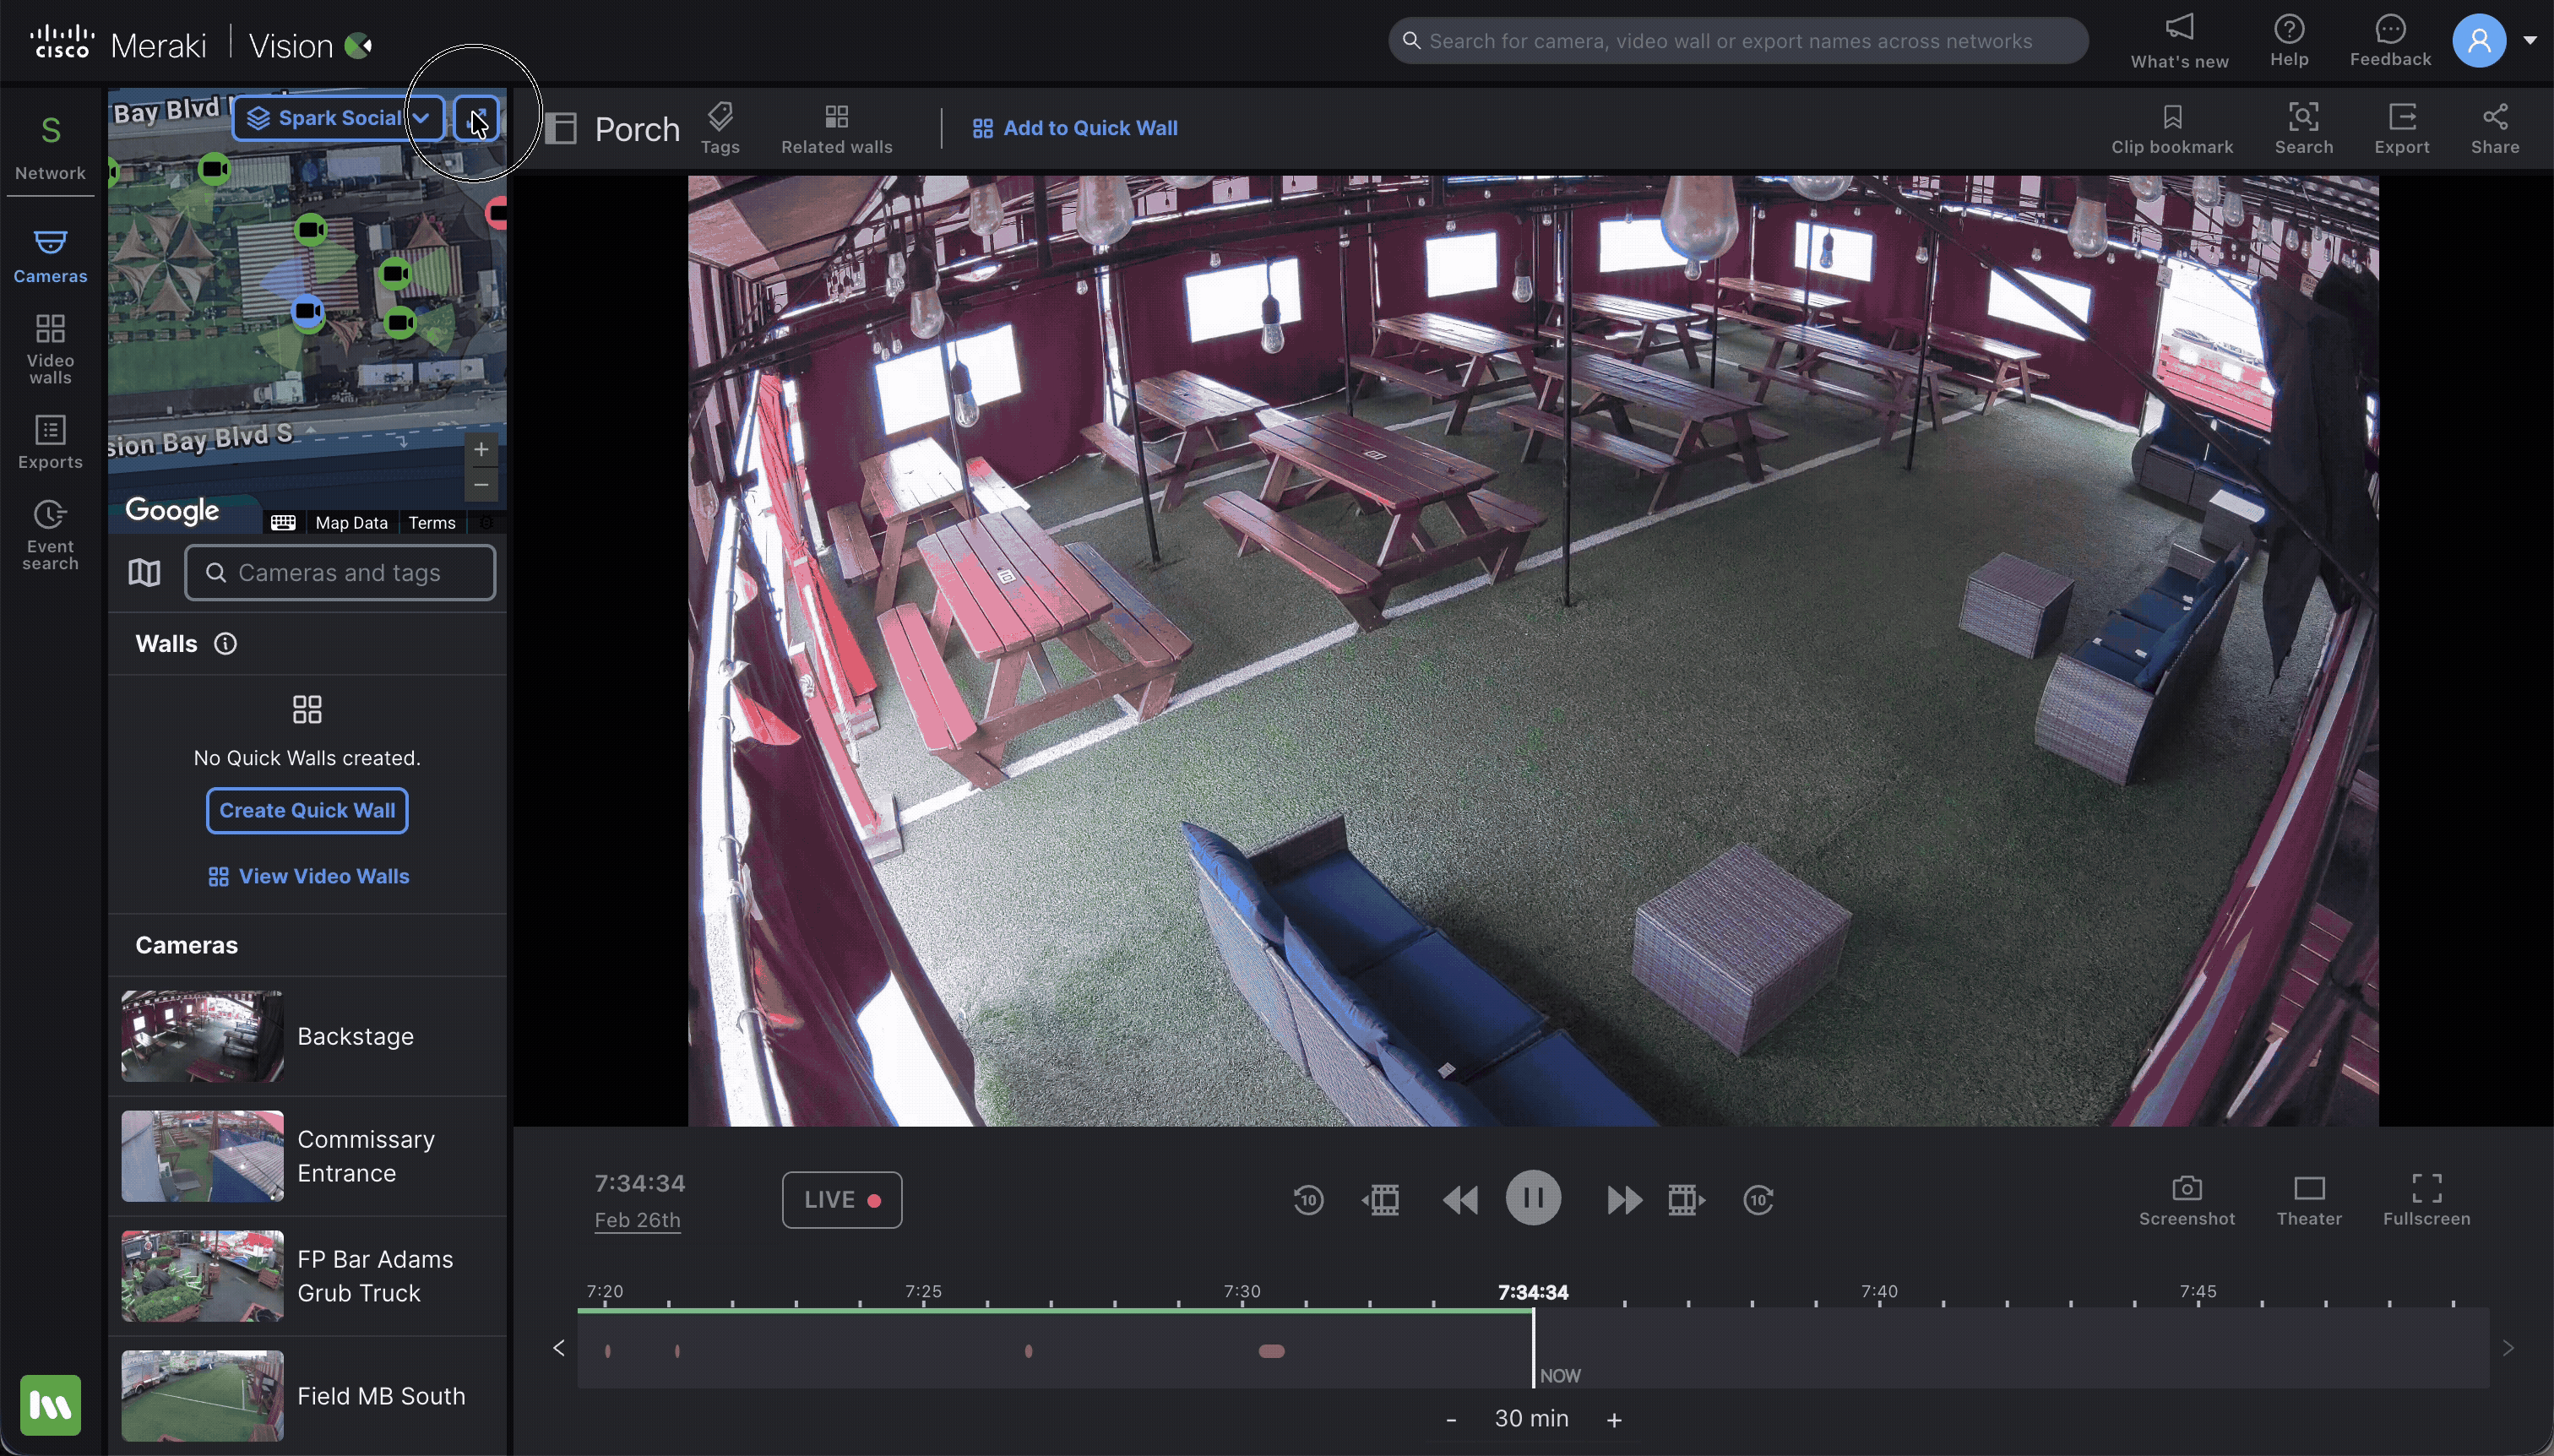
- Click directly on a Camera Icon to highlight it.
- A small preview (a static image captured from your camera) will appear, allowing you to jump straight to the Live Feed, or you can switch to the floor plan associated to that camera.
.gif?revision=1&size=bestfit&width=638&height=363)
- Enlarging the map
- You can also enlarge the map in the Vision Portal by selecting the arrows.
- In the enlarged view, you can also switch floor plans, and hover over the cameras to see a preview.
Verification
- The Map is Configured and Visible in the Vision Portal
- If the map is configured, then the map will be visible in the Vision Portal.
- If the map is not visible, you will see a validation message in the Vision Portal informing you there is no map setup.

- Please follow the configuration details in the documentation.
- If the map is configured, then the map will be visible in the Vision Portal.
- Role-based Access Control and Maps
- If you have access to a camera, you will be able to see this camera placed on the map.
- If you do not have access to a specific camera you will not be able to see this camera placed on the map.

Additional Resources
For additional information on configuring the maps please visit: