
Cisco C9350 Smart Switch Onboarding Guide
Cisco Smart Switch Onboarding Guide
Overview
Cisco C9000 Series Smart Switches are designed to offer more flexible operations, assure a more secure experience, and bring exceptional speed and scale to enterprise networks is the foundation for a future-proofed workplace. Cisco Smart Switches simplify operations, combining unified hardware, unified software, and support, regardless of how you manage your network.
Software
Cisco IOS XE now supports operational flexibility in how users choose to manage their devices. With support for on-premises, cloud management and CLI provisioning, the new Cisco C9000 Smart Switch generation offers a unified experience with multiple management options.
Note: Support for Cisco Smart Series and universal provisioning is introduced with IOS XE 17.18.X.
See here to learn more about cloud-management support for Cisco IOS XE platforms.
Cloud Management Options via Dashboard
For users seeking to manage their Cisco Smart switches via the Meraki Dashboard, the cloud-native IOS XE release introduces a guided onboarding workflow, allowing them to select from the below management modes based on their specific requirements and preferences.
Management mode determines whether the device is managed by the Cloud or on-premises. Configuration source determines if the configuration remains local to the device or is replaced and fully managed by the cloud.
-
Cloud-management mode:
For users looking to manage their inventory/licenses as well as devices on Meraki dashboard, they can onboard their switches to Meraki Dashboard under the cloud-management mode with the flexibility to choose whether the configuration remains local to the device or is fully replaced and fully managed by cloud.
-
Configuration Source: Cloud
The Cloud-management mode with configuration source as Cloud offers the full cloud management experience. Configurations are managed via the Meraki user interface and delivered entirely from the cloud. This capability also offers a read-only Cloud CLI terminal to view the entire running-configuration or perform advanced troubleshooting using IOS XE show commands. For details on cloud-management with cloud as configuration source, click here
-
Configuration Source: Device 1
The Cloud-management mode with configuration source as device is an evolution of Cloud Monitoring. In this mode, users can onboard their device to the cloud to access central monitoring and troubleshooting tools, as well as a Cloud CLI terminal to execute read/write commands. Configurations are managed via local console, SSH, or CLI and remain local to the device. For details on cloud-management with device as configuration source, click here
Cloud-management | Configuration Source: Device will be able in a future release
-
On-premised management mode:
For users looking to manage their Cisco C9350 inventory and licenses on Meraki dashboard, they can onboard their switches to an on-prem network on the dashboard. Devices can be then managed as usual via an on-premises management platform or CLI console.
|
Management Option |
C9350 series |
C9610 series |
|
Cloud-management w/ Cloud as the configuration source |
17.18.1 |
Future release |
|
Cloud-management w/ Device as the configuration source |
Future release |
|
|
On-premises management |
17.18.1 |
17.18.1 |
Prerequisites to On Board to Dashboard
-
Configure your Dashboard Network: To add devices to your Meraki dashboard network please refer to the Creating a Dashboard Account and Organization document.
-
Check and Set Network Firmware: Ensure that the switch network is set to the correct firmware version. Recommended versions are subject to change and are available in each dashboard by navigating to Organization > Firmware Upgrades. You can refer to Managing Firmware Upgrades for steps to set network firmware to the desired version.
-
Check and Configure Upstream Firewall Settings: If a firewall is in place, it must allow outgoing connections on particular ports to particular IP addresses. The most current list of outbound ports and IP addresses for your particular organization can be found under Help → Firewall info. The help button is located on the top right corner of any dashboard page. For more information refer to Upstream Firewall Rules for Cloud Connectivity.
Onboarding Flow
Here is the flow to onboard a Cisco C9350 to Meraki Dashboard with the optionality to choose from the above management options
-
Claim Order
-
Add devices to an existing network or in a new network
-
Customize default management mode of a network (optional). Default management mode for a newly created network is always set to “Cloud-management”

Here is a summary of supported features with onboarding at launch and beyond:
|
|
C9350 series |
C9610 series |
|
Onboarding flow for Cloud-management w/ Cloud as the configuration source |
Supported |
Future release |
|
Onboarding flow for Cloud-management w/ Device as the configuration source |
Future release |
Future release |
|
On-premises management |
Supported |
Supported |
|
In-network mode conversion |
Future release |
Future release |
|
Mixing on-prem and cloud-managed devices in same network |
Not Supported |
Not Supported |
Dashboard Provisioning
Step 1: Device claiming
-
Determine the Cloud ID to claim on dashboard ( ex: Cloud ID: XXXX-XXXX-RHSL ).
- The Cloud ID can be retrieved from the sticker affixed to the front of the switch or the sticker that is on the top of the switch.


-
It may also be determined by claiming with an Order Number, provided via email to the original purchase and ship-to contact(s). For more information on order-based claiming, see Claiming devices and Orders.
-
The Cloud ID can also be retrieved via console once the system boots, via issuing show cloud-mgmt.
-
Claim the device into inventory:
-
In Dashboard, navigate to: Organization > Inventory and select Claim Devices
-
Enter the order number, and “claim order” or
-
choose “Claim individual devices”, enter the cloud ID of the device(s) and “claim devices”

-
Assign to network
-
Locate and select the cloud ID of the switch to be assigned to a network
-
Choose “add to network”

-
Select an existing network or create a new network

-
Select Next and then choose the Cloud Management Mode youd like

-
Select Next and then click Add to Network

Step 2: Device bootup and Zero Touch Provisioning (ZTP)
Please Provide the new switch an uplink on a VLAN that has a path to the internet.
The uplink should be connected to the upstream switch as either an access port, or a trunk with a native VLAN set on the trunk (untagged VLAN). Once the switch is connected to cloud you may adjust your uplink settings on both the upstream device and the newly provisioned switch
Power on and allow the switch or stack time to boot.
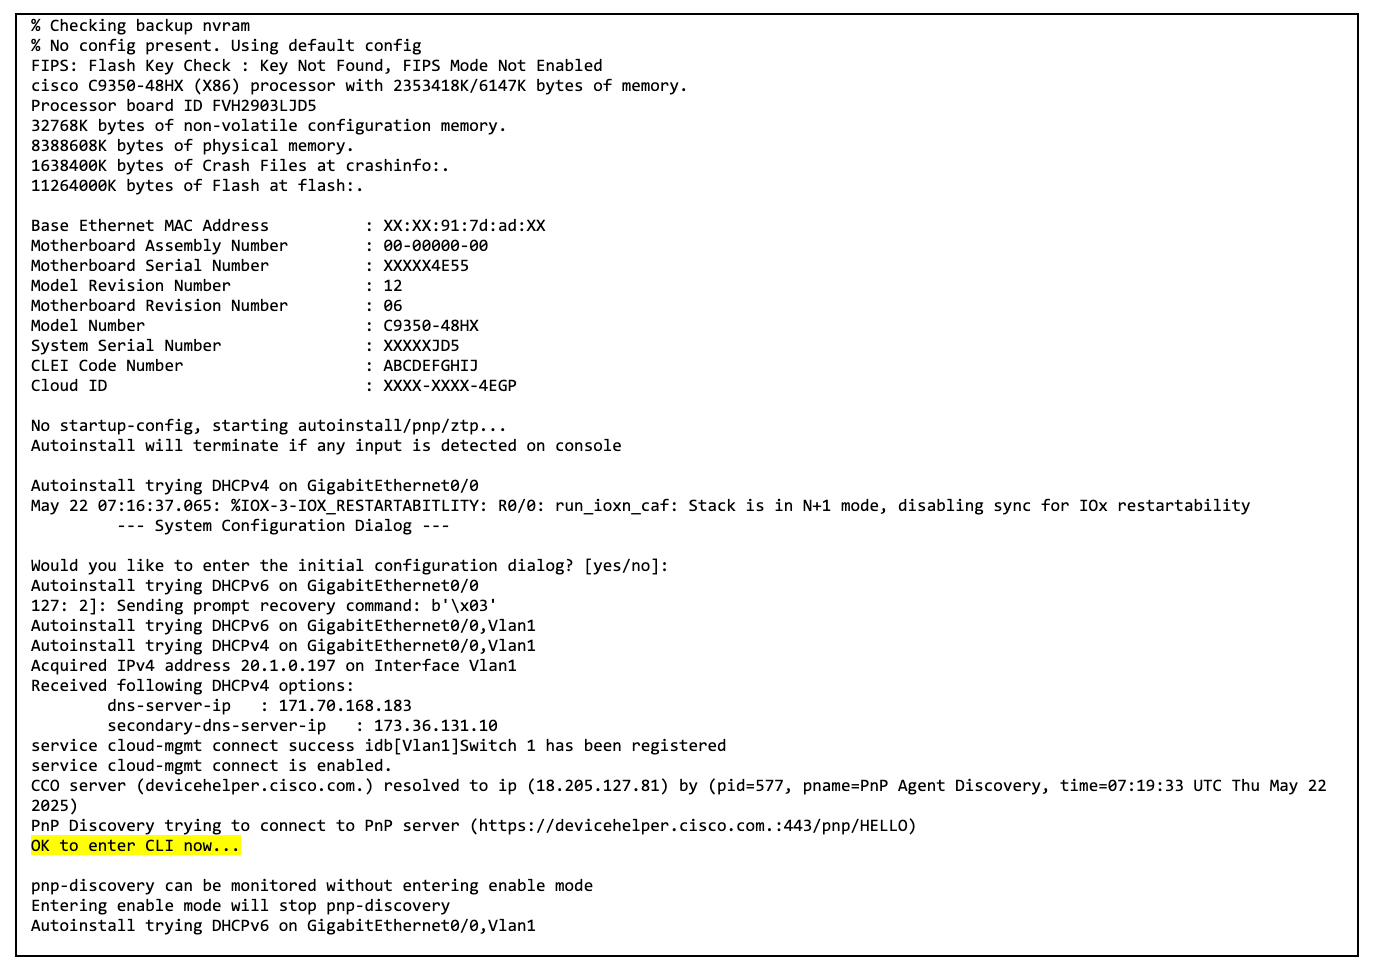
While not required, the system boot sequence and cloud-connectivity status may be monitored or disrupted via the system console. An example of the boot process and cloud-mgmt sequence can be seen below.
If you are connected to the console any keystroke during the Zero-touch provisioning sequence will disrupt the ZTP process, and require subsequent manual intervention. For Zero-touch cloud provisioning, do not enter any keystrokes.
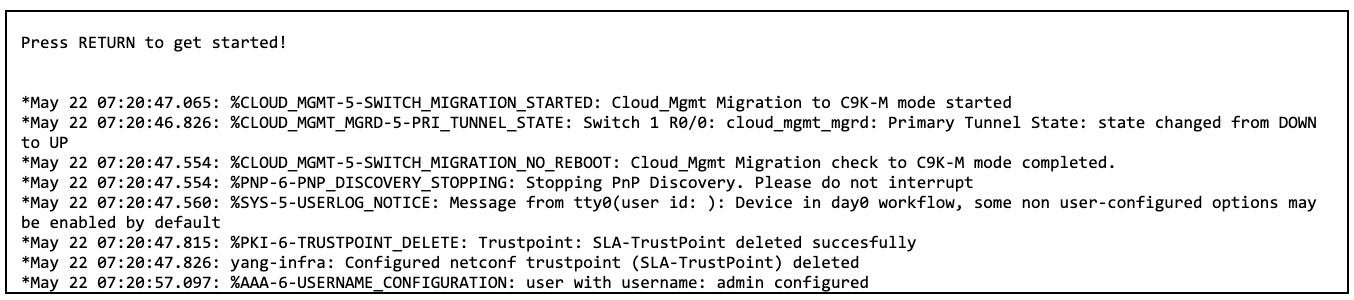
You will see in the logs the tunnel come up
Step 3: Final Onboarding
On the Meraki Dashboard, once the switch or stack completes provisioning, the newly-claimed device(s) will show a Green status, and port information should begin to report on the Switch detail views:

Congratulations, you have successfully provisioned the new Cisco Smart Switch, and the product is available and ready for production use.
Troubleshooting
Useful troubleshooting commands
- To see if your switch is configured for Cloud-Mode or On-Prem mode (C9K-M the -M signifies Cloud mode)

- To display if the switch has connected to dashboard and the tunnels are UP

- To display if your switch is having any issues with applying configuration from dashboard to the switch. If you see the word failed anywhere there is an issue getting configuration from dashboard.

- If the ZTP process is interuppted during boot by a key stroke on the console and you want the switch to be cloud managed, the procedure below can be followed to re-initiate the ZTP cloud provisioning process.
You must have already claimed your Cloud ID in dashboard and assigned to a network.
-
Get into the console and issue the command: service cloud-mgmt connect
-
Wait a few seconds, then issue the command: show cloud-mgmt connect
-
You should see the output below:

-
If you want to re-initialize the PnP service, you can reinitiate the process via the system console:
- Perform the command: write erase
- Followed by the command: reload
- Then DO NOT hit any keys on the console