
Deploying Powershell and Shell Scripts in Systems Manager
Deploying Powershell and Shell scripts
This article will show how to deploy Powershell scripts (.ps1) on Windows, and shell scripts (.sh) on macOS. Scripts are deployed using the SM Agent. This feature is currently in Early Access Beta, and will release in the future.
View a high level example which shows the advantages of being able to use scripts in SM to configure more advances applications, such as the Windows Cisco Secure AnyConnect VPN module:
Requirements
- macOS 10.12 (Sierra) or higher
- Windows 10 22H2 or higher
- Powershell 5.1+ installed
- Meraki Endpoint agent version 3.7.0 or higher
- Version 4.1+ is required for scheduling scripts with a rerun frequency.
- Script (.sh or .ps1) which can finish within 60 seconds
- Scripts which take longer than 60 seconds will timeout and report as an error in Dashboard.
Note: To learn more about the Meraki Systems Manager agent enrollment please see the Windows documentation and macOS documentation.
Early Access
The Meraki Systems Manager Scripting feature is currently in Early Access beta and currently needs to be opted in. The Early Access page is available to org-write admins in the navigation menu by going to Organization > Configure > Early Access.
Some features and user interface screenshots referenced in this document may change or be unavailable during the early access stage.
Add a script
Navigate to the Systems Manager > Manage > Scripts page.
Click on + Add script. 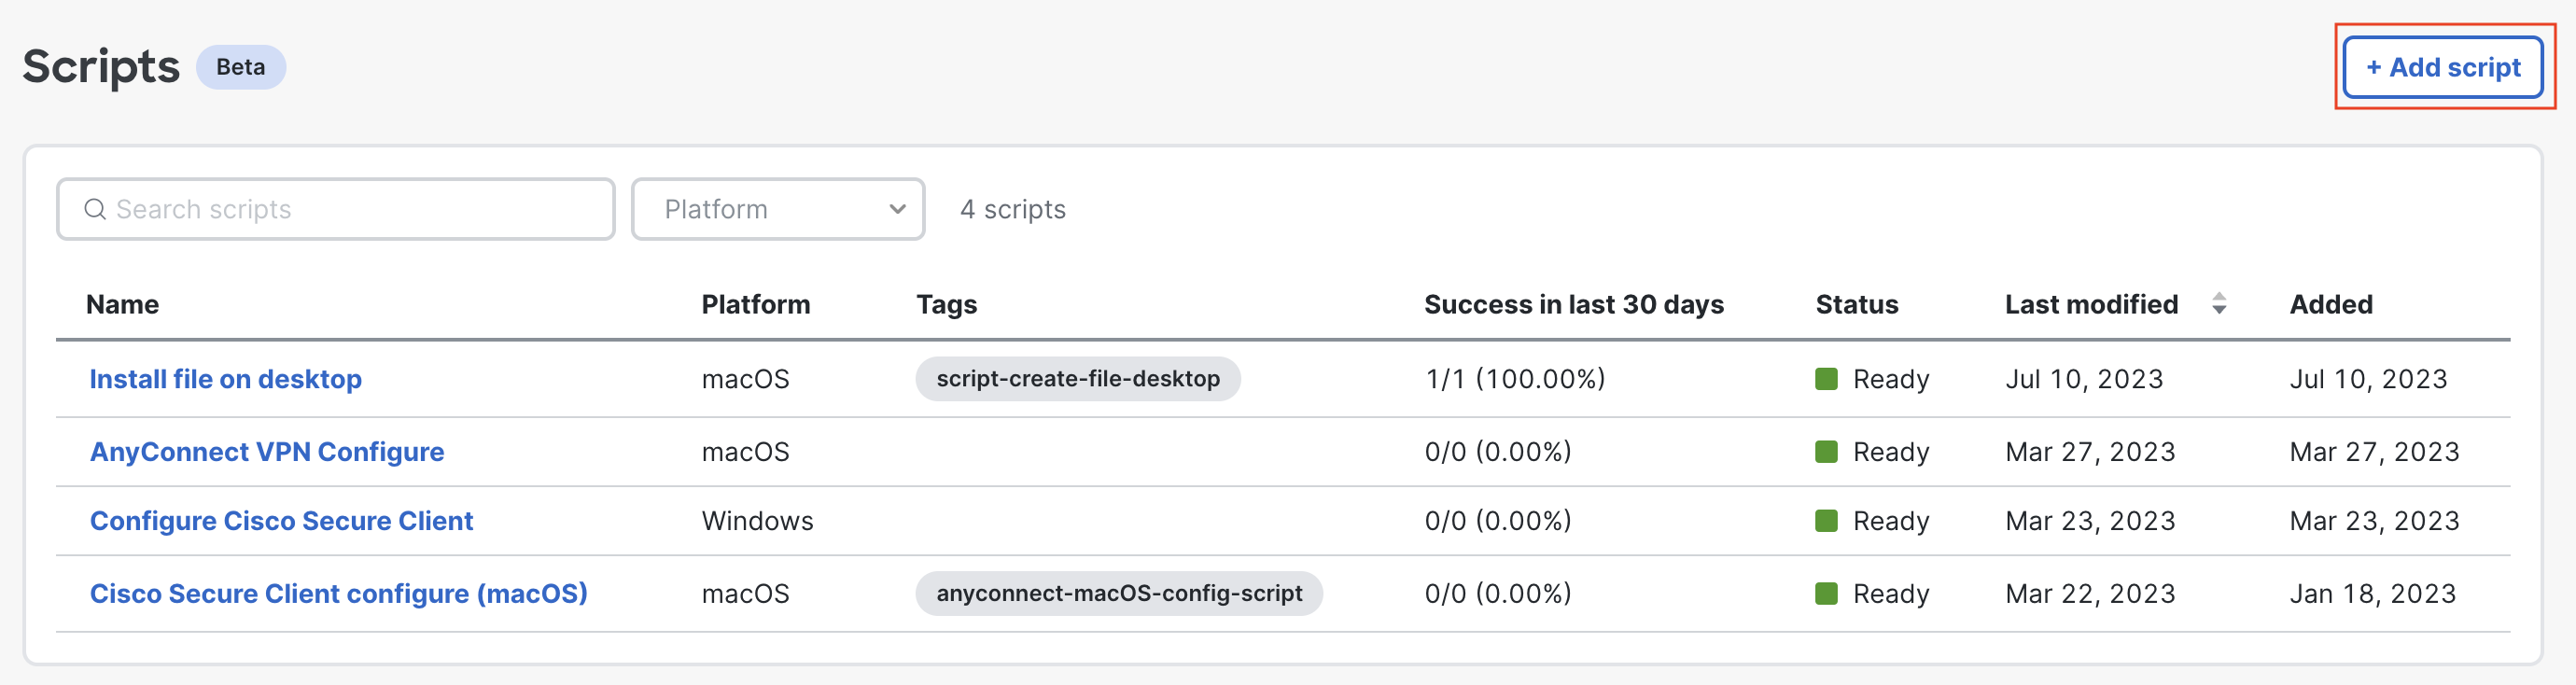
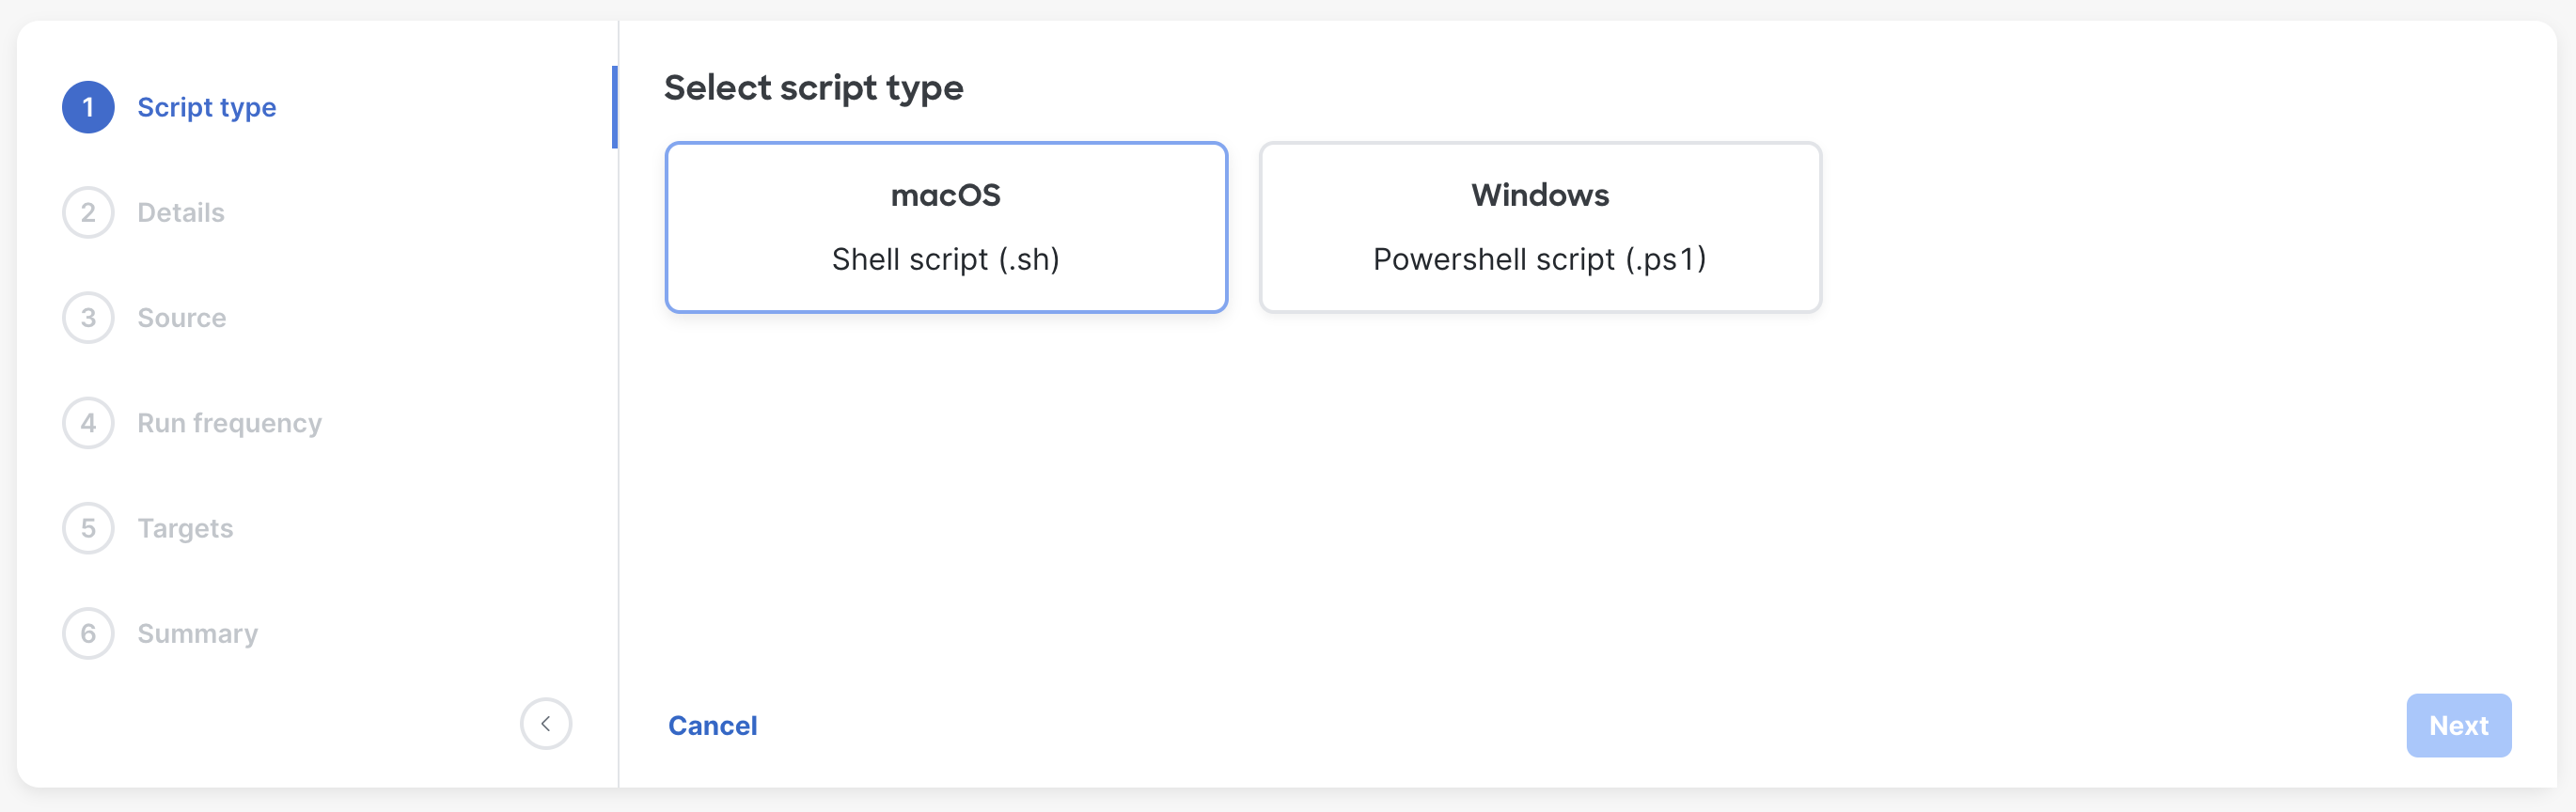
Select a platform script type
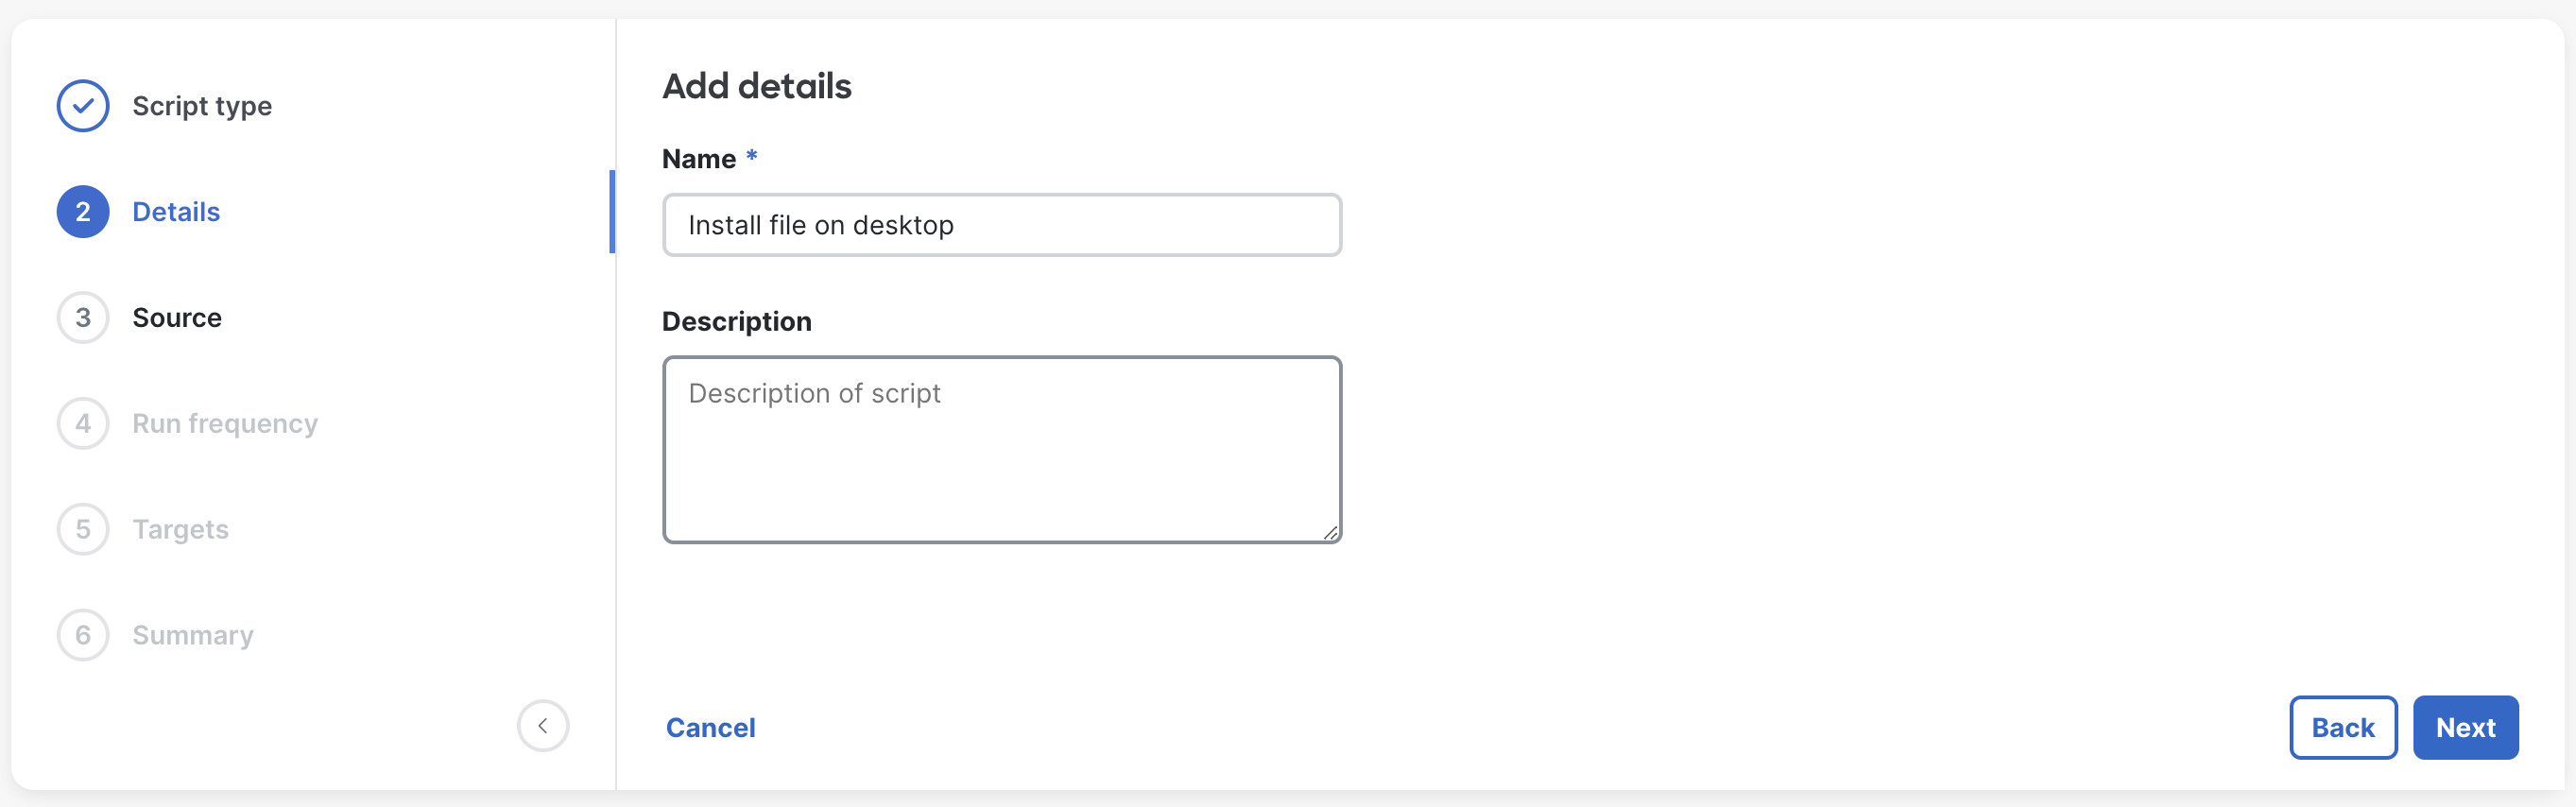
Give the script a name and description. These are references for Dashboard administrators about the script and will not be visible the end users.
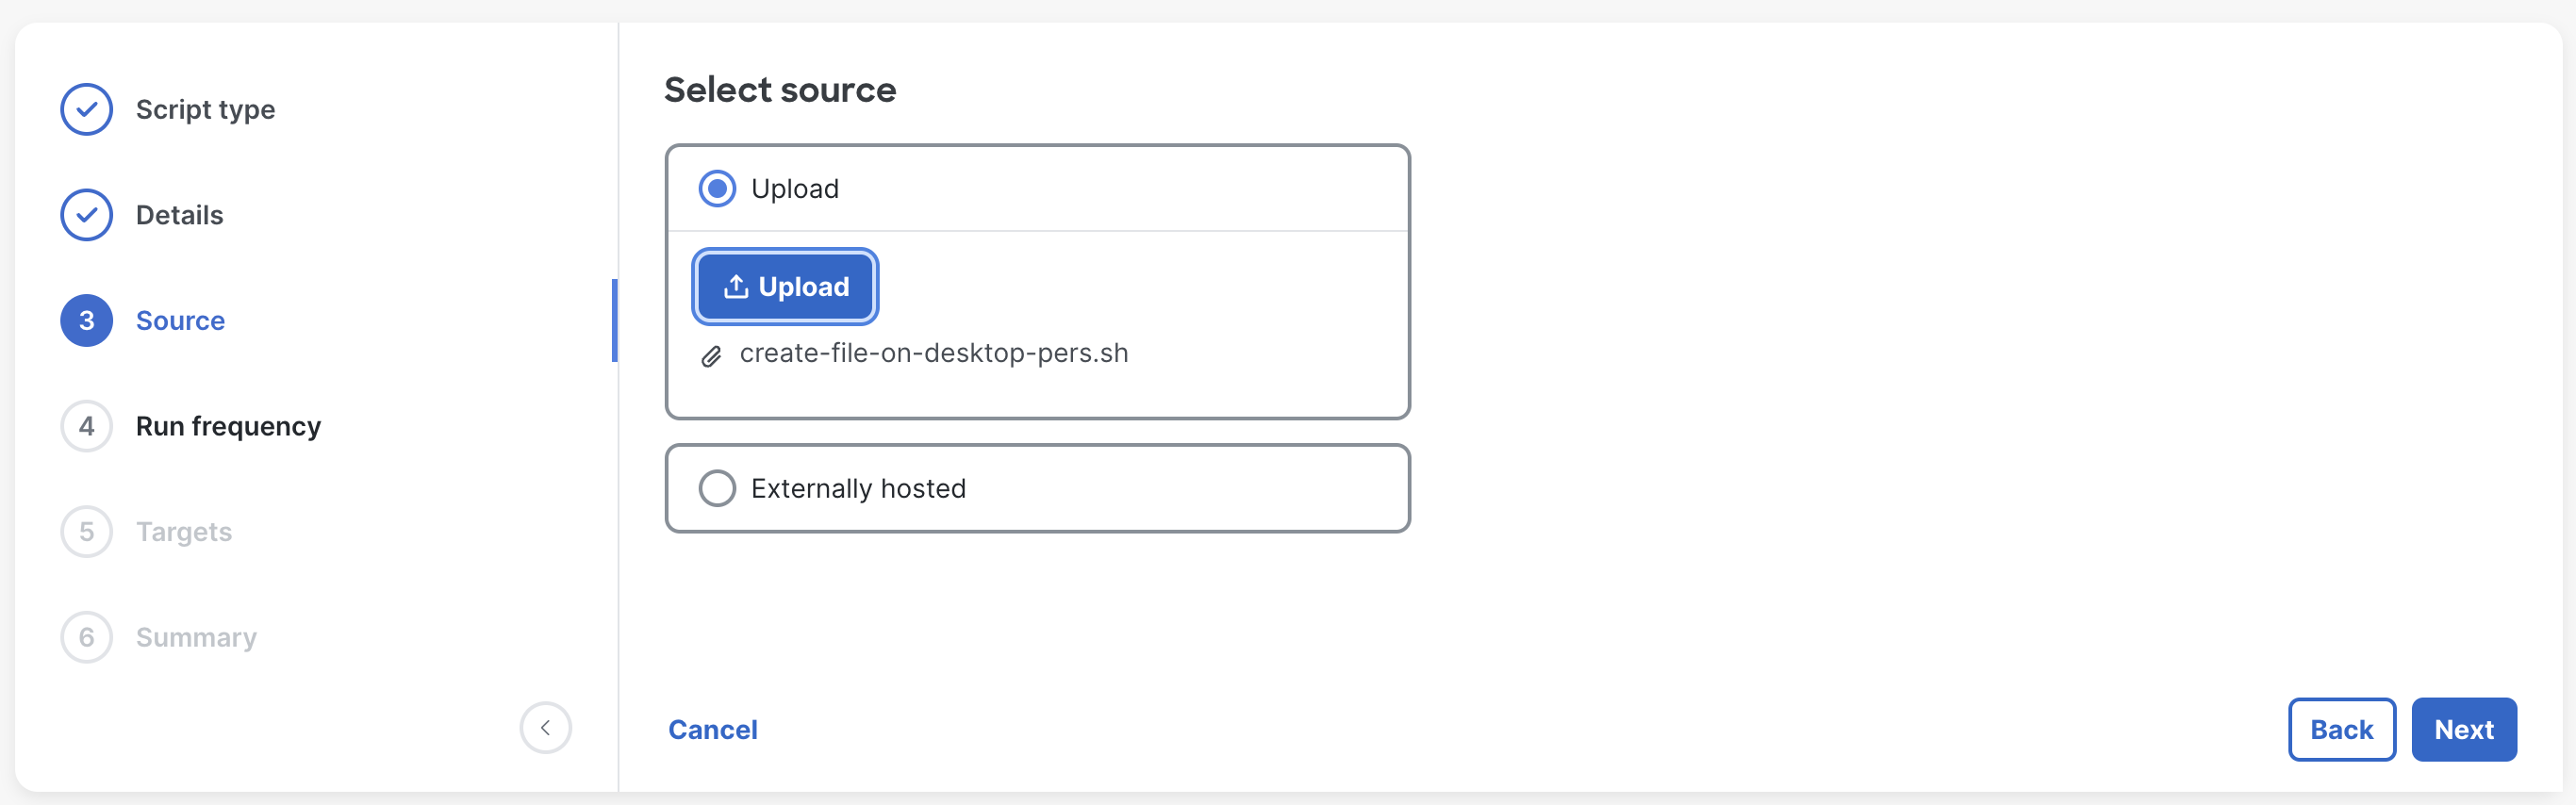
Upload a script file (.sh for macOS) or (.ps1 for Windows). Or, reference an externally hosted url for a direct download of a script.
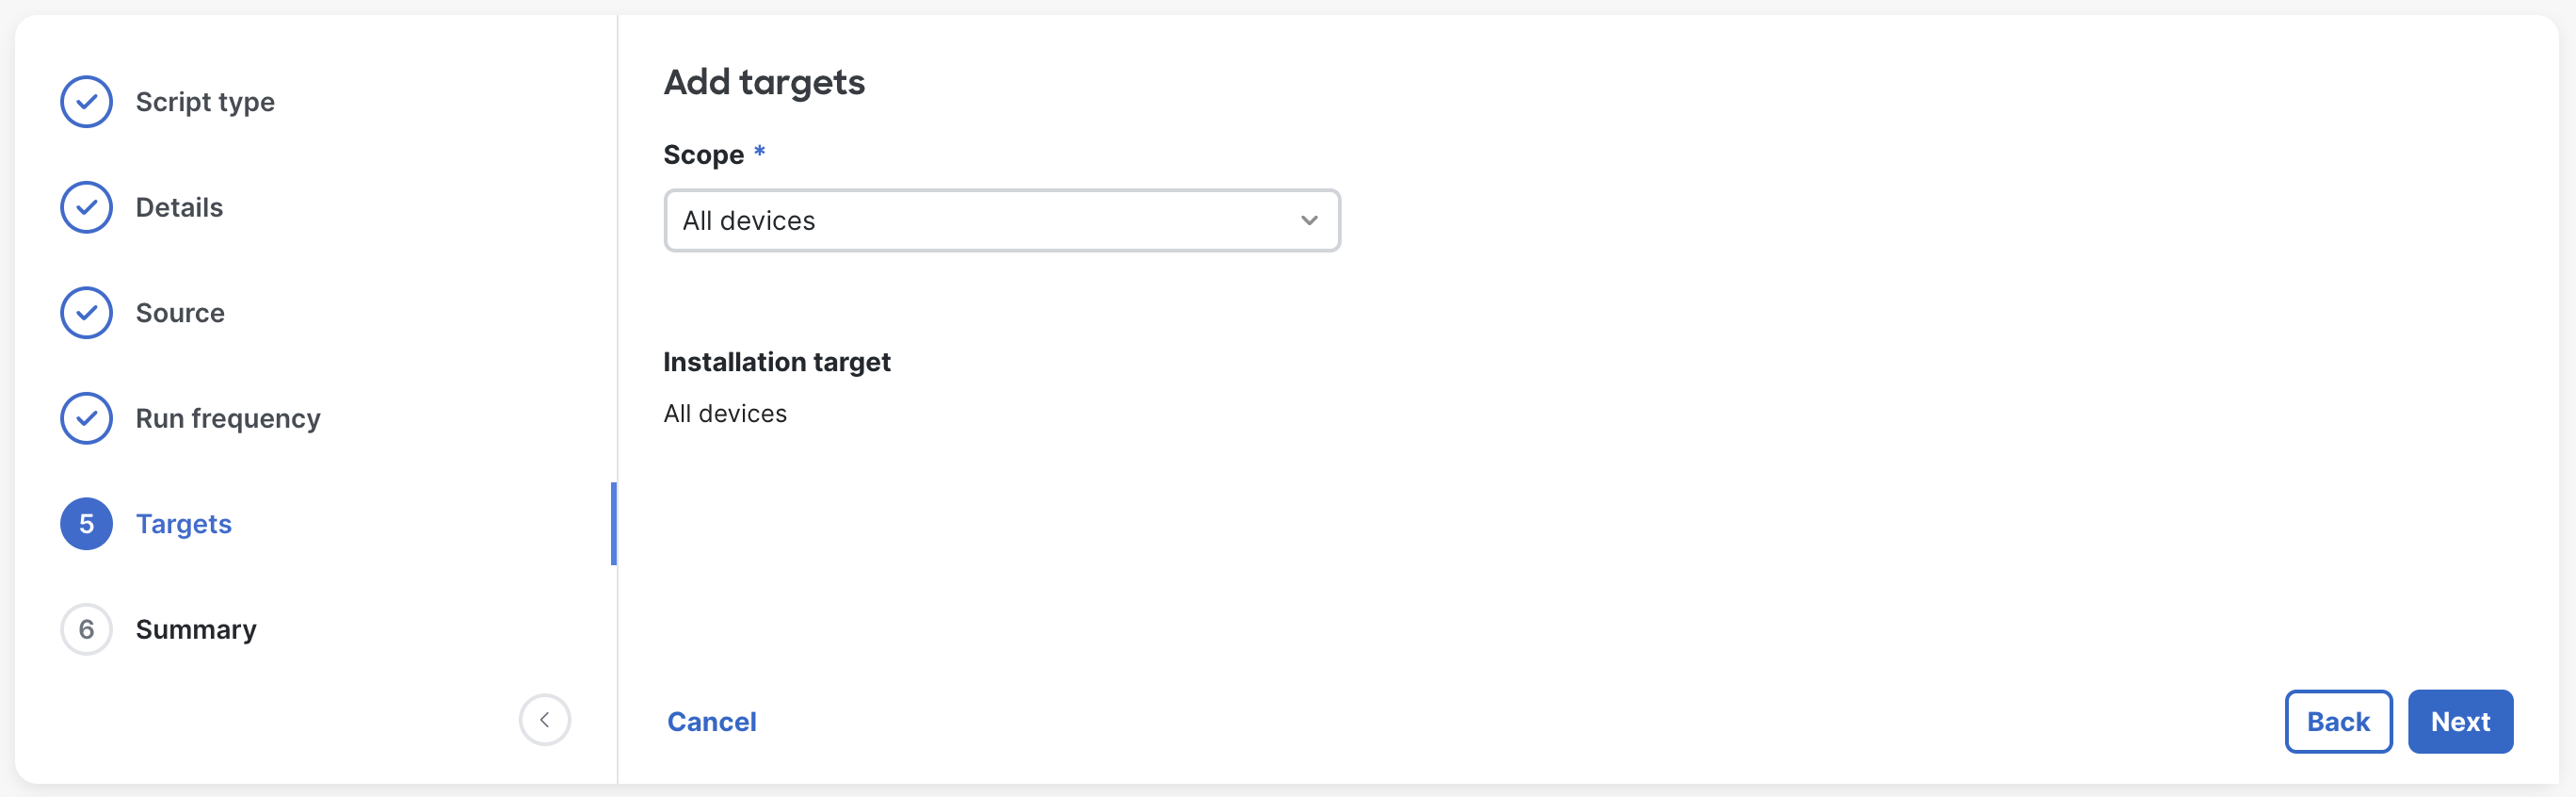
Add target scoping to the script. This can be used to target only specific groups or devices via a specific tag. Or, use All devices to target every device in the network. For more information on tags, see here.
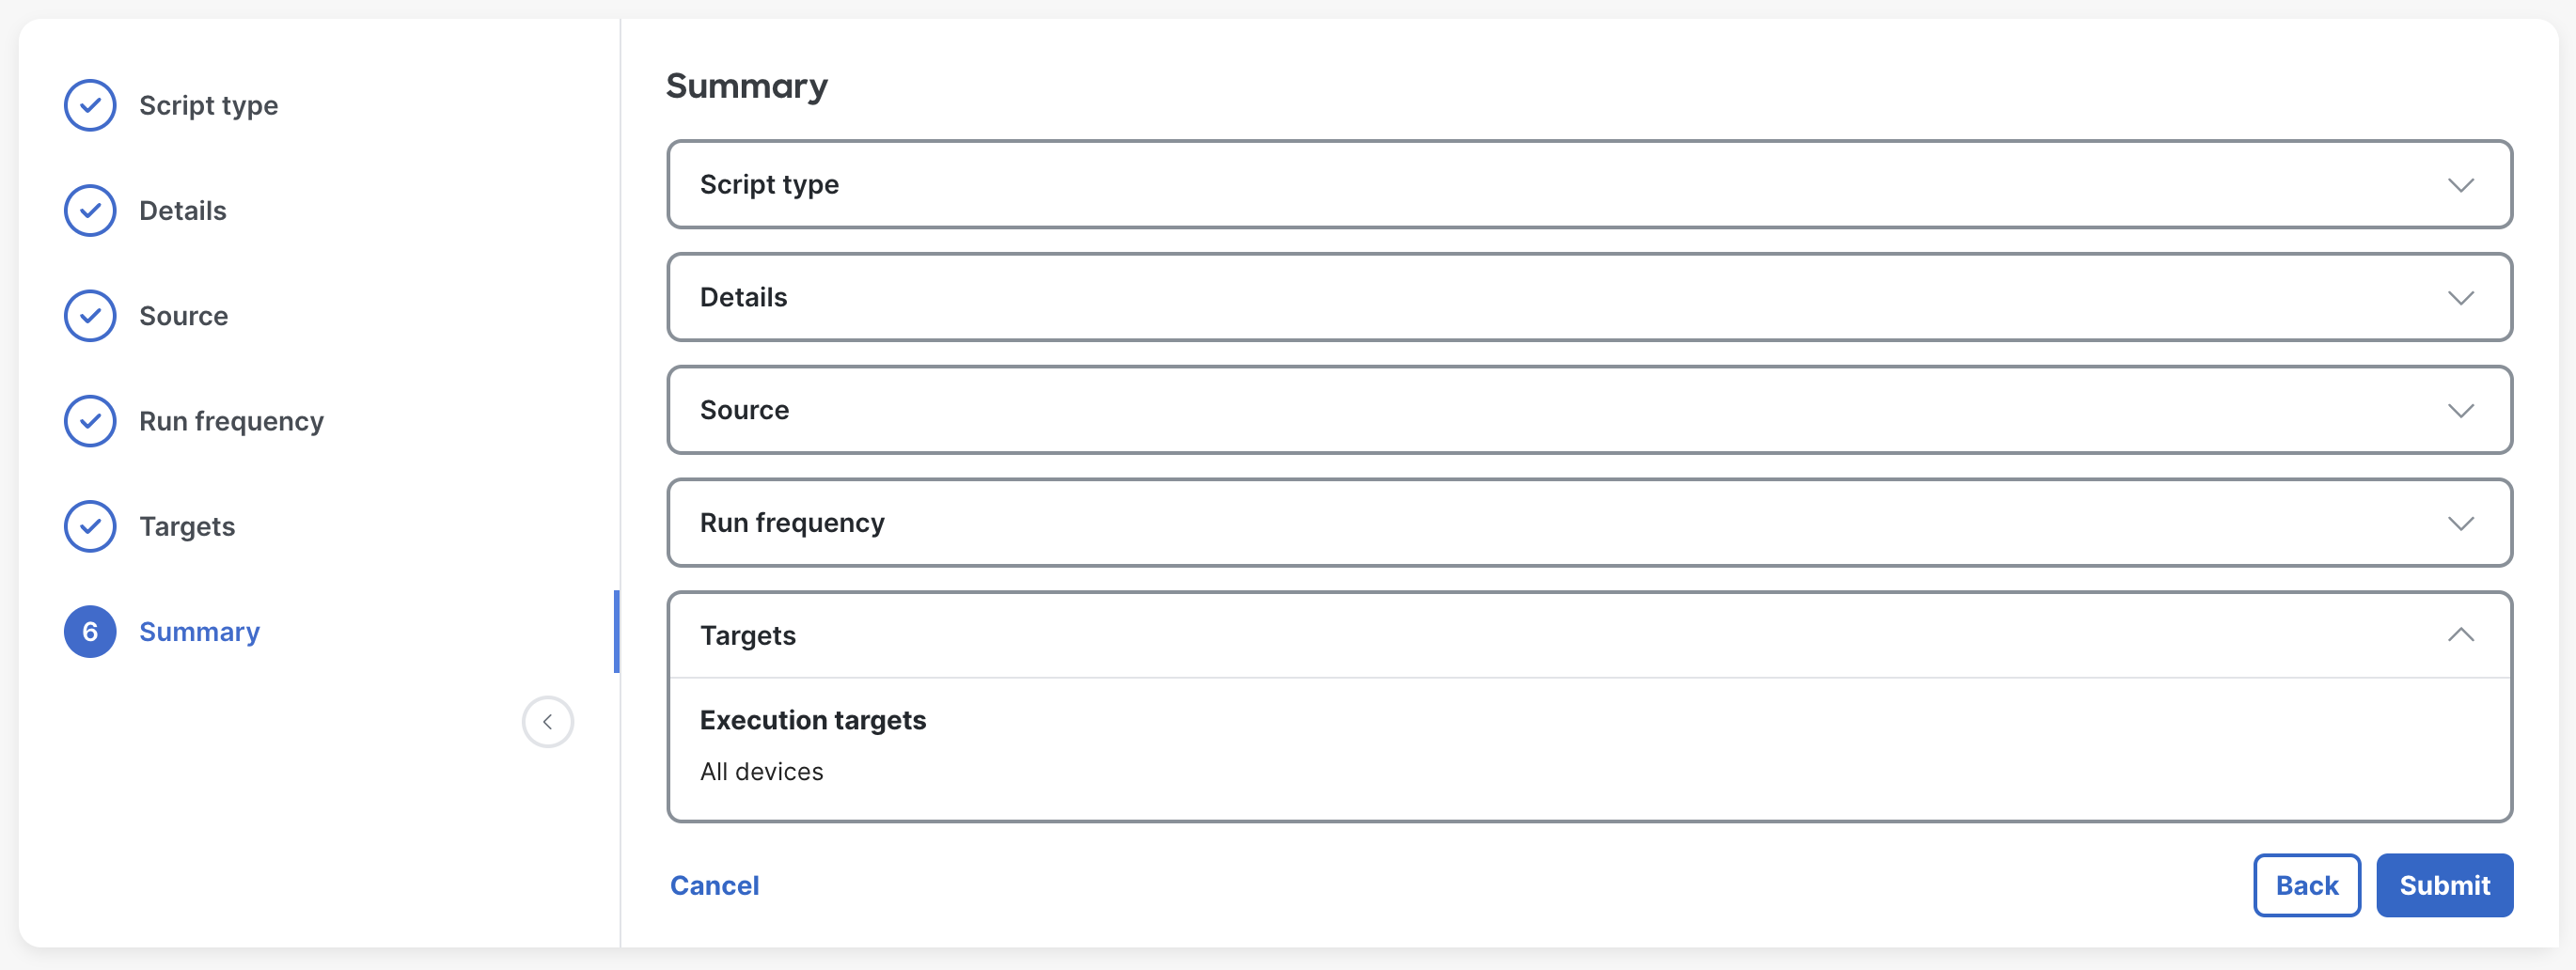
View the final step summary and click Submit to save the script.
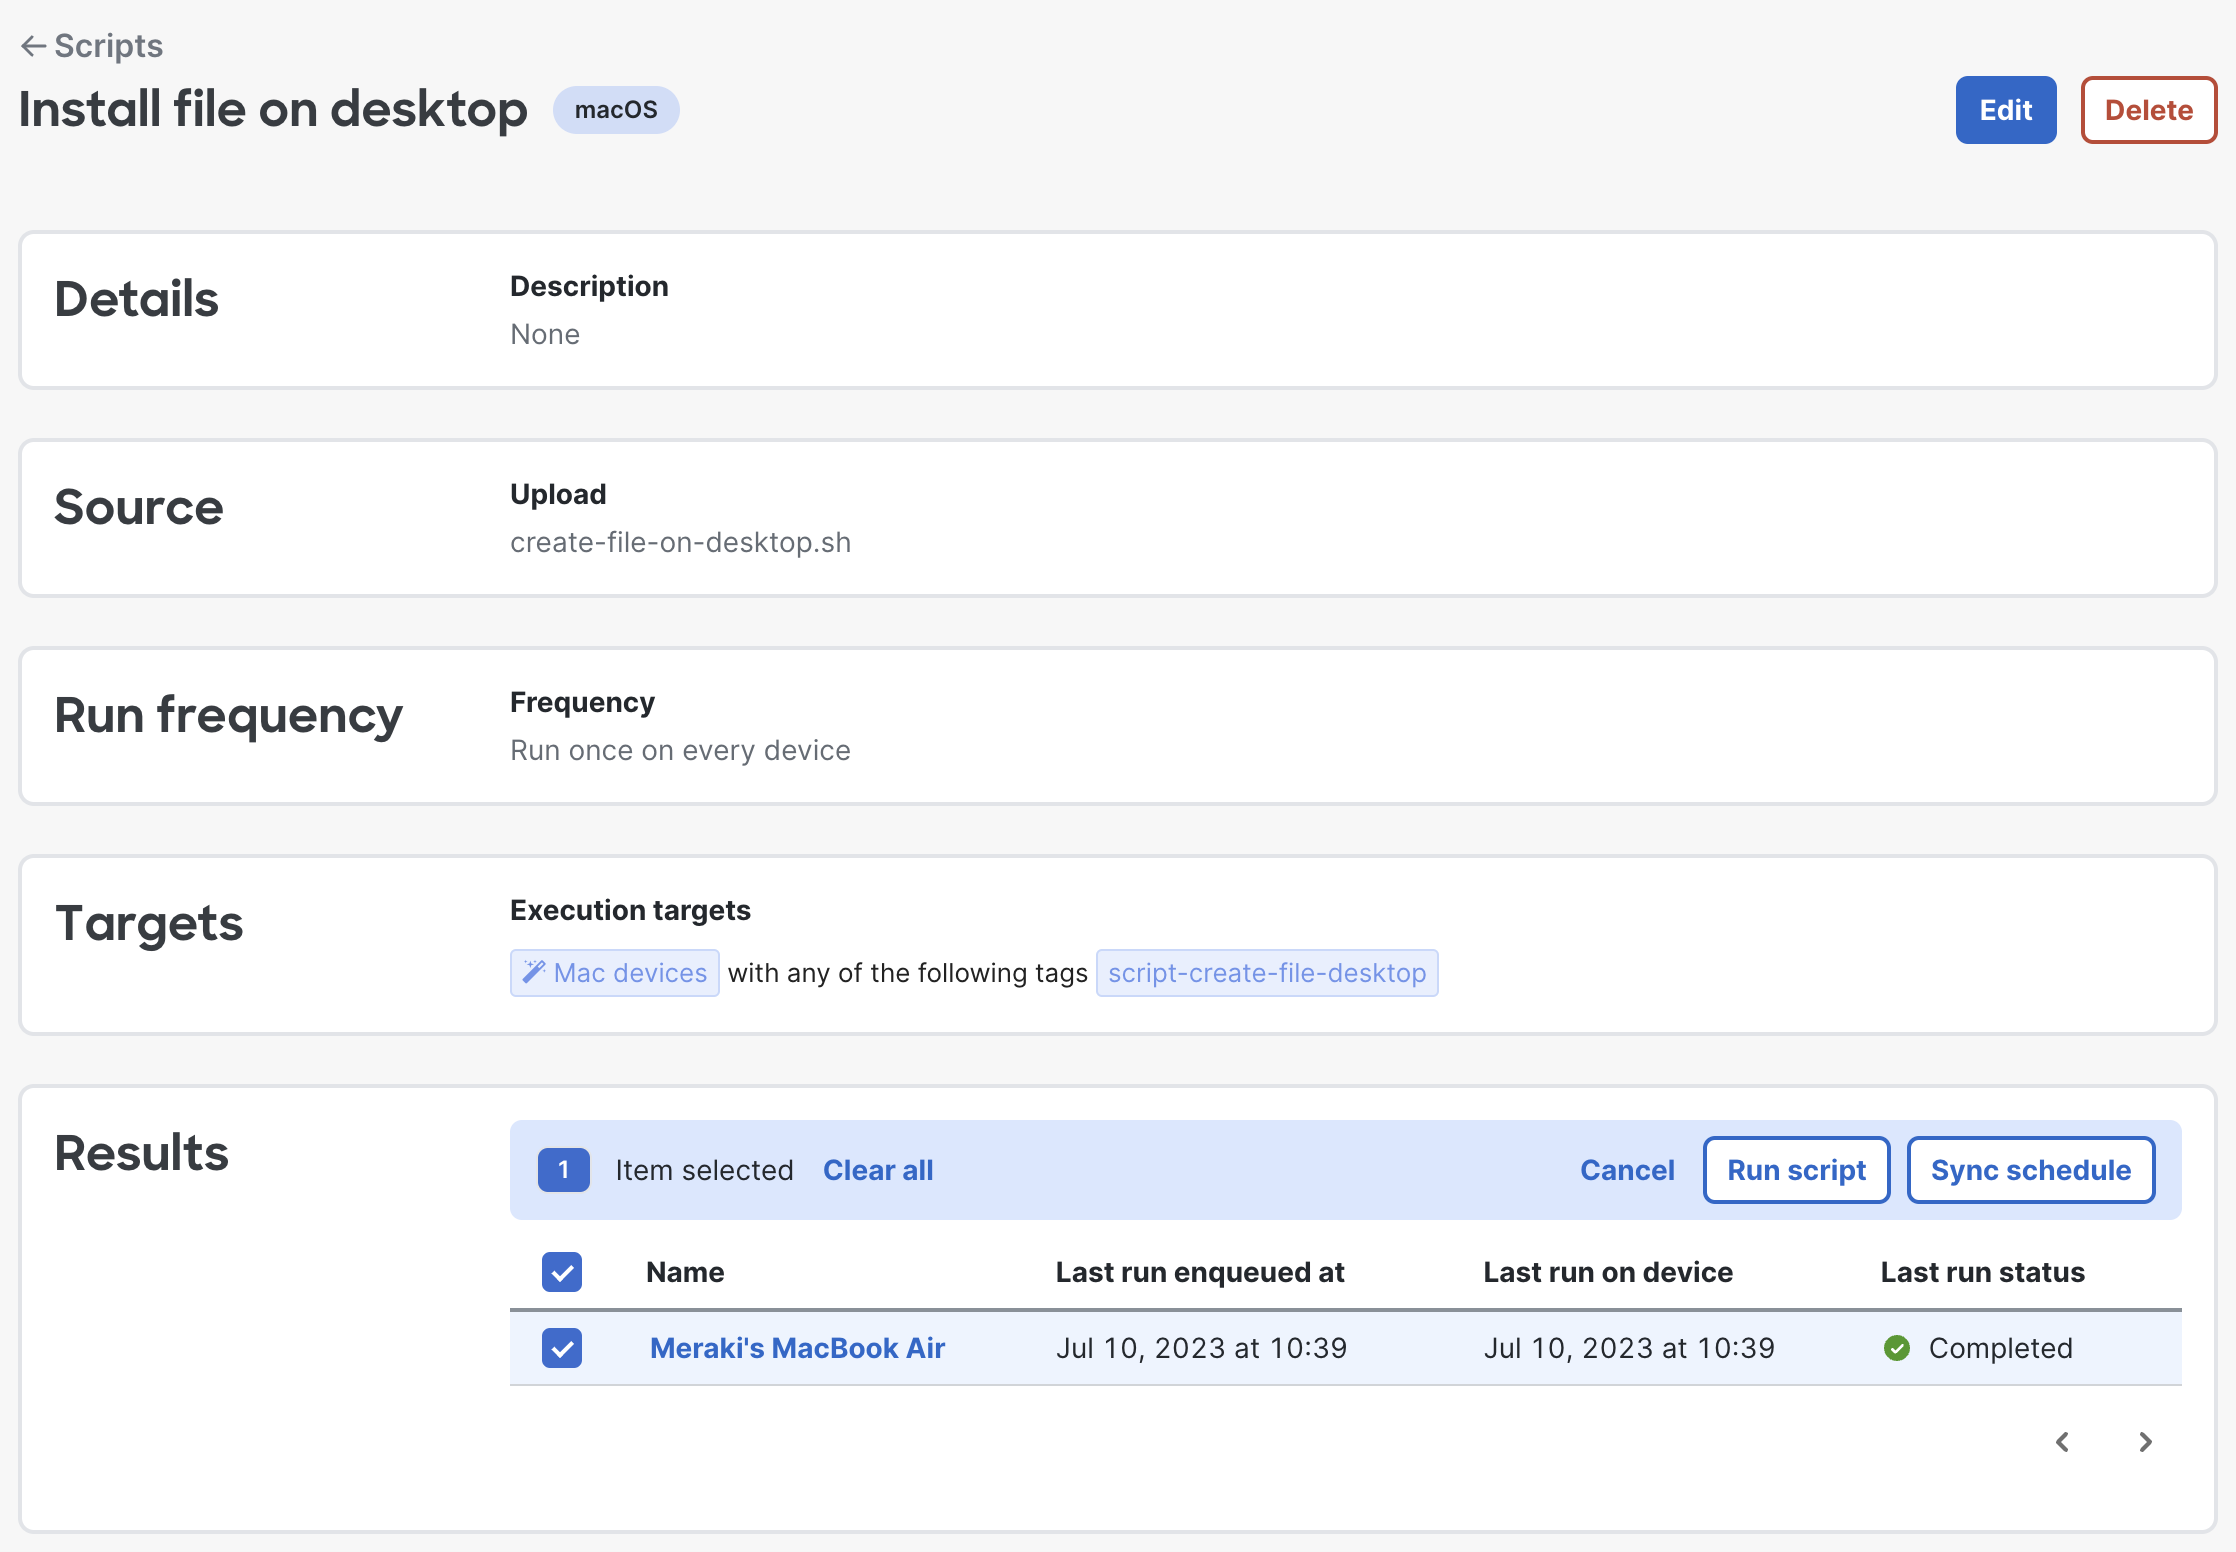
Click on the script on the Systems Manager > Manage > Scripts and view the script's last run status and more. Also at any point an admin can click on a device to manually run script or sync schedule (which should happen automatically to keep the run frequency schedule up to date with device, but administrators can manually sync schedules as needed).
Logging and debugging
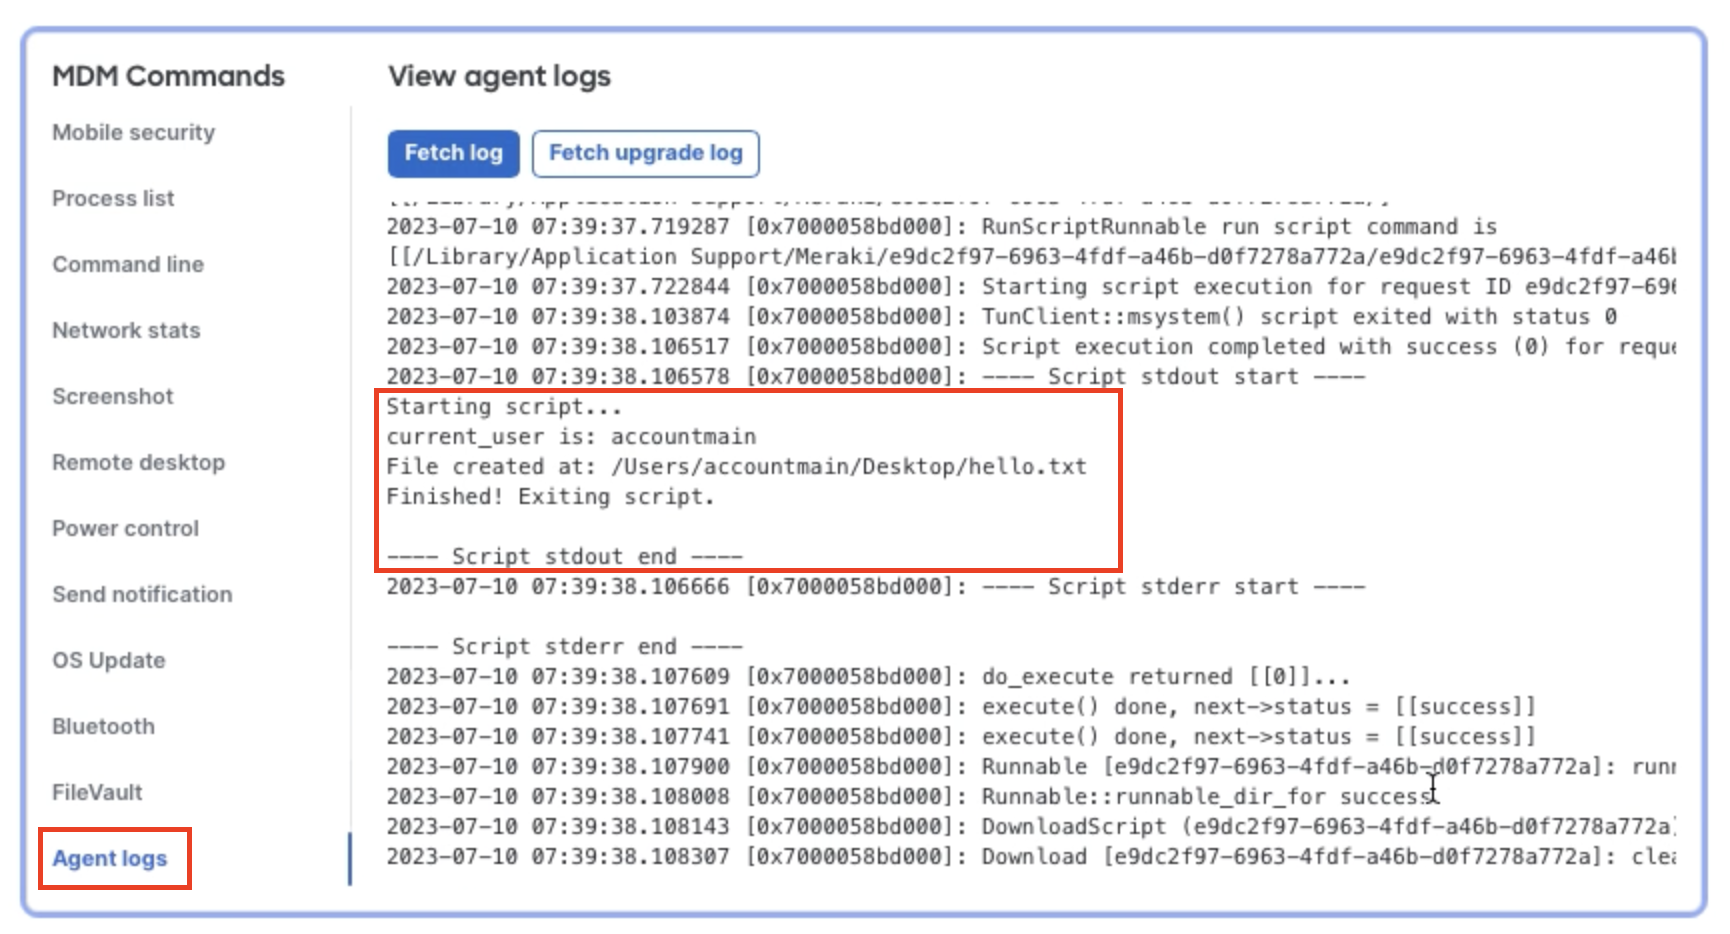
On a single device from dashboard, find on the MDM Commands section and click on Agent logs and then fetch logs. This will pull the current m_agent.log from the device so it can be read in Dashboard. This will show all of the script's download/executing information.
Tip: Add your own echo debugging lines into your scripts. These will output into the log file for debugging purposes and can be viewed from this fetch log section.
Disabling scripting feature
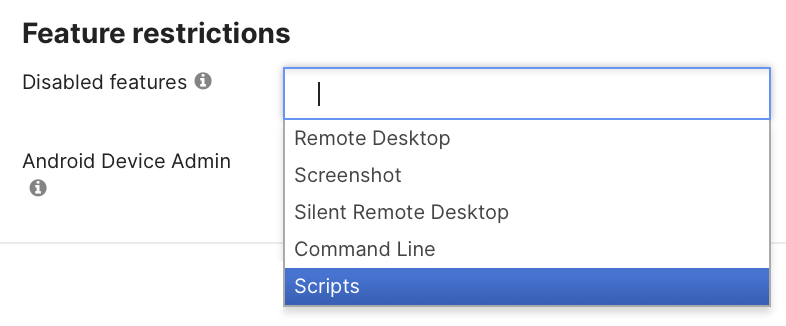
In situations where scripts are not required and the tightest security is top of mind, disabling the entire scripting feature may be desired. To disable the scripting feature entirely, navigate to Systems Manager > Configure > General and find the Feature restrictions section. Simply add Scripts to this list, and the entire scripting feature will be disabled for the network.
Example scripts
The following scripts can be used as basic script examples.
This article provides steps of how scripts can be deployed and example files. Please note that our Support team cannot provide assistance with setting up your own script deployment, or using third-party tools.
Note: Prior to bulk deployment, please test and verify all scripts for your own devices on your own environment. These examples are meant to be guidelines only and should be further customized and confirmed. It is always recommended to test scripts locally on a single device in command line first, prior to attempting to install in bulk with Systems Manager.
macOS - Create a file at a location
Note: This a basic shell script to show how to install a file at a specific location on macOS. This is great for application installs which require custom configurations and/or activations. The example below will install a hello.txt file in /Users/${current_user}/Desktop.
#!/bin/sh
# Get the current local username

current_user=$(stat -f "%Su" /dev/console)
# Set the file path

path="/Users/${current_user}/Desktop"

file="${path}/hello.txt"

file_contents='Script text in here.'
# Make directory if it does not already exist

mkdir -p "${path}"
# Create file with contents

echo "${file_contents}" > "${file}"
# Change permissions to allow the current user to open the file

chmod 777 "${file}"
exit 0
macOS - Cisco Secure Client AnyConnect Configuration .xml
This will create the profile.xml file in /opt/cisco/secureclient/vpn/profile/ for macOS.
Note: Add other Cisco Secure Client AnyConnect VPN options, such as AutomaticVPNPolicy and many more, for your specific needs. You can also configure other Cisco Secure Client modules with this same technique. See Cisco Secure Client AnyConnect documentation for more information.
#!/bin/sh
profile_xml_path=/opt/cisco/secureclient/vpn/profile #for AnyConnect 4.1X and lower use /opt/cisco/anyconnect/profile

profile_xml_file=/opt/cisco/secureclient/vpn/profile/profile.xml # for AnyConnect 4.1X and lower use /opt/cisco/anyconnect/profile/profile.xml
mkdir -p ${profile_xml_path}

cat <<EOF>${profile_xml_file}

<?xml version="1.0" encoding="UTF-8"?>

<AnyConnectProfile xmlns="http://schemas.xmlsoap.org/encoding/" xmlns:xsi="http://www.w3.org/2001/XMLSchema-instance" xsi:schemaLocation="http://schemas.xmlsoap.org/encoding/ AnyConnectProfile.xsd">

    <ClientInitialization>

        <UseStartBeforeLogon UserControllable="false">true</UseStartBeforeLogon>

        <AutomaticCertSelection UserControllable="false">true</AutomaticCertSelection>

        <ShowPreConnectMessage>false</ShowPreConnectMessage>

        <CertificateStore>All</CertificateStore>

        <CertificateStoreMac>All</CertificateStoreMac>

        <CertificateStoreLinux>All</CertificateStoreLinux>

        <CertificateStoreOverride>true</CertificateStoreOverride>

        <ProxySettings>Native</ProxySettings>

        <AllowLocalProxyConnections>false</AllowLocalProxyConnections>

        <AuthenticationTimeout>30</AuthenticationTimeout>

        <AutoConnectOnStart UserControllable="false">true</AutoConnectOnStart>

        <MinimizeOnConnect UserControllable="false">true</MinimizeOnConnect>

        <LocalLanAccess UserControllable="false">false</LocalLanAccess>

        <DisableCaptivePortalDetection UserControllable="false">false</DisableCaptivePortalDetection>

        <ClearSmartcardPin UserControllable="false">true</ClearSmartcardPin>

        <IPProtocolSupport>IPv4,IPv6</IPProtocolSupport>

        <AutoReconnect UserControllable="false">true

            <AutoReconnectBehavior UserControllable="false">ReconnectAfterResume</AutoReconnectBehavior>

        </AutoReconnect>

        <SuspendOnConnectedStandby>false</SuspendOnConnectedStandby>

        <AutoUpdate UserControllable="false">true</AutoUpdate>

        <RSASecurIDIntegration UserControllable="false">Automatic</RSASecurIDIntegration>

        <WindowsLogonEnforcement>SingleLocalLogon</WindowsLogonEnforcement>

        <LinuxLogonEnforcement>SingleLocalLogon</LinuxLogonEnforcement>

        <WindowsVPNEstablishment>LocalUsersOnly</WindowsVPNEstablishment>

        <LinuxVPNEstablishment>LocalUsersOnly</LinuxVPNEstablishment>

        <PPPExclusion UserControllable="false">Disable

            <PPPExclusionServerIP UserControllable="false"></PPPExclusionServerIP>

        </PPPExclusion>

        <EnableScripting UserControllable="false">false</EnableScripting>

        <EnableAutomaticServerSelection UserControllable="false">false

            <AutoServerSelectionImprovement>20</AutoServerSelectionImprovement>

            <AutoServerSelectionSuspendTime>4</AutoServerSelectionSuspendTime>

        </EnableAutomaticServerSelection>

        <RetainVpnOnLogoff>true

            <UserEnforcement>AnyUser</UserEnforcement>

        </RetainVpnOnLogoff>

        <CaptivePortalRemediationBrowserFailover>true</CaptivePortalRemediationBrowserFailover>

        <AllowManualHostInput>true</AllowManualHostInput>

    </ClientInitialization>

    <ServerList>

        <HostEntry>

            <HostName>Host</HostName>

            <HostAddress>host:port</HostAddress>

        </HostEntry>

    </ServerList>

</AnyConnectProfile>

EOF
chmod 777 ${profile_xml_file}
exit 0
macOS - Add a printer
Install a printer using lpadmin.
Note: The below script assumes you are installing an HP LaserJet 1300 printer and the PPD file is located in the specified location. If your printer is different, you will need to replace the PPD file path with the appropriate path for your printer. Different printers require different installations, so please change to install with your specific printer.
#!/bin/bash
# Variables

printer_name="Office Printer"

printer_ip="10.10.10.123"
# Install the printer from a predownloaded file in /Library/Printers/PPDs/Contents/Resources/

lpadmin -p "$printer_name" -v "lpd://$printer_ip/binary_p1" -E -P "/Library/Printers/PPDs/Contents/Resources/HP LaserJet 1300.gz"
# Enable the printer

enable "$printer_name"
exit 0
macOS - Add timestamp text to a file on desktop (schedule script test file
Create a file on macOS desktop of the currently logged in user and update it with the current timestamp. This can be used when testing scheduled script re-run frequencies.
#!/bin/sh

echo 'Starting script...'

# Get the current local username
current_user=$(stat -f "%Su" /dev/console)

echo "current_user is: ${current_user}"

# Set the file path
path="/Users/${current_user}/Desktop"
file="${path}/script-schedule-test.txt"

# Check if the file exists
if [ ! -f "${file}" ]; then
    echo "File does not exist. Creating..."
    touch "${file}"
    chmod 777 "${file}"
fi

# Append timestamp to the file contents
timestamp=$(date +"%Y-%m-%d %T")
file_contents="Last ran by Cisco Meraki Endpoint Agent on: ${timestamp}"

# Append the updated content to the file
echo "${file_contents}" >> "${file}"

echo "Timestamp added to: ${file}"

echo 'Finished! Exiting script.'

exit 0
Windows - Cisco Secure Client AnyConnect Configuration .xml
This will install the profile.xml configuration file for the Cisco Secure Client application on Windows 10 and Windows 11.
Note: Add other Cisco Secure Client AnyConnect VPN options, such as AutomaticVPNPolicy and many more, for your specific needs. You can also configure other Cisco Secure Client modules with this same technique. See Cisco Secure Client AnyConnect documentation for more information.
## Path of VPN profile.xml.

$profileXmlPath = 'C:\ProgramData\Cisco\Cisco Secure Client\VPN\Profile' #Cisco Secure Client (5.0+) directory, the path for 4.1X and lower is different.
## Content of profile.xml

$profileXml = '<?xml version="1.0" encoding="UTF-8"?>

<AnyConnectProfile xmlns="http://schemas.xmlsoap.org/encoding/" xmlns:xsi="http://www.w3.org/2001/XMLSchema-instance" xsi:schemaLocation="http://schemas.xmlsoap.org/encoding/ AnyConnectProfile.xsd">

    <ClientInitialization>

        <UseStartBeforeLogon UserControllable="false">true</UseStartBeforeLogon>

        <AutomaticCertSelection UserControllable="false">true</AutomaticCertSelection>

        <ShowPreConnectMessage>false</ShowPreConnectMessage>

        <CertificateStore>All</CertificateStore>

        <CertificateStoreMac>All</CertificateStoreMac>

        <CertificateStoreLinux>All</CertificateStoreLinux>

        <CertificateStoreOverride>true</CertificateStoreOverride>

        <ProxySettings>Native</ProxySettings>

        <AllowLocalProxyConnections>false</AllowLocalProxyConnections>

        <AuthenticationTimeout>30</AuthenticationTimeout>

        <AutoConnectOnStart UserControllable="false">true</AutoConnectOnStart>

        <MinimizeOnConnect UserControllable="false">true</MinimizeOnConnect>

        <LocalLanAccess UserControllable="false">true</LocalLanAccess>

        <DisableCaptivePortalDetection UserControllable="false">false</DisableCaptivePortalDetection>

        <ClearSmartcardPin UserControllable="false">true</ClearSmartcardPin>

        <IPProtocolSupport>IPv4,IPv6</IPProtocolSupport>

        <AutoReconnect UserControllable="false">true

            <AutoReconnectBehavior UserControllable="false">ReconnectAfterResume</AutoReconnectBehavior>

        </AutoReconnect>

        <SuspendOnConnectedStandby>false</SuspendOnConnectedStandby>

        <AutoUpdate UserControllable="false">true</AutoUpdate>

        <RSASecurIDIntegration UserControllable="false">Automatic</RSASecurIDIntegration>

        <WindowsLogonEnforcement>SingleLocalLogon</WindowsLogonEnforcement>

        <LinuxLogonEnforcement>SingleLocalLogon</LinuxLogonEnforcement>

        <WindowsVPNEstablishment>LocalUsersOnly</WindowsVPNEstablishment>

        <LinuxVPNEstablishment>LocalUsersOnly</LinuxVPNEstablishment>

        <PPPExclusion UserControllable="false">Disable

            <PPPExclusionServerIP UserControllable="false"></PPPExclusionServerIP>

        </PPPExclusion>

        <EnableScripting UserControllable="false">false</EnableScripting>

        <EnableAutomaticServerSelection UserControllable="false">false

            <AutoServerSelectionImprovement>20</AutoServerSelectionImprovement>

            <AutoServerSelectionSuspendTime>4</AutoServerSelectionSuspendTime>

        </EnableAutomaticServerSelection>

        <RetainVpnOnLogoff>true

            <UserEnforcement>AnyUser</UserEnforcement>

        </RetainVpnOnLogoff>

        <CaptivePortalRemediationBrowserFailover>true</CaptivePortalRemediationBrowserFailover>

        <AllowManualHostInput>false</AllowManualHostInput>

    </ClientInitialization>

    <ServerList>

        <HostEntry>

            <HostName>${mxHostName}</HostName>

            <HostAddress>${mxHostAddress}:${mxVpnPort}</HostAddress>

        </HostEntry>

    </ServerList>

</AnyConnectProfile>'
## Create the new profile.xml file in the directory.

New-item -Force -Path $profileXmlPath -Name "profile.xml" -ItemType "file" -Value $profileXml
Deploying a Script on macOS (via App)
Note: Systems Manager now has a first-class script deployment mechanism, therefore this method is no longer recommended. The following (below) are previous steps which still technically work, but are now considered a deprecated way to deploy scripts in SM. Please use the Systems Manager > Manage > Scripts page to upload custom scripts now.
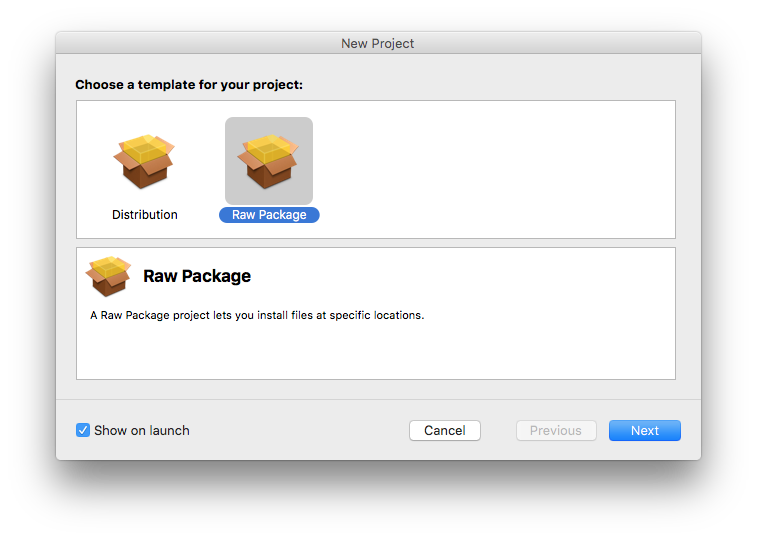
The mechanism by which this works on macOS is by creating a .pkg file using a pre- or post-installation script. We'll be using Packages as our example .pkg creator software, but any software which can create .pkgs which run silently are viable.
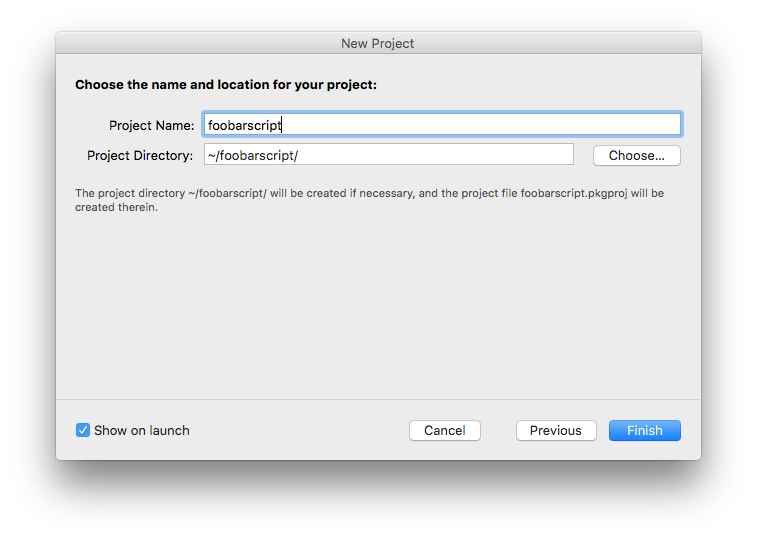
- Open Packages and create a new Package
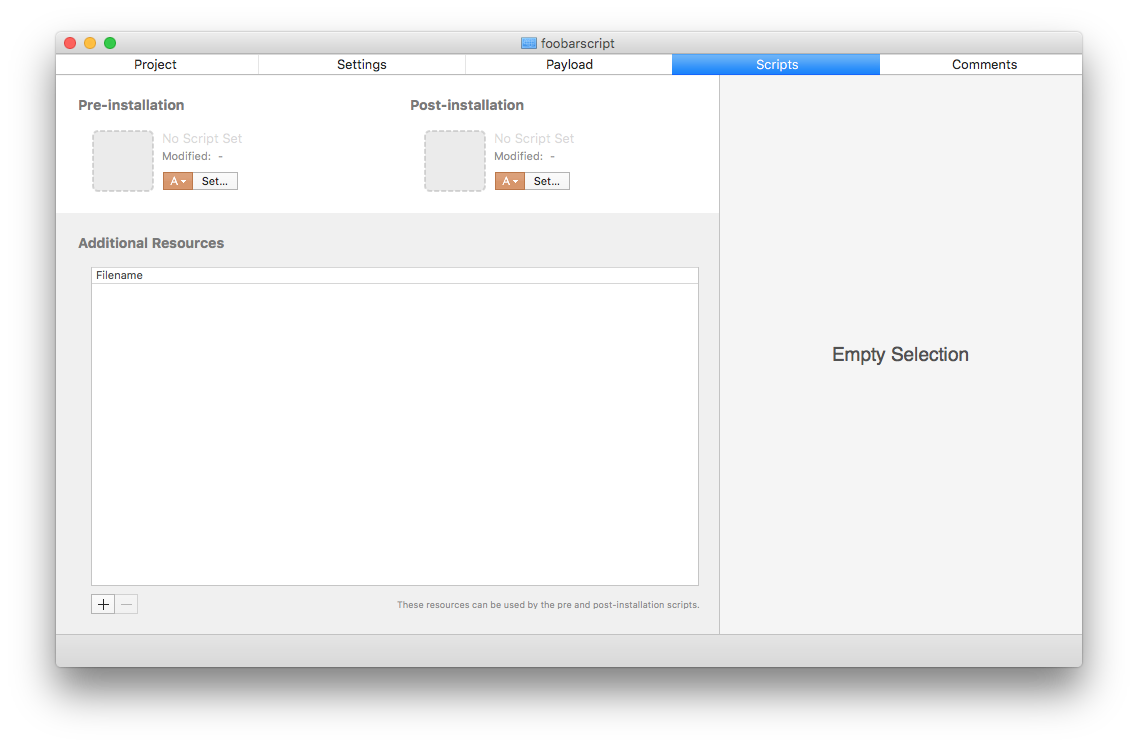
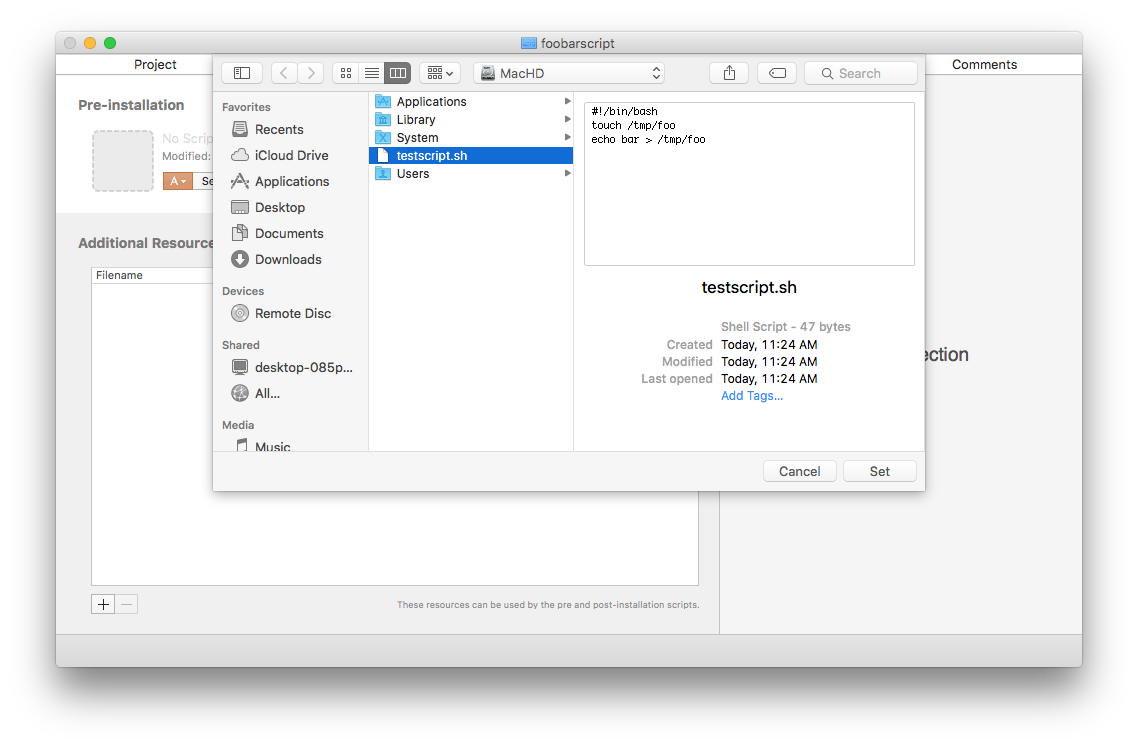
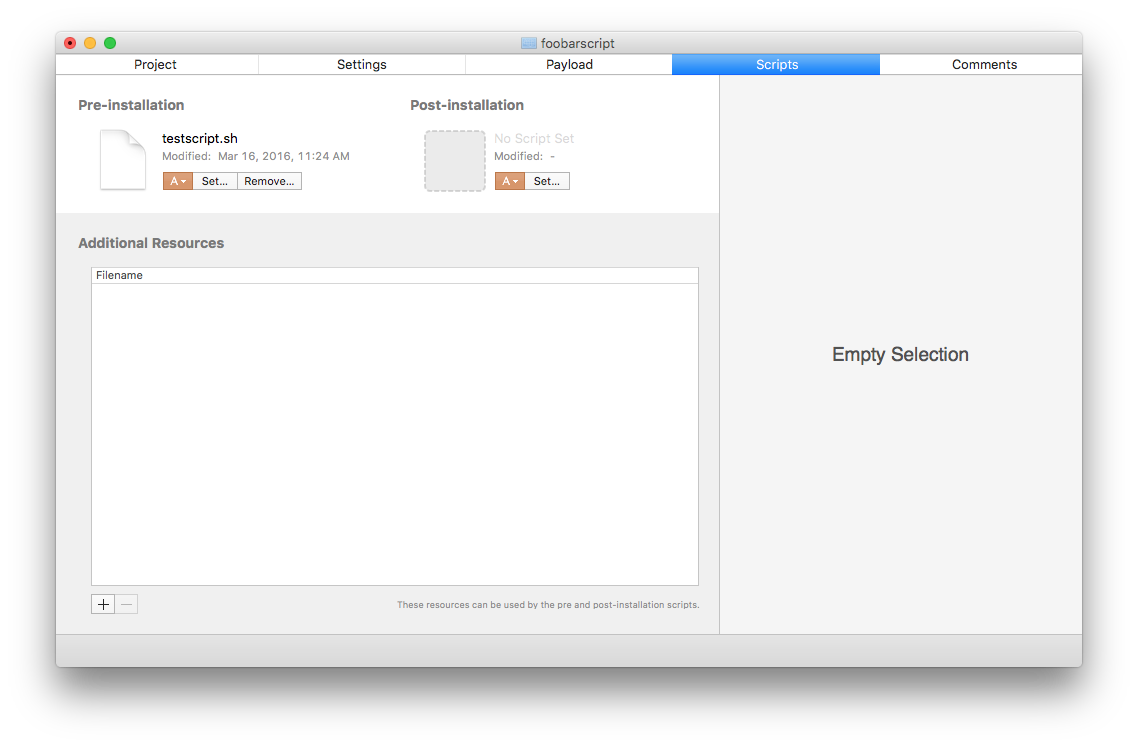
- Once created, move to the Scripts section of the main project section and define your script
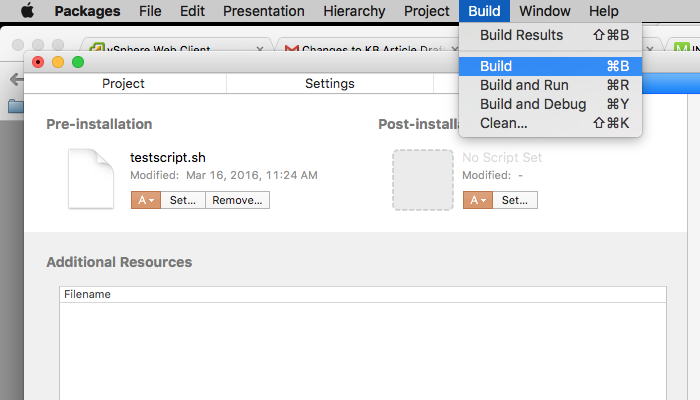
- Build the Package
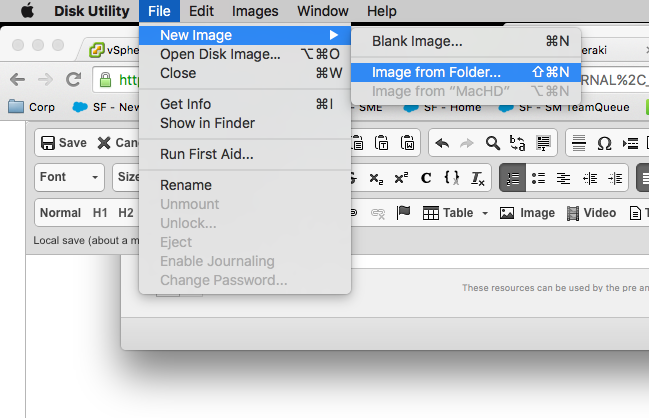
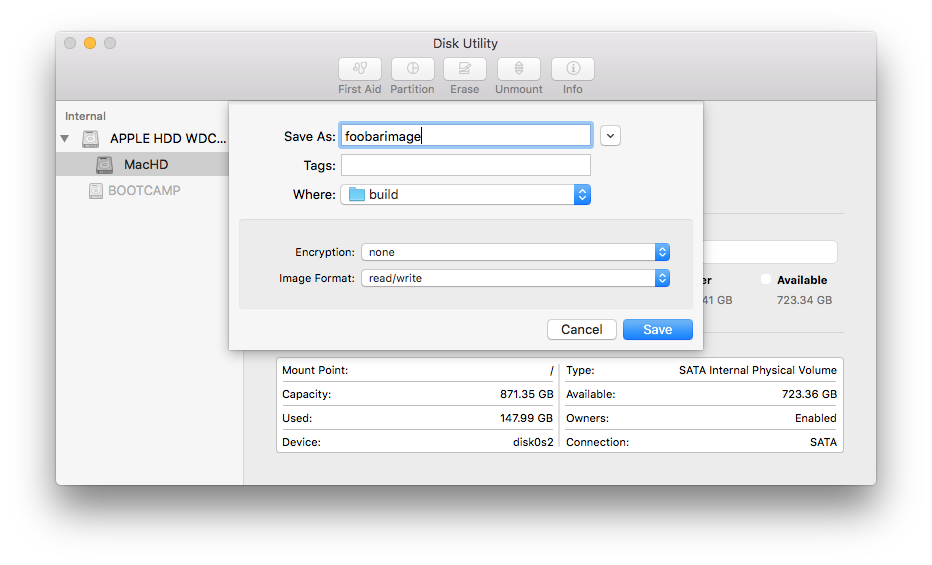
- Open Disk Utility and create a blank .dmg for encapsulating the package for deployment

- Configure a new OS X Custom App
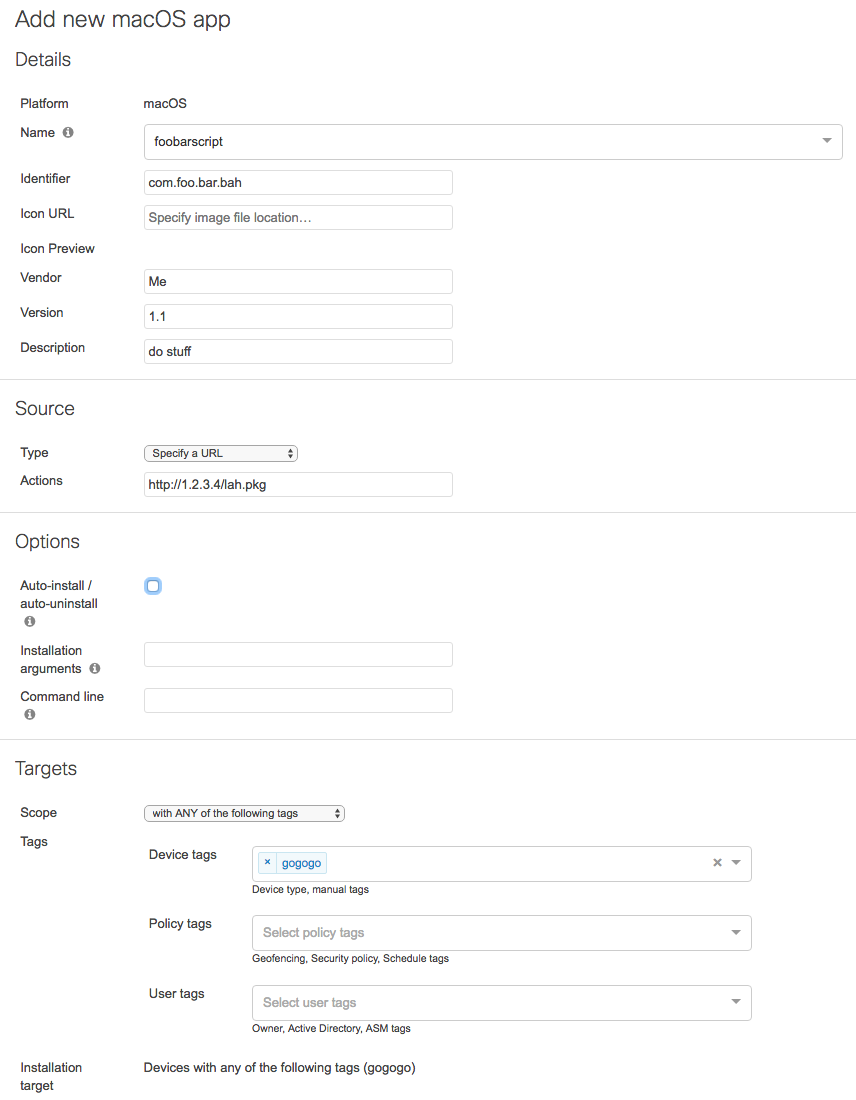
NOTE: in most circumstances, you'll want to make sure to uncheck "Auto-install / auto-uninstall" for script deployments, unless you're setting a telltale. This can be done easily by generating a generic .app program from xcode (the default cocoa application is sufficient for this purpose), matching the program name in Dashboard to the one you're making, and having the package file install the .app into /Applications.
Deploying a Script on Windows (via App)
Note: Systems Manager now has a first-class script deployment mechanism, therefore this method is no longer recommended. The following (below) are previous steps which still technically work, but are now considered a deprecated way to deploy scripts in SM. Please use the Systems Manager > Manage > Scripts page to upload custom scripts now.
Script deployment on Windows is much easier to document: the Windows mechanism for Software Installer will run arbitrary .exe files. You can create an easy framework by which you can run batch files or powershell scripts via the Nullsoft Scriptable Install System , or any other method by which to create binaries to do work (for example, you could just code a script wrapper and compile it for win32 - x86). To set a telltale that the script has been run, follow the instructions to add a program to Add/Remove Programs here. Add this as a custom app on the Systems Manager > Apps page and deploy the binary as an application.