
Windows Enrollment
On-device Enrollment
If you have a Dashboard account set up with an EMM network, you can find instructions under Systems Manager > Manage > Add devices, or follow along the steps below.
There are two methods for Windows installation: Agent or Profile. You can use either method for enrollment. Each method supports different features. Use both methods when possible to access all available MDM features.
- Azure AD
- OpenID Connect
From now on there are three options to replace Azure AD, Google, OpenID Connect:
- Use the bulk enrollment token. This works with SM networks of any authentication type. It is not designed for interactive enrollment and needs to use a command line invocation of << msiexec >> to install.
-
Create an SM network with Meraki authentication for interactive agent enrollment.
-
For interactive Web SSO enrollment, SAML can be used. For instance, Microsoft Azure AD/Entra ID and Microsoft ADFS can be configured to enable SAML.
Agent Installation
It is important to note that for agent versions up to v3.0.3, the agent installer package is network-specific, meaning you must use an install package downloaded directly from the Systems Manager network from which you wish to manage your clients. Agent versions starting with v3.1 and up are network-agnostic.
In addition, Systems Manager software must be installed with local administrator privileges as applicable by the device type.
Prepare for Agent Installation
Before beginning the installation process, prepare the following:
- The network ID or network enrollment string.
- The agent installation file (.msi).
- Authentication credentials.
Network ID and Enrollment String
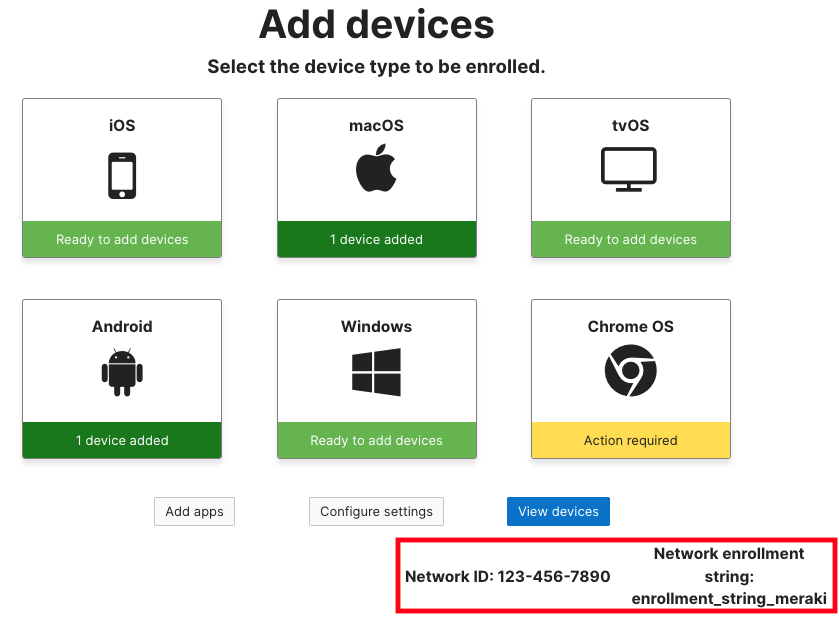
During agent installation, the agent requires a network ID or enrollment string to identify the destination dashboard network. The network ID and enrollment string (if an enrollment string has been configured) can be found on the Systems Manager > Manage > Add devices page:
Agent Installation File
The agent installation .msi file can be downloaded from dashboard or from the enrollment portal (enroll.meraki.com). The agent version downloaded from either location will correspond to the agent version configured in Systems Manager > General > Agent versions.
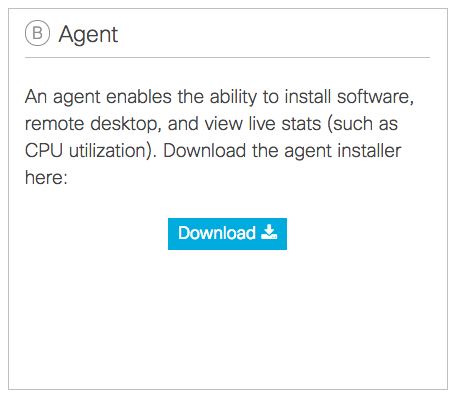
- In Dashboard, navigate to Systems Manager > Manage > Add devices > Windows. Click the Download button. The .msi installation file will begin downloading:
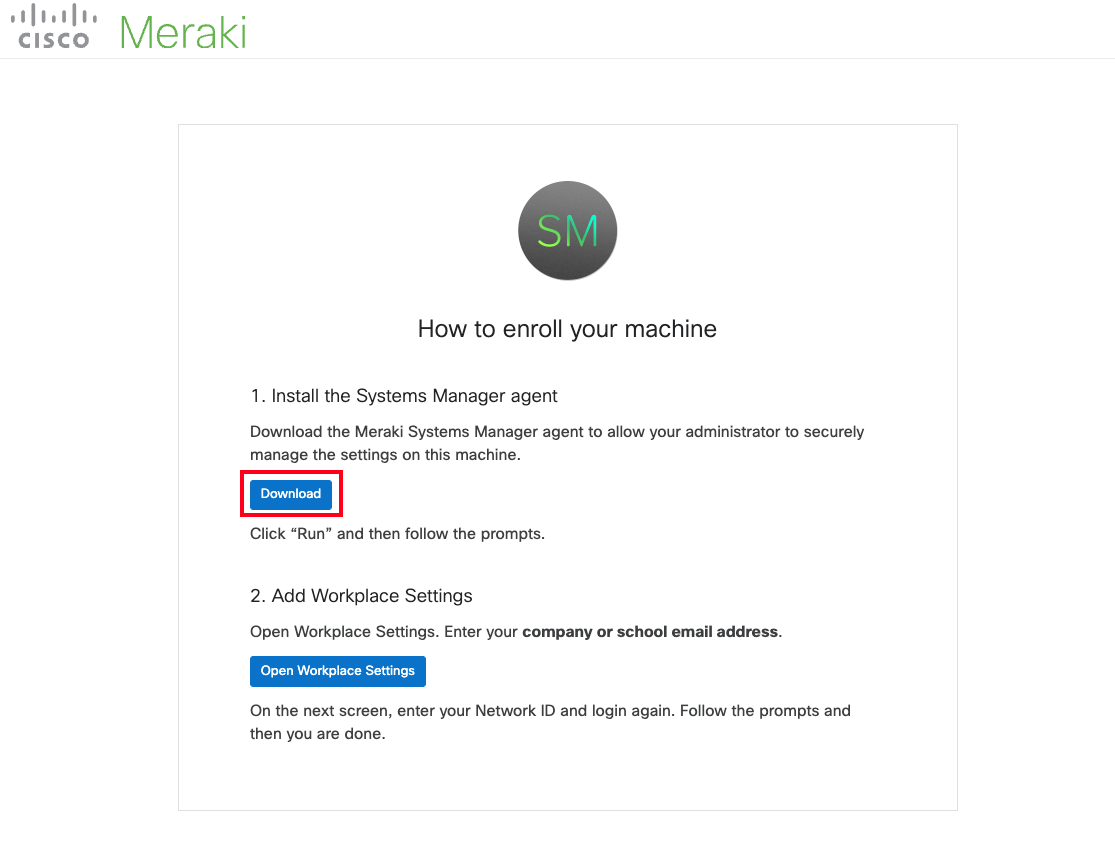
- The installer can also be reached by navigating to enroll.meraki.com, entering the 10-digit network ID found in Dashboard, and downloading the agent there.
Authentication Credentials
Authentication credentials may be required for successful agent installation. The authentication tickbox (Systems Manager > General > Enrollment settings > Authentication) will determine whether enrollment authentication is required during agent installation. When enabled, the installation will require credentials to be supplied.
Run the Agent Installer
Version 1.0 - 3.0.3
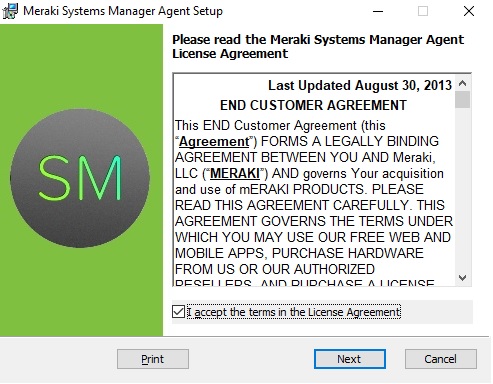
- After the installer finishes downloading, double-click MerakiPCCAgent.msi and click Run when prompted.
- Accept the Licensing Agreement and click Install.
- Once the Systems Manager Agent has finished installing, your Windows device will show up under Monitor > Clients in Dashboard as soon as it has an Internet connection.
Version 3.1.0+
- After the installer finishes downloading, double-click SMAgent-x.x.x.msi and click Run when prompted.
- Accept the Licensing Agreement and click Next.
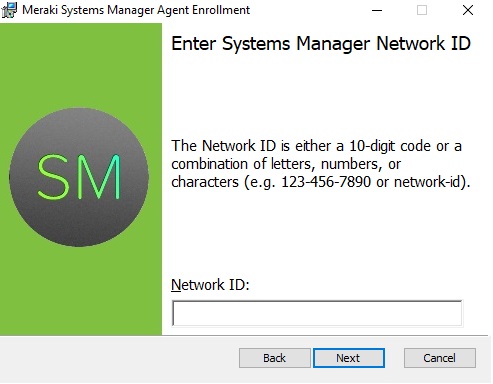
- Enter the Network ID or Network Enrollment String at the prompt then click Next
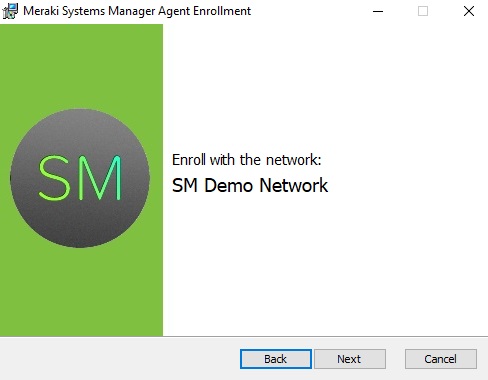
- Confirm the desired enrollment network name appears and then click Next
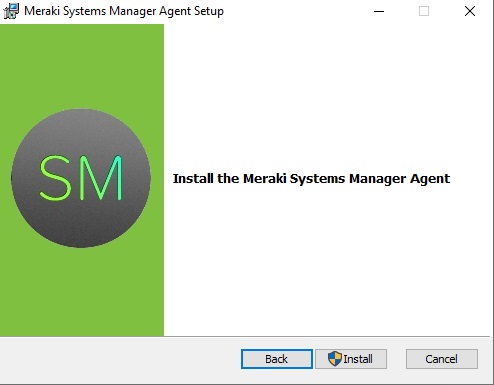
- Click Install
- Once the Systems Manager Agent has finished installing, your Windows device will show up under Monitor > Clients in Dashboard as soon as it has an Internet connection.
Command Line Options
The agent can be installed via command line to support use cases where scripting for mass deployment and/or silent installation are required. To install the agent silently via command line, the commands below can be used.
You can also use methods like Systems Manager Sentry or Active Directory Group Policy Objects to install the agent en masse.
Version 1.0 - 3.0.3
Silent installation should follow this syntax:
msiexec.exe /q /i <Path to agent installer msi>
For example:
msiexec.exe /q /i c:\temp\MerakiPCCAgent.msi
Version 3.1.x - 3.4.x
Silent installation should follow this syntax:
msiexec.exe /q /i <Path to agent installer msi> ENROLLMENT_CODE=<network enrollment code or enrollment string>
For example:
msiexec.exe /q /i c:\temp\SMAgent-x.x.x.msi ENROLLMENT_CODE=123-45-6789
Version 3.5.x - 3.9.x
Version 3.5.x+ of the Windows Agent supports passing Meraki Authentication and Active Directory credentials during the installation to assign the device to a user during silent enrollment. The following parameters should be passed to enroll a device silently:
- No Authentication: ENROLLMENT_CODE
- Meraki Authentication: ENROLLMENT_CODE, EMAIL, PASSWORD
- Active Directory: ENROLLMENT_CODE, EMAIL, PASSWORD
| ENROLLMENT_CODE | The numeric enrollment code or ENROLLMENT_STRING found under Systems Manager > Add Devices |
|---|---|
|
Specifies the user to authenticate. This is the user/owner's email address. For Active Directory, depending on the LDAP configuration on the Systems Manager > General page, it may only be the username. |
|
| PASSWORD | The password for the specified user |
Silent installation should follow this syntax:
msiexec.exe /q /i <Path to installer msi> ENROLLMENT_CODE=<network enrollment code / enrollment string> EMAIL=<email> PASSWORD=<password>
For example:
msiexec.exe /q /i MerakiAgent-x.x.x.msi ENROLLMENT_CODE=123-45-6789 EMAIL=test@acme.com PASSWORD=password
Other SM Authentication methods such as Azure AD, Google, OpenID and SAML do not currently support silent installation. Use the parameters for "No Authentication" if these enrollment authentication types are enabled in your network.
Version 4.x+ with Bulk Enrollment Token
Version 4.x+ of the Windows Agent requires a bulk enrollment token to silently enroll devices. The bulk enrollment token secures agent registration by using a randomly generated string that must be passed as an installation parameter during agent installation.
To create a new bulk enrollment token:
- Navigate to Systems Manager > Configure > General
- Under the "Enrollment settings" section, change the Bulk Agent Registration setting to "Enabled" and click on Generate New Token

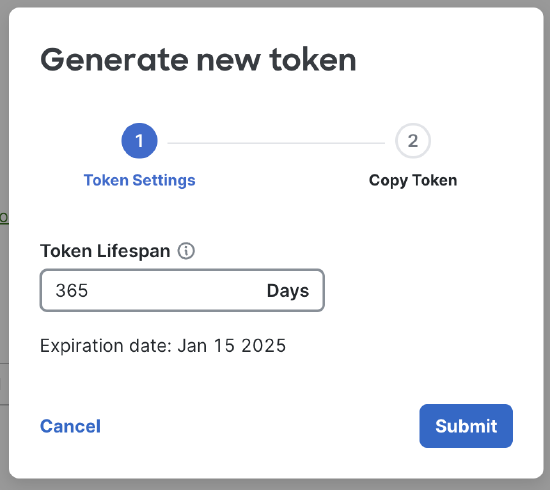
- Set a token lifespan, then click Submit. The maximum token lifespan is 365 days (1 year).
- Copy the Registration token, check the acknowledgment button, and store it in a secure location.
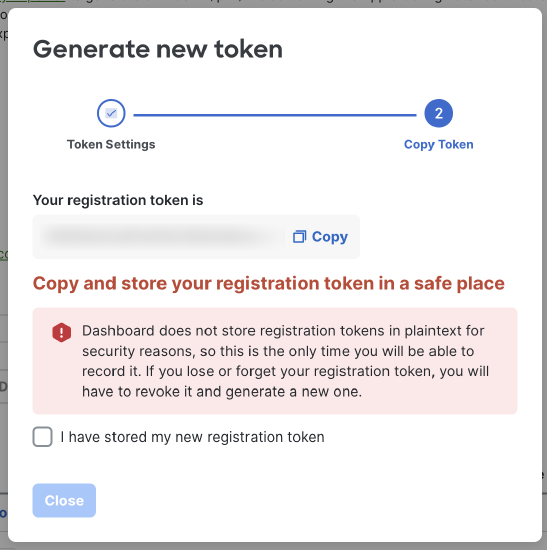
Bulk enrollment tokens replace enrollment authentication for endpoint registration to your network. Keep your bulk enrollment token safe as you would any secure password. Dashboard does not store bulk enrollment tokens in plaintext for security reasons, so this is the only time you can record it. If you lose or forget your bulk enrollment token, you must revoke it and generate a new one.
To silently enroll the agent with a bulk enrollment token, use the command:
Silent installation should follow this syntax:
msiexec.exe /q /i <Path to installer msi> ENROLLMENT_CODE=<network enrollment code / enrollment string> ENROLL_TOKEN=<bulk enrollment token>
For example:
msiexec.exe /q /i EndpointAgent-X.X.X-com.msi ENROLLMENT_CODE=123-45-6789 ENROLL_TOKEN=abcdefghijklmnop
Auto-installing the Windows Agent
The Windows agent can be pushed down as an application to Windows devices that have gone through profile enrollment. This can help streamline the enrollment process of Windows devices, ensuring that both profile and agent are installed without needing to manually run the .msi on devices. The agent can be added Systems Manager > Manage > Apps > + Add app > Windows > Custom app via MDM and scoped to all devices, or via tags. Please note that the MSI will need to manually be uploaded, with installation arguments following the logic of the documentation above (see example below for 4.2.2.) Once configured, enrolled devices can automatically install the agent if within the specified scope.

Troubleshooting Agent Installer
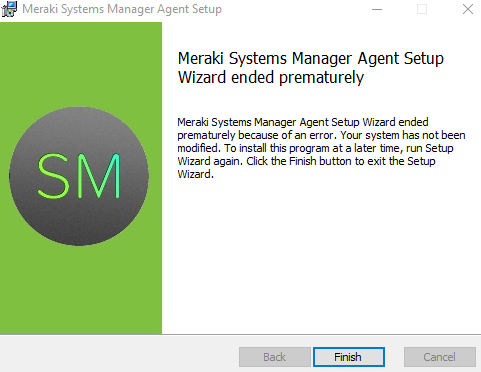
If the installer finishes with an error such as "Meraki Systems Manager Agent Setup Wizard ended prematurely" make sure that the .msi was attempted to be run as Administrator. Right click on the agent .msi and run as Administrator. To install the SM Agent, administrator privileges are required.
Agent Installer Log
To generate a SM agent installer .log (for additional debugging) run it with the /l*v install.log command added to the msiexec argument, like this:
msiexec /q /i <Path to installer msi> /l*v <path to installer log> ENROLLMENT_CODE=<your SM network enrollment code or enrollment string>
ex. msiexec.exe /q /i EndpointAgent-X.X.X-com.msi /l*v install.log ENROLLMENT_CODE=123-45-6789 ENROLL_TOKEN=abcdefghijklmnop
Profile Installation
Systems Manager can only push user-level settings (e.g. a payload with restrictions, wifi) to the device if the MDM-enrolled user is currently logged into the device. Other agent based features which do not change user-level settings (such as agent live tools) should work no matter which user is logged in. For more information on the differences between Windows agent and profile enrollment features, refer to the Systems Manager Agent and MDM Profile Enrollment document.
Profile installation requires administrator privilege.
Open Work Access Settings
- Navigate to Systems Manager > Manage > Add devices > Windows.
- Option 1: From the device, you wish to enroll, navigate to enroll.meraki.com, and enter the 10-digit network id found in Dashboard. Click the 'Open workplace settings' link to open the Work Access settings page. The agent can be downloaded from this page as well.
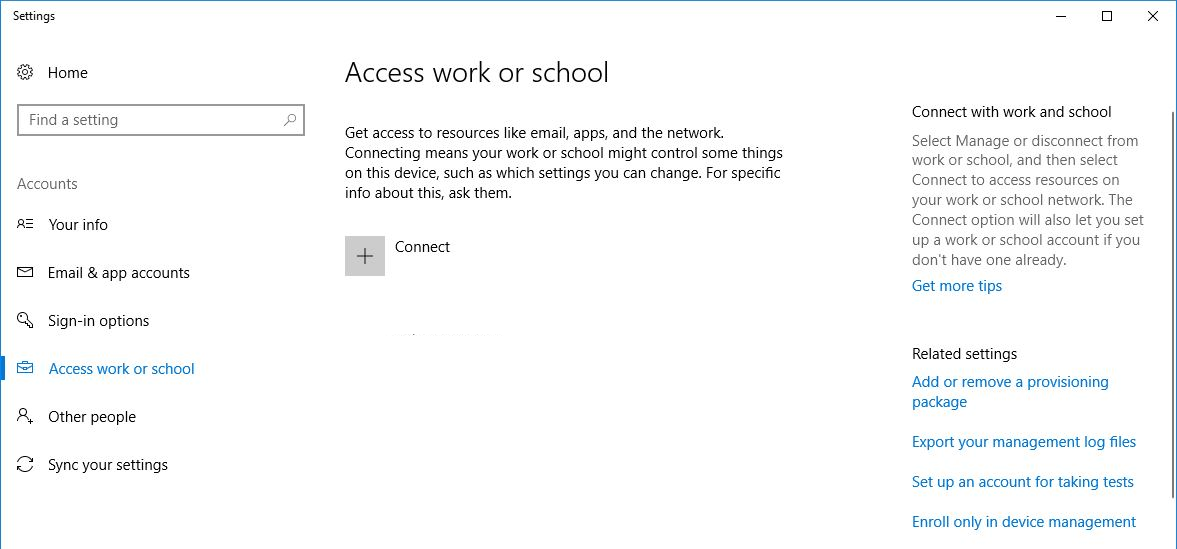
- Option 2: In Windows settings, navigate to 'Settings > Accounts > Access work or school.' You can also search 'Connect to work or school' in your Windows menu to find the below page.
- On native Windows 10, click 'Enroll only in device management'.

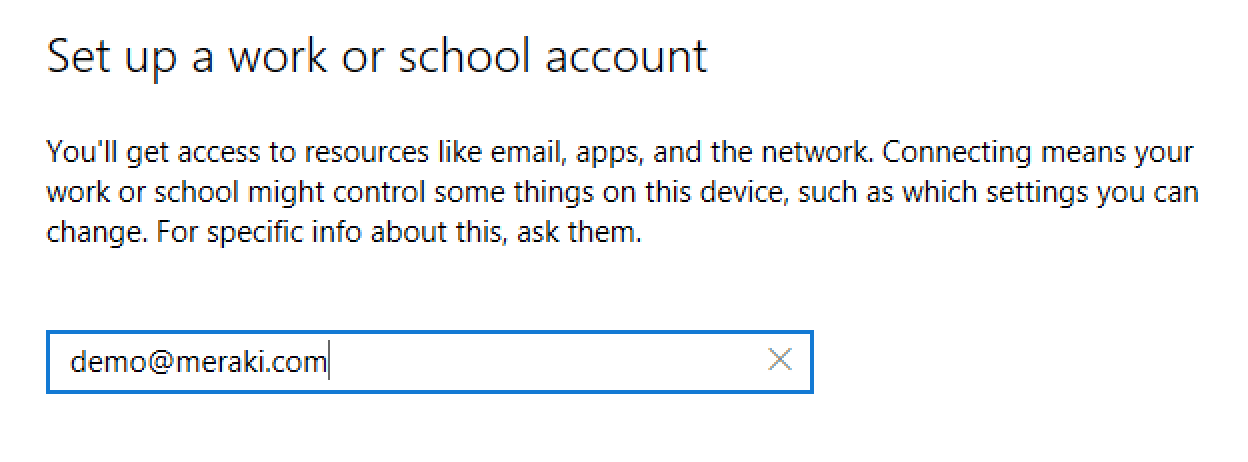
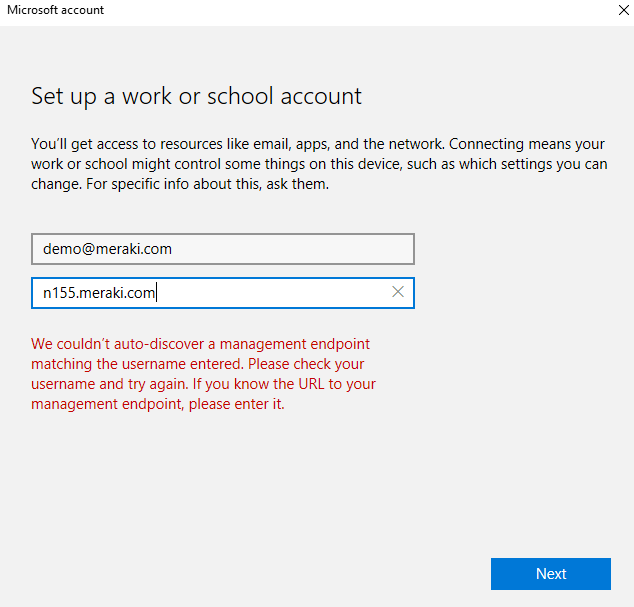
- Enter an email address and click Next.
Any email can be entered here, as it is not used to authenticate the enrollment. If your organization has InTune bundled in with your Office365 or Azure instance, do not enter a domain-joined email, as it will begin enrollment into InTune instead of prompting for your server information to complete the following steps.
- In the Server box, enter your server URL (check your browser URL while signed into Dashboard, e.g. n155.meraki.com), and click Connect or Continue.
- Enter your network ID, where XXX-XXX-XXXX is the network-specific ID.
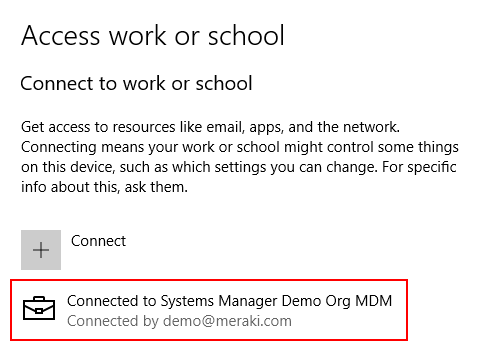
- Click register. You should see a message that the device is 'Connected to Systems Manager' as below. The device will automatically synchronize with the Meraki Cloud and appear in the client list.
Additional Enrollment Methods
Endpoint Management Enrollment SSID
You can also use SM Sentry to force iOS, Android, Windows, and Mac devices to enroll in Systems Manager for an efficient mass deployment or BYOD. When enabled on a given SSID for a Cisco Meraki wireless access point, Sentry facilitates the secure and rapid onboarding and deployment of SM to mobile devices. For more information on Endpoint management enrollment, please visit the following page.