
Apple Volume Purchase Program (VPP)
Overview
The Volume Purchase Program (VPP) is an Apple portal for businesses and schools to purchase and license apps and books in volume. Systems Manager fully integrates with VPP to easily distribute, revoke, and centrally manage your licenses. This article will explain how to link your VPP account to Dashboard, and what the licensing distribution options are. VPP facilitates silent deployments of App Store and Mac App Store applications to iOS and macOS devices, while allowing your company/institution to maintain ownership of the applications you purchase.
To understand how Apple's managed distribution model is designed, reviewing Apple's Business and Education whitepapers on VPP app distribution is strongly recommended before using this tool in Systems Manager.
Enrolling into VPP is free:
Note: Apple School Manager VPP accounts support location-based VPP licenses where a single VPP account/token can be connected to Meraki Systems Manager with licenses purchased from many different VPP accounts. This makes purchasing licenses and syncing to Meraki Systems Manager a more simplified experience. For more information on location-based VPP tokens and all of its features go here. Existing VPP accounts can be invited into the new Apple School Manager location-based VPP accounts by following this.
Adding Apple VPP Account(s) to Systems Manager
Note: It is recommended that your Apple VPP token does not reside in multiple MDM solutions
- In Dashboard, navigate to the Organization > Configure > MDM page.
- Scroll down to Apple VPP Accounts.
- Select Add account

- In the Add VPP account window input the required information:
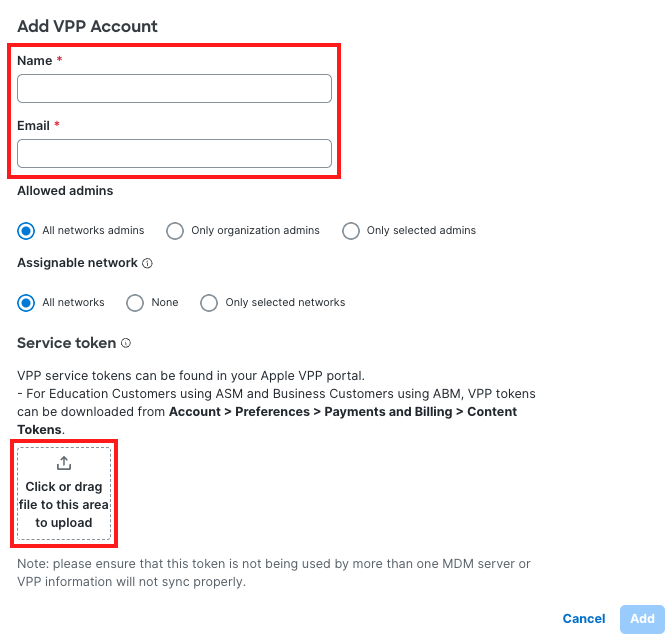
Name: Name of the VPP administrator's account. This will be shown on the email sent to invited users and should indicate your organization.
Email: Email address on record for the VPP account.
Allowed admins: Determines which Dashboard administrators will be allowed to manage users and app licenses for this VPP in Dashboard.
Assignable networks: Determines which Systems Manager networks within an Organization are able to use VPP device assignment.
5. VPP service tokens can be downloaded from your Apple School Manager (ASM) or Apple Business Manager (ABM) portal by navigating to (Account) > Preferences > Payments and Billing > Content Tokens.

6. Upload the VPP service token and click Add.

Note: If a "VPP service token can't be blank" error appears when attempting to save, make sure there are no special characters or trailing numbers such as '(1)' in the filename of the vpp service token. This can also indicate that your VPP token is already bound to another MDM solution. If this is the case, you will need to remove the token from the existing solution or generate a new VPP token to upload into Dashboard.
7. Once your account is synced, you should see your licenses populated in Systems Manager > Manage > VPP
Renewing a VPP Token
Renewing a VPP Token is as simple as repeating the steps for adding a VPP token to your Dashboard Organization, but instead of selecting Add account in step 3 above, select the pencil icon of the existing VPP Token entry.

Then click Update Token.

From there, you can download the new copy of your VPP Token from the ABM/ASM portal, upload it to your Dashboard Organization, and save your changes to complete the VPP Token renewal.
VPP Deployment Methods
There are three options for VPP license distribution. Please see Apple's documentation for a full list of requirements and feature differences.
- Device Assignment
Assign licenses to specific iOS, iPadOS, macOS, or tvOS devices, based on serial numbers. This allows for pushing applications without requiring the device to be signed in with an Apple ID, as well as silently installing apps without any end user input when used with supervised devices.
- User Assignment
Assign licenses to a specific users, based on an Apple IDs. This is useful in cases like 1:1 deployments for schools, where students have their own iPads and unique Apple IDs to sign-in with. User assignment can also be used to license iOS App Store applications.
Distribute licenses as redeemable codes, which can be given to end users to claim. This method is deprecated by Apple, and not recommended over the two managed distribution methods.
Note: It is recommended to license apps either by device or user, not both.
Any unused VPP Redemption Codes can be migrated to the more robust Device Assignment or User Assignment licenses by following this.
Device Assignment
VPP Device Assignment grants app licenses directly to a device, identifying it by serial number. This makes VPP Device Assignment the best option to use when you do not want to associate your apps to end user's Apple ID(s). Furthermore, on Supervised iOS devices and macOS 10.11+, apps install completely silently with VPP Device Assignment.
For detailed steps on how to grant and revoke VPP Device Assignment licenses, please watch the video below:
The following requirements must be met in order to use VPP Device Assignment:
- iOS 9+, macOS 10.11+, or tvOS 12+
- Systems Manager Enterprise
- VPP enabled in Dashboard
- Available licenses on the VPP portal
In addition to the above requirements, the app itself must support device assignment. This can be checked by navigating to Systems Manager > Manage > VPP, and checking the Device-assignable column (shown below). An app with a Y supports device licensing:
To grant VPP Device Assignment Licenses
- Ensure the App has licensing under the Systems Manager > Manage > VPP page.
- Will show up like this

-
If the app does not show up on the VPP page, ensure that you are viewing the correct VPP token, and then check your Apple Business Manager/Apple School Manager to ensure licensing has been purchased for the desired App. All iOS Apps require licensing be "purchased" through Apple, even if they are free, they will still require assignment in ABM/ASM.
- Then Navigate to the Systems Manager > Manage > Apps page
- If the App shows up under the list of Apps page proceed to step 10, if it does not please continue to step 5.
- Click on the "import" button on the top right-hand side of the page, underneath the "+ add app" button,
- Select the correct OS for the App you are importing from your VPP token.
- In the Next Window that pops up, select the VPP Account that matches the one the App was added to in your ABM/ASM
- Licensed Apps that have not been added to the Apps page will show up here and can be imported.
- If the app does not show up and you are certain that the correct VPP account is listed, try clicking the ignore version check at the bottom of the pop up window. This will allow the dashboard to Import all selected apps, regardless of whether version information exists or not. This option is useful for B2B apps that are not listed in the public iTunes store.

- Select the App license(s) you would like to add and click Import
- Then click save on the App list page.
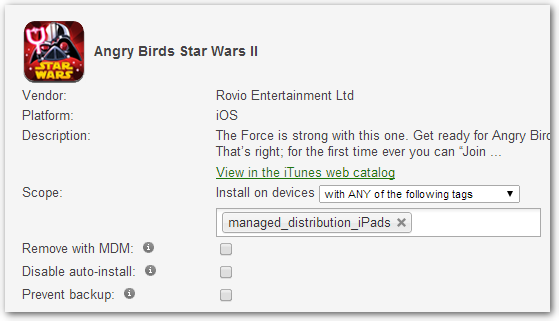
- Now click into the App you would like to add to devices to create its scope. Please note by default the App scope will be set to No devices (disabled), this is so the dashboard does not automatically start handing out App licenses to all devices online, checking in and unlocked.
- Scroll down to the Licenses section
- Select VPP device assignment from the drop-down, your App licenses will now show up here with all the license information.
- Now you will want to scroll to the next section Targets to scope what devices this App should be installed on

- The Most common selections are "All Devices" or "With Any of the following tags".
- When any of the tag options are selected you will be given an option to create or insert Device tags (most common), policy tags or user tags.
- Once you have scoped the App, you can hit the Save button at the bottom of the page and the dashboard will start to push the App to devices that meet the three requirements: Online, checking in to the dashboard, and are passcode unlocked.


To enable VPP device licensing for an app:
-
In Dashboard, make sure the app has been added under Systems Manager > Manage > Apps.
-
Select the app to view more details.
-
Enable VPP device licensing:
-
Free apps: Enable the checkbox for Use VPP device license.

-
Paid apps: Set the Purchase Method to VPP Device Assignment:

-
-
Click Save Changes.
On app install, a license for the app will be associated with the serial number of the device that downloaded it, allowing anyone to use the app on that device.
VPP Apple ID User Assignment
VPP User Assignment grants apps to end user's Apple ID(s). This is a great option for 1-to-1 deployments where end users are already using their own Apple IDs.
For detailed steps on how to grant and revoke VPP Apple ID licenses, please watch the video below:
The following requirements must be met in order to assign licenses on a per-user basis:
- iOS 7+, or macOS 10.9+
- VPP enabled in Dashboard
- Available licenses on the VPP portal
- Each user must have a personal Apple ID to receive managed distribution apps. This licensed Apple ID must then be signed in on the iOS/macOS device in order to receive VPP apps.
Note: Apple limits each Apple ID to 10 devices, so it is not recommended to use a shared Apple ID across all of your organization’s devices.
Configuring user assignment consists of the following steps:
- Invite user to receive licenses.
- Grant license for the desired app to the user.
- Deploy the app with Systems Manager.
A license can also be reclaimed by revoking a user's app license.
Invite User to Receive Licenses
You can bulk import and invite VPP users via CSV, as well as individually.
- Navigate to the Systems Manager > Manage > VPP page.
- Click on the User management tab.
- Select + Add user on the right of page.
- Input the account information of the user to grant VPP access.
- Find and check the desired user(s) in the list, and select Send invitation(s).
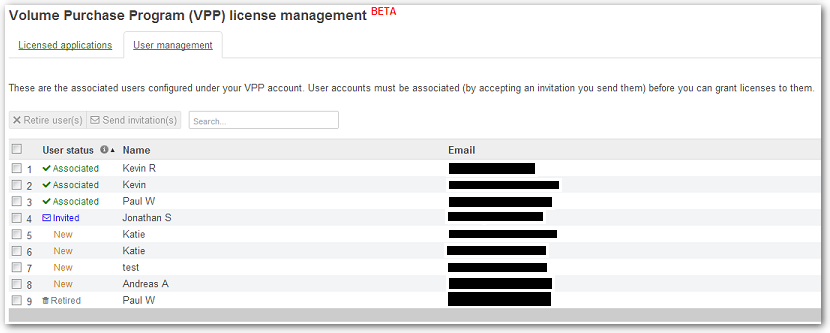
- Confirm that User status for the selected user(s) changes from New to Invited.
-
Invited users will receive an email from Cisco Meraki. Accepting the invitation will require the user to sign in to iTunes or the App Store with their Apple ID, and accept Apple's VPP terms and conditions.
Note: Invitation links are unique and can only be accepted once. The Apple ID which is used to accept the invitation is not received or reported by Systems Manager.
The following image shows a list of users with various statuses. Only 'Associated' users have accepted the invite.
Grant License for Desired App to User
To automatically assign licenses to users in scope, and avoid manually granting licenses to users, see this article.
- Navigate to the Systems Manager > Manage > VPP page.
- Click on the Licensed applications tab.
- Select the app to grant license for (if multiple VPP accounts have been added on the Org > Settings page, ensure the proper account is selected from the VPP account' drop-down menu).
- Check the box next to the user and click on + Grant license to user(s).
- Confirm license access to selected number of users.
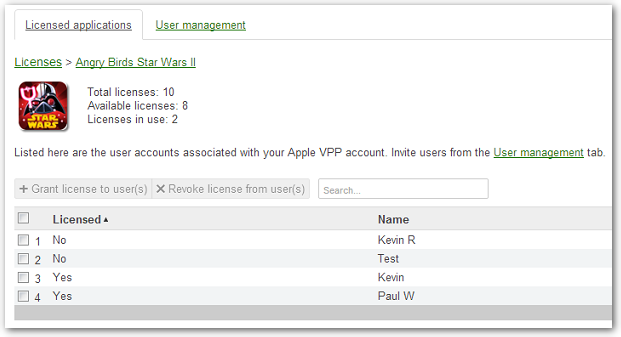
At this point, 'licensed' users have been granted a VPP license for the selected app. Licensed users will be able to download this app onto their device by signing in with the licensed Apple ID, and navigating to the 'Purchased' tab in Apple's App Store.
In order for the licensed app to be managed by Systems Manager the app must still be deployed via Systems Manager.
Deploying Apps with Systems Manager
- Navigate to the Systems Manager > Manage > Apps page.
- Select + Add new > iOS App Store app or macOS App Store app.
- Search for and choose the desired app already licensed.
- Define the scope of the app. This should cover the users/devices that were licensed through VPP.
- (Paid apps only) Set the Purchase method to VPP app assignment.
- Confirm clients in scope at the bottom of the page.
- Click Save Changes.
Apple Books (iBooks) App License
- Apple Books are assigned per user and not per device. Please take note when assigning an Apple book via VPP:
- VPP Apple book licenses must be granted to an Apple ID (user) and require an Apple ID to sign in.
- VPP Apple book licenses are not device-assignable.
- Apple Book licenses are permanent and cannot be revoked or reassigned.
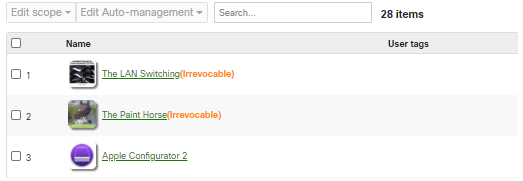
Irrevocable next to an App verifies the license is permanent and cannot be revoked from the Apple ID it is assigned to.
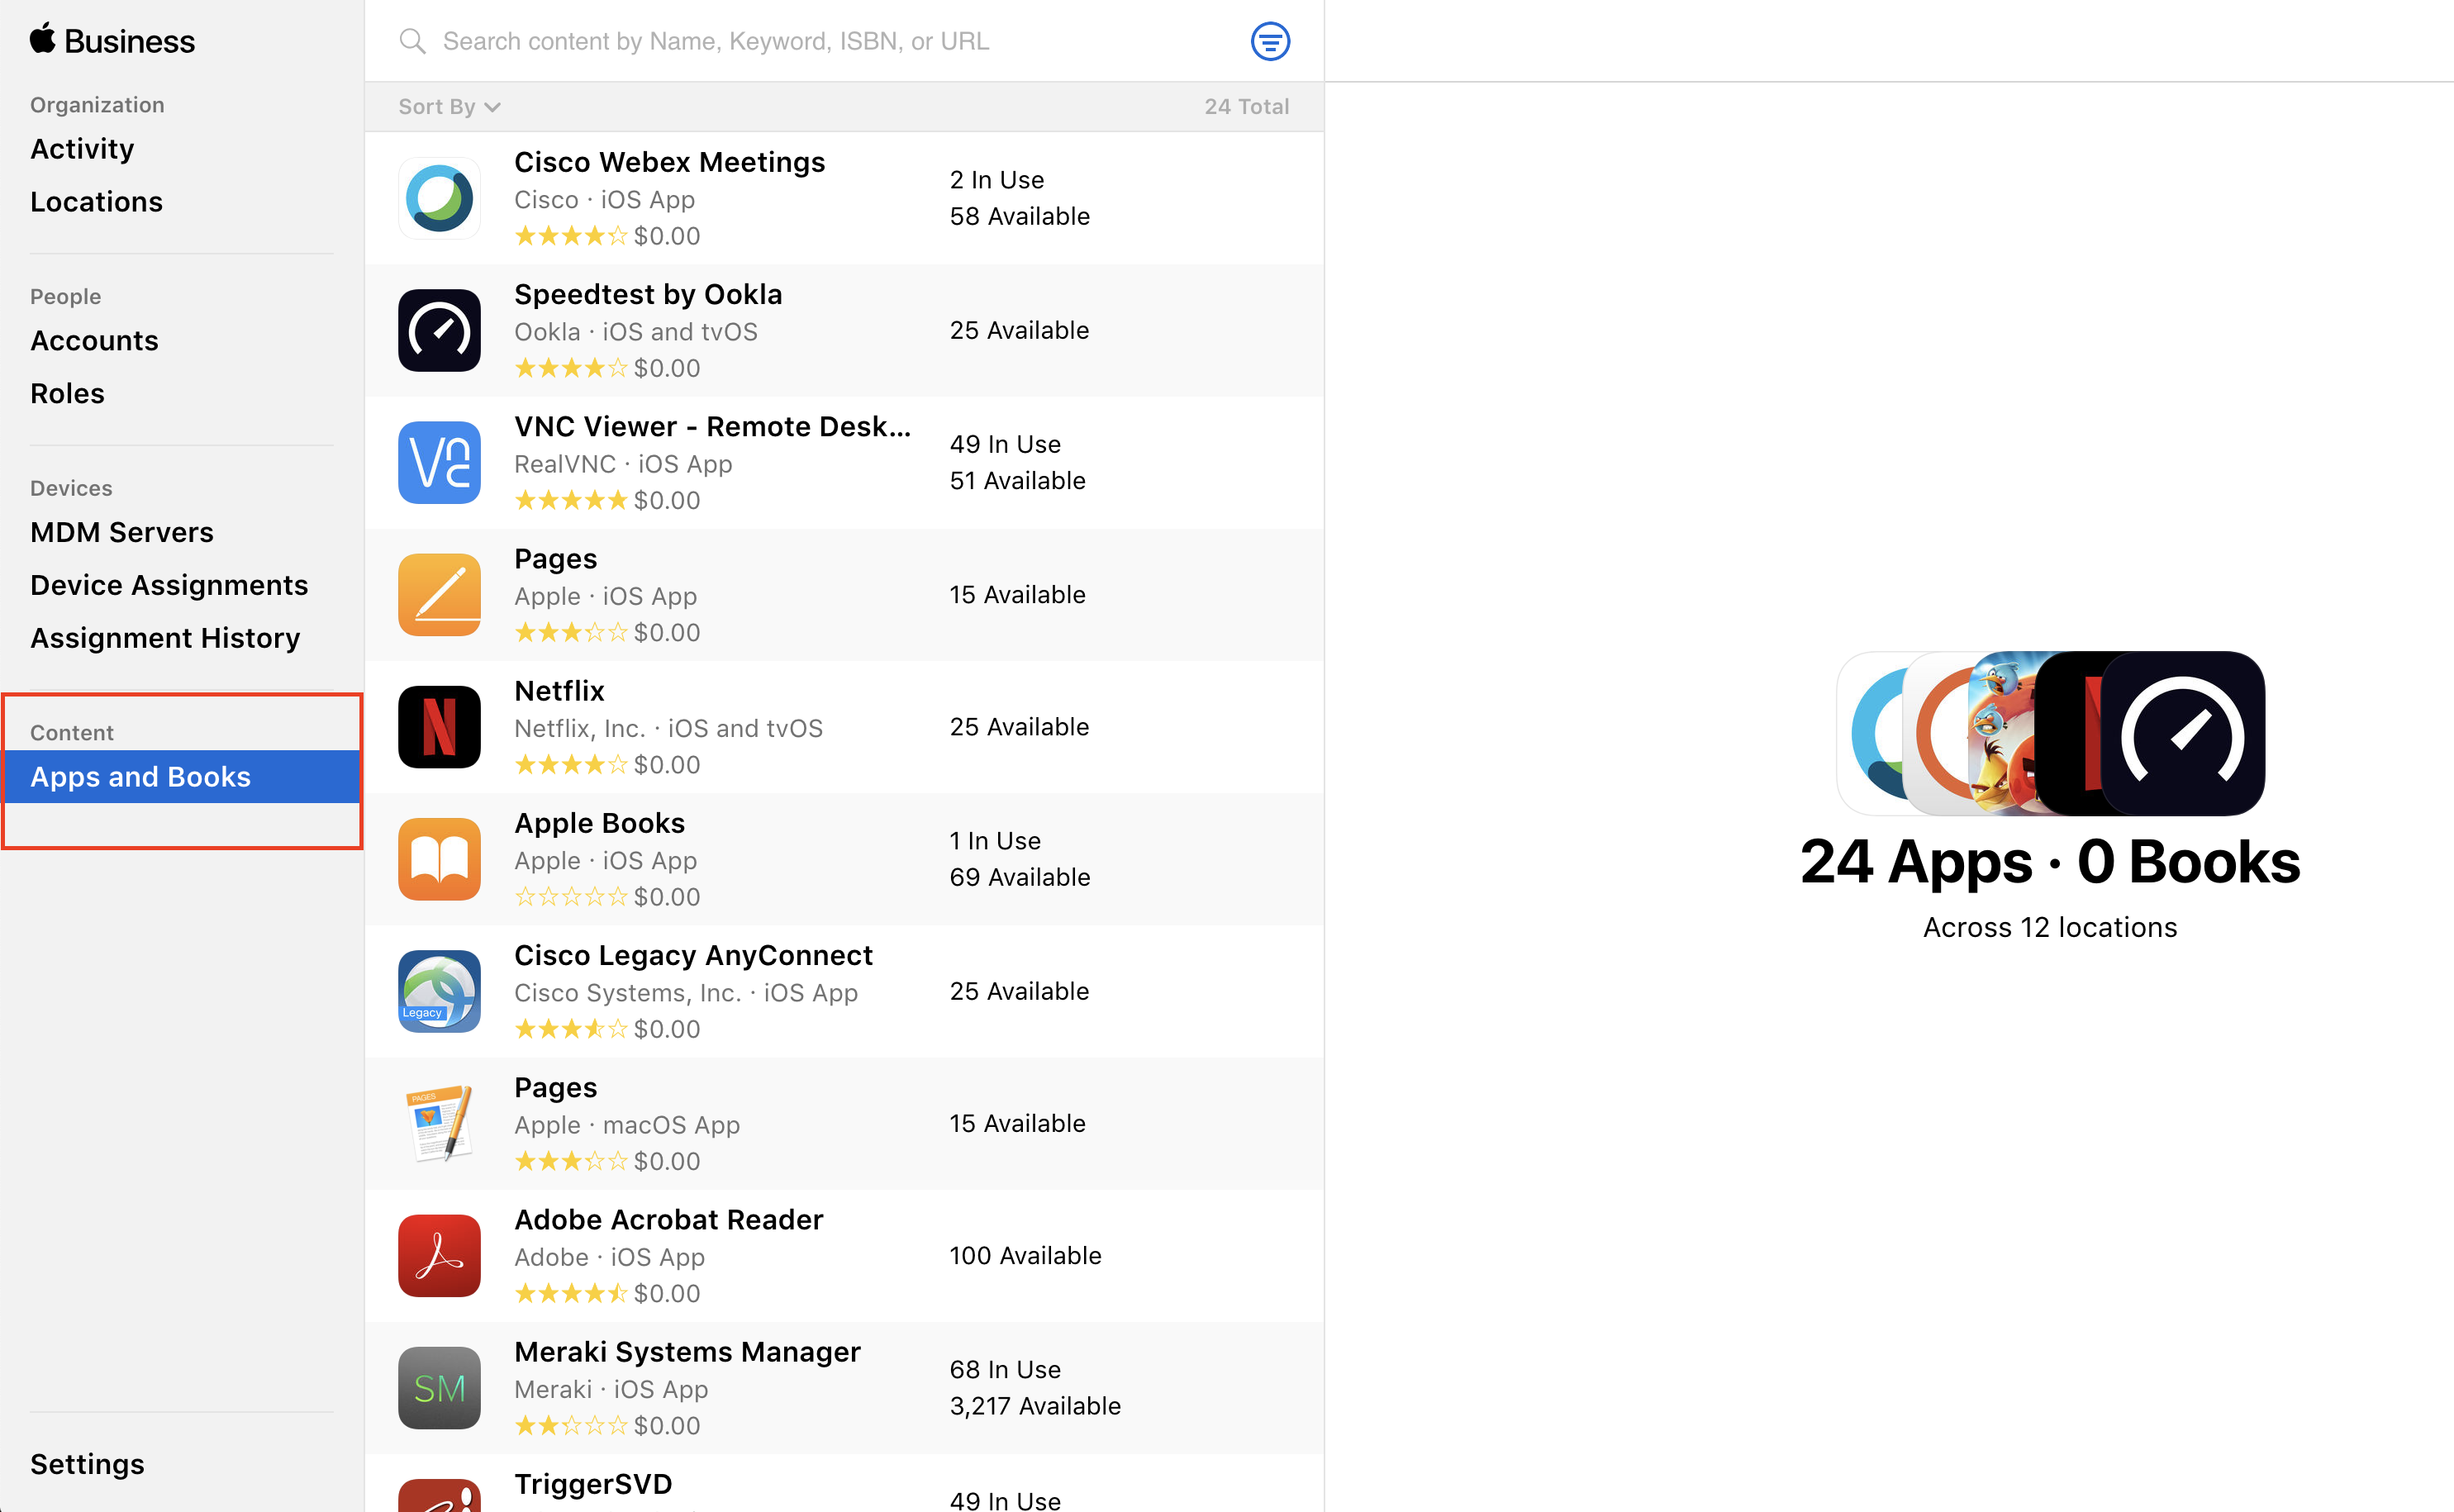
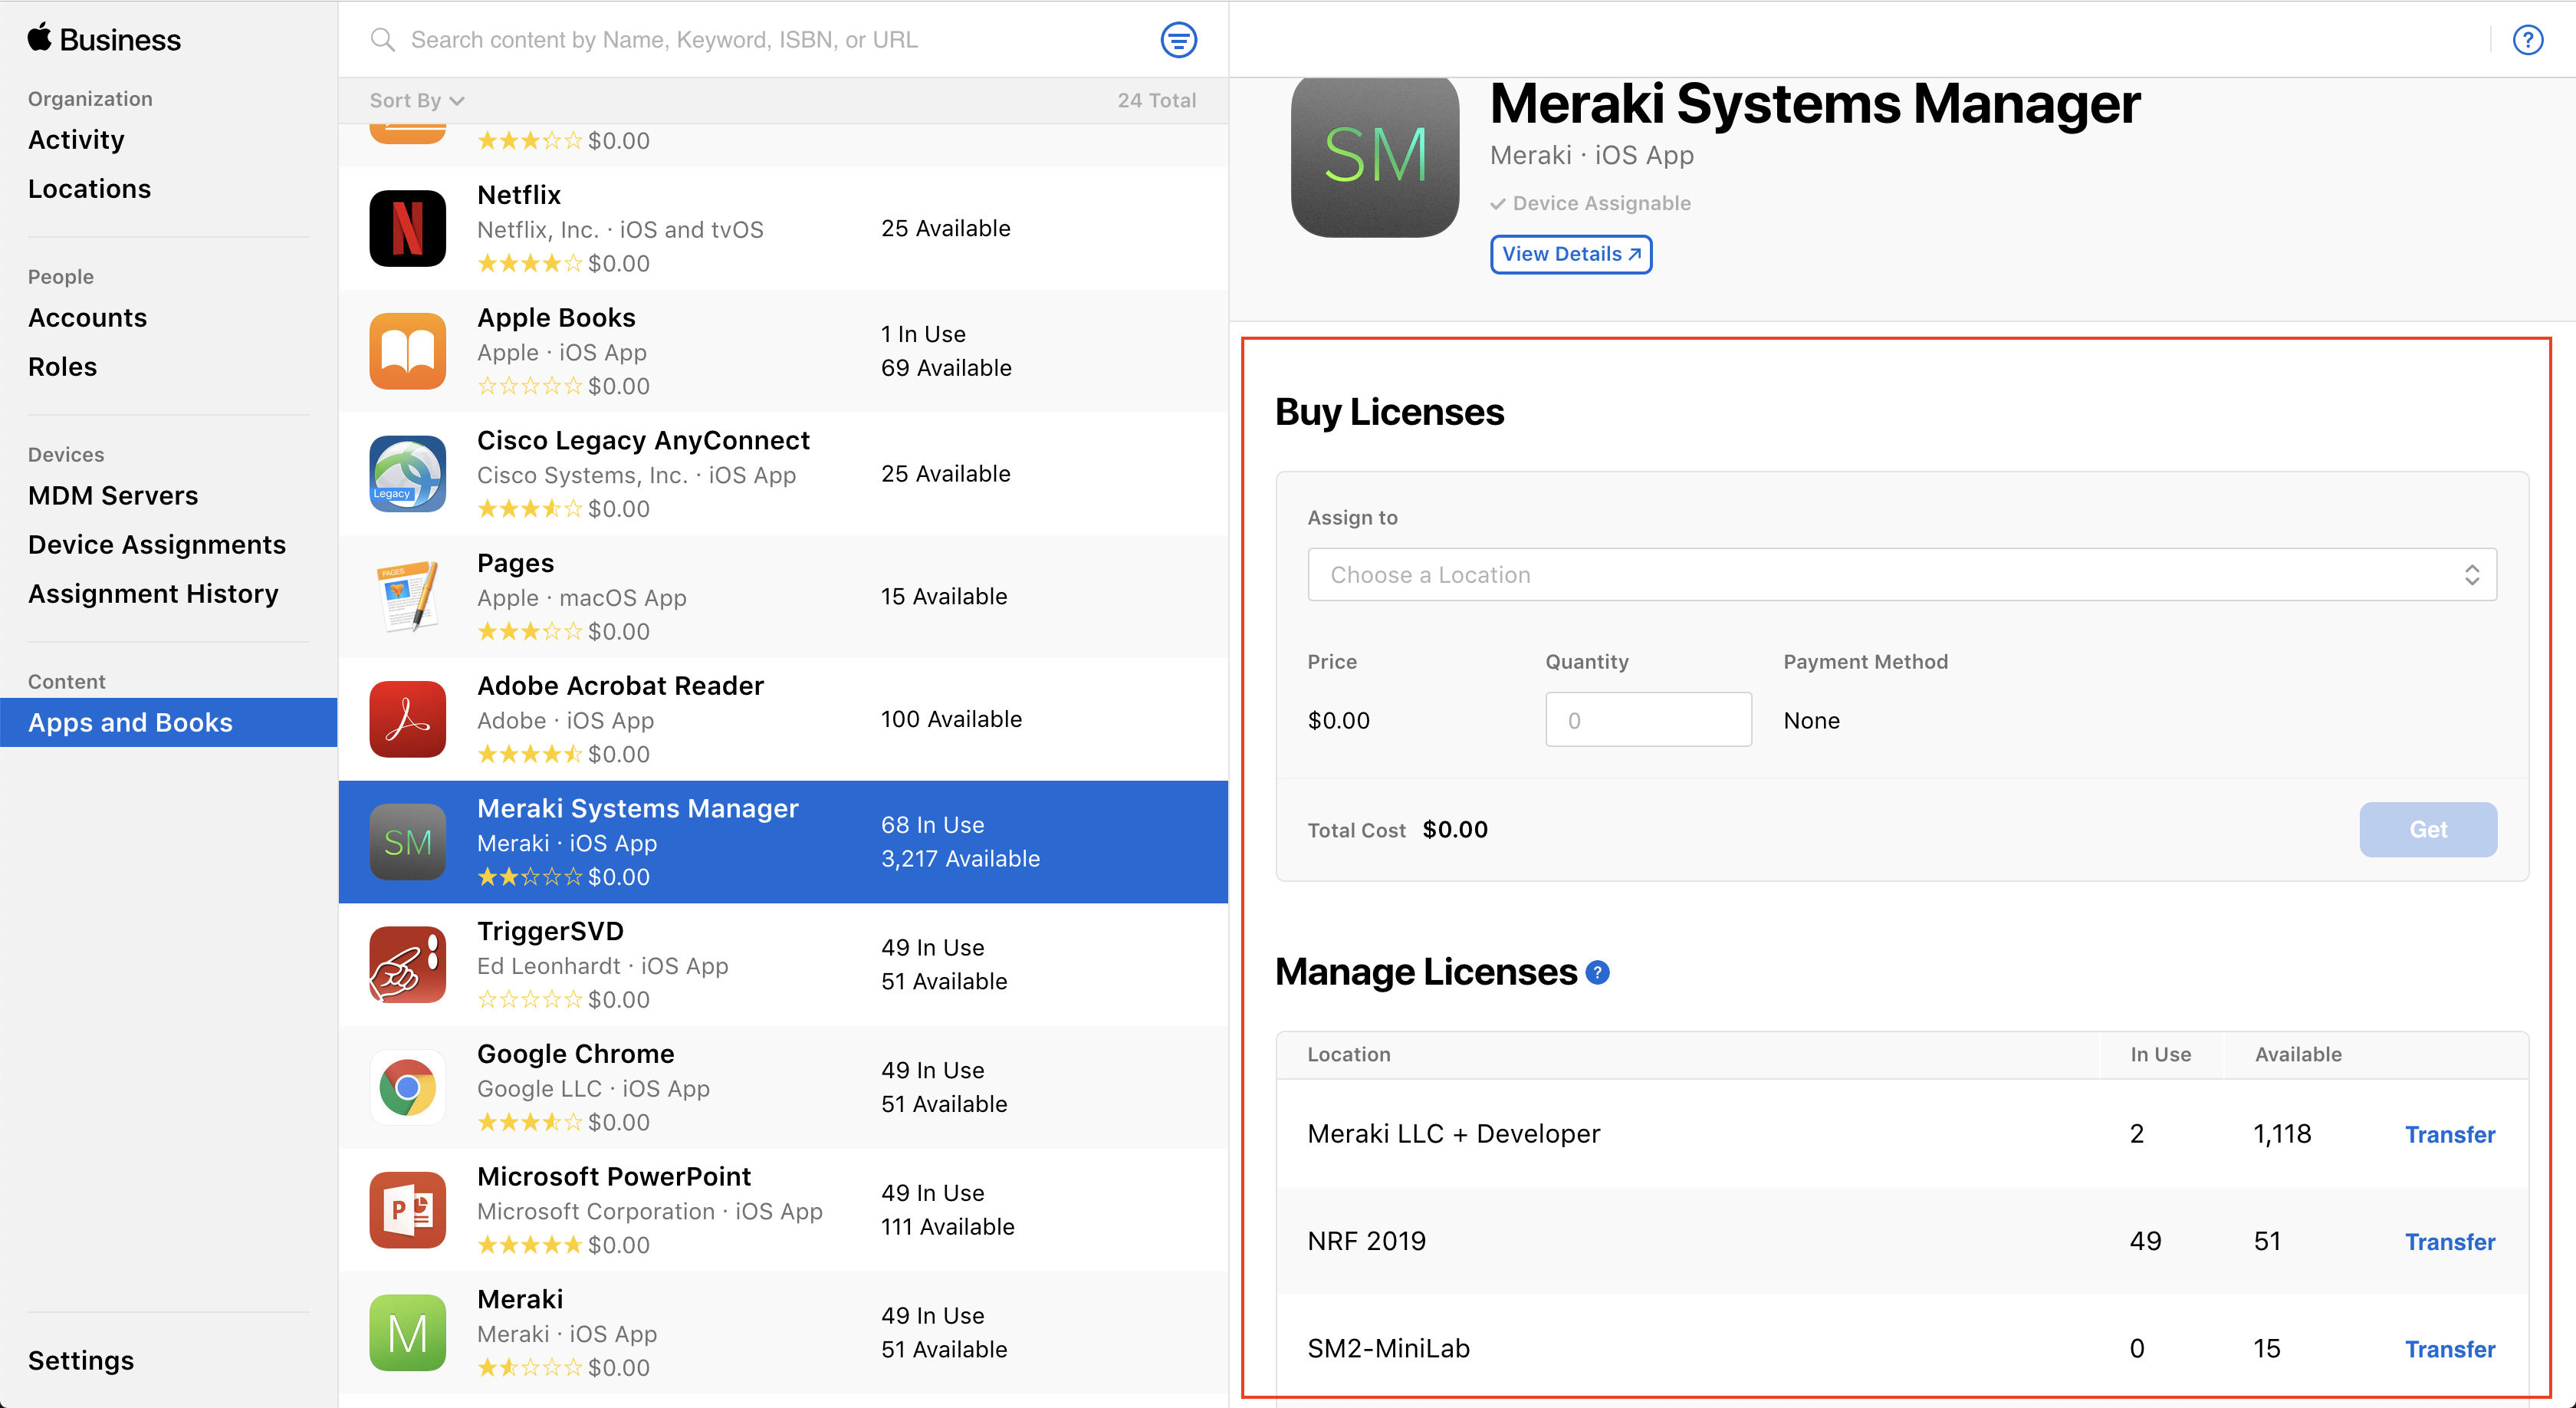
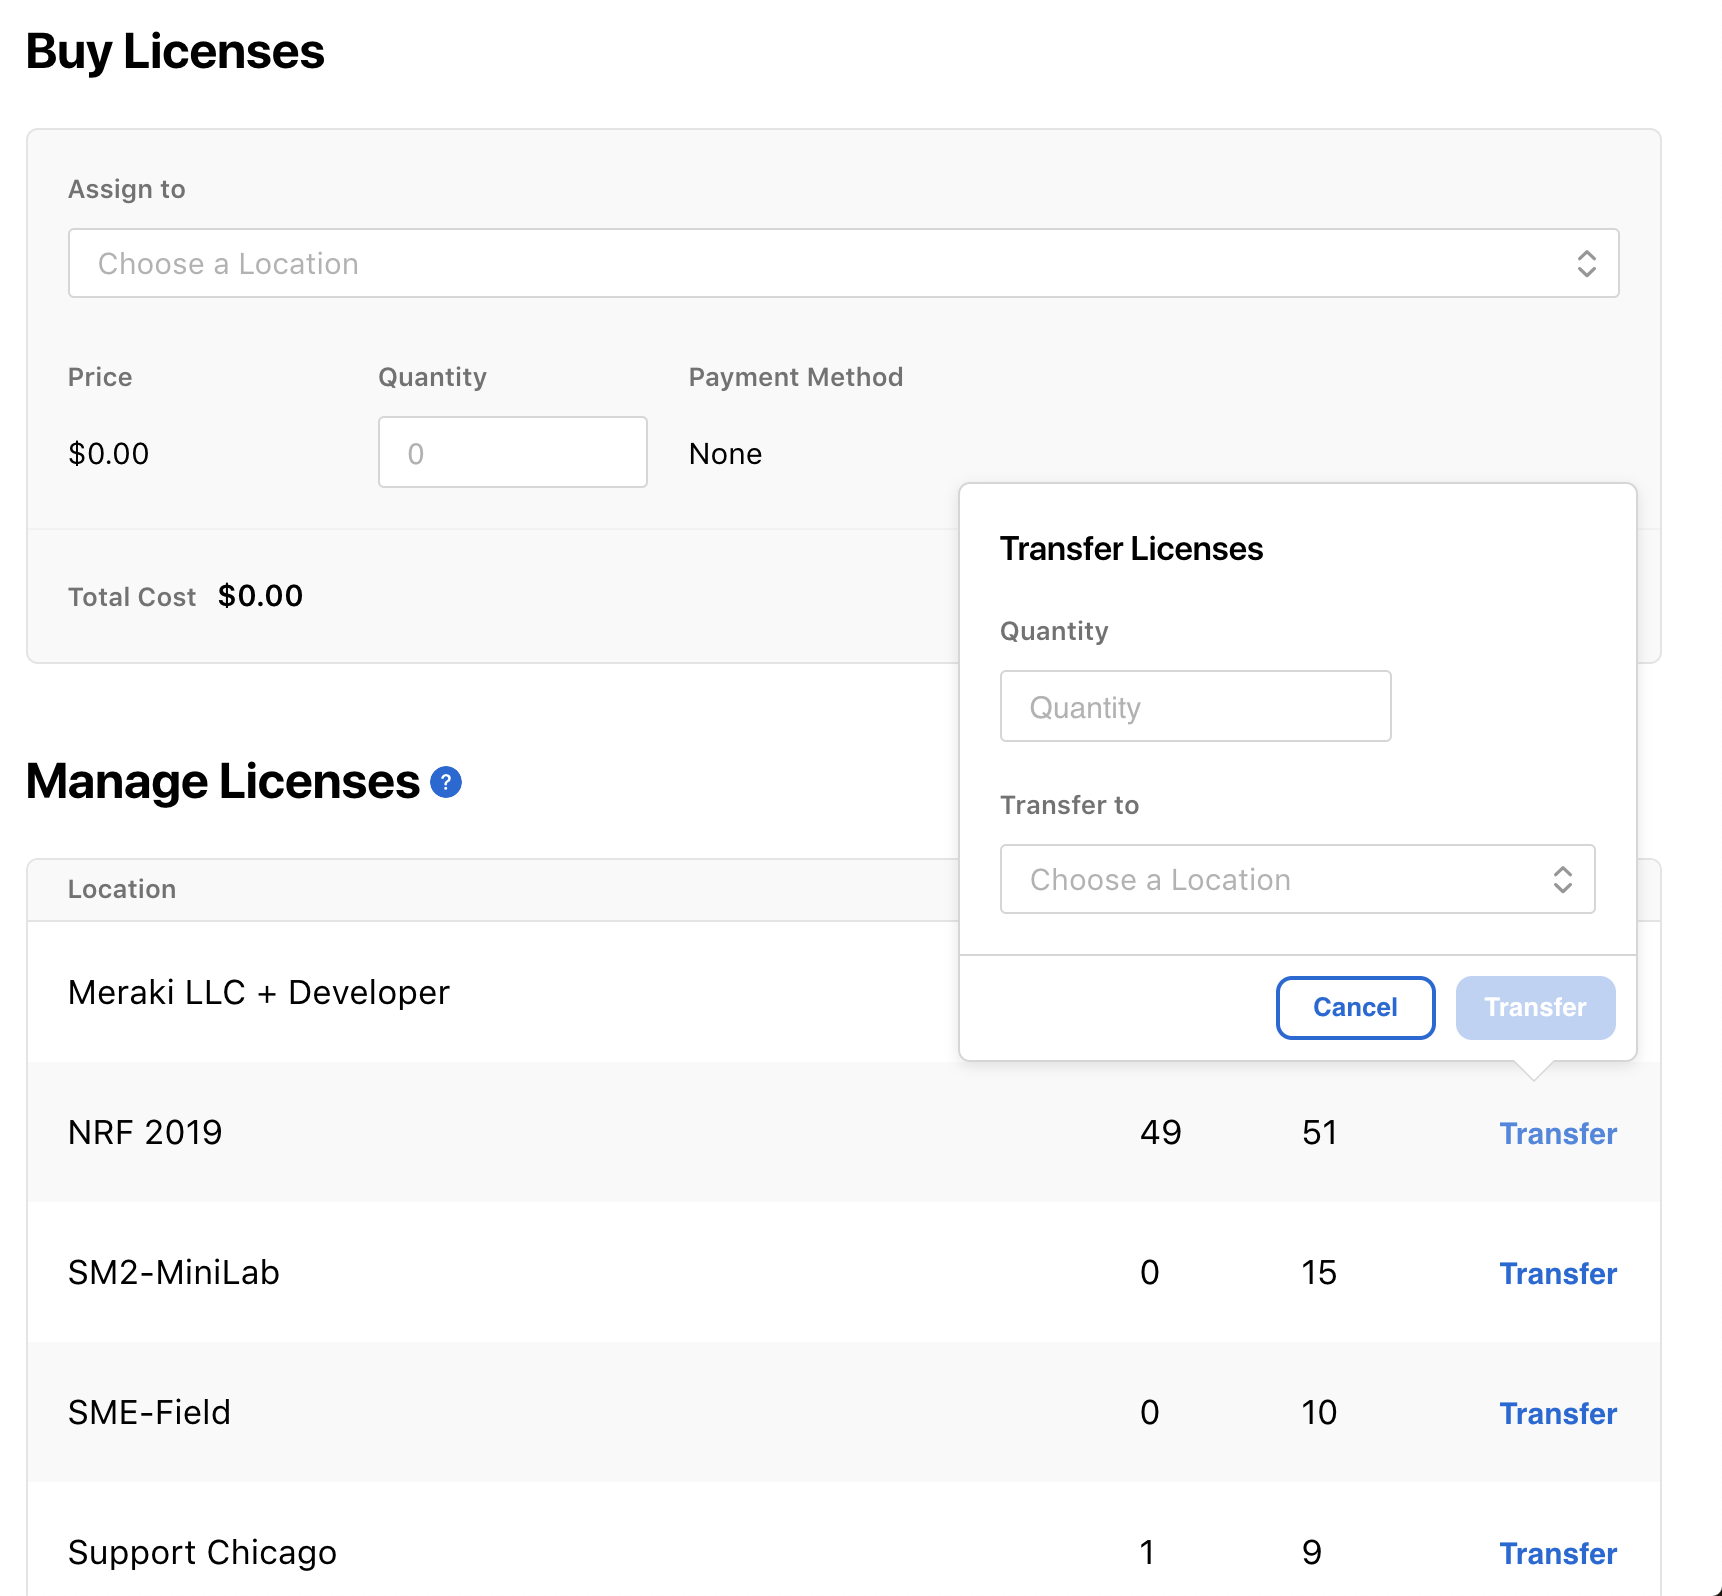
Location Based VPP in Apple School Manager & Apple Business Manager
On Apple School Manager and Apple Business Manager, Apple has added a new concept called "Locations". Locations gives the Apple portal administrator the ability to transfer VPP licenses between different Locations (which will transfer the VPP licenses between different VPP tokens). Be sure to add the VPP tokens to Org > MDM for all/any of the Apple School Manager or Apple Business Manager Locations that you want to sync licenses from. Use the following screenshots to help confirm that the VPP licenses are in the desired VPP Location/token.
Troubleshooting VPP Installs
If you've followed the above steps and have issues installing apps onto your device, see the troubleshooting guide here.
Removing App licenses
Revoking Device Assignment App License
- If the App was scoped to specific Devices with a tag,
- Navigate to the Desired Device details page Systems Manager > Devices > Desired device
- Remove the tag from the device (ensuring the tag only affects the App license and not other settings)
- Save changes at the bottom of the page.
- If the App was scoped to All devices and only needs to be removed from some,
- Navigate to Systems Manager > Manage > Apps page.
- Search for and choose the desired app already licensed.
- Define the scope of the app, you will now need to add the tag to all devices in the network that require the app.
- Confirm clients in scope at the bottom of the page.
- Click Save Changes.
Revoke license from removed Device: If the device was removed from the dashboard or the tag was removed but the device serial still shows up in the VPP section taking up a device license you can try the following workaround.
- Navigate to the Systems Manager Apps list SM> Apps and
- Select the specific App and scroll down to Licensing
- Under License usage details there will be a "Revoke unknown device licenses" button - This will revoke the device-assigned licenses for any devices that are not currently enrolled and in scope of this app. Note, the "Revoke unknown device licenses" button requires organization administrator privilege, and is not accessible for network admins.

Revoking a User's App License
To automatically revoke licenses from users who are no longer scoped for an app, and avoid manually revoking licenses from users, see this article.
In order to re-claim a license, the user's app license must be revoked. A license can be revoked for a specific app or a user's access to all licensed apps can be revoked. As per Apple's policies, a revoked user will be granted a 30-day grace period before any re-claimed apps are removed from the user's purchase history. Once a license has been revoked for one user, it can be reassigned to another user after a brief time (typically about two minutes).
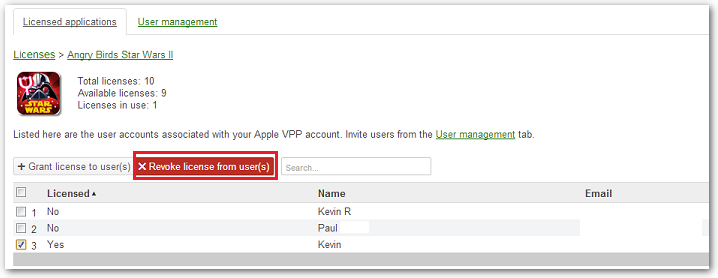
To revoke access to a specific app:
- Navigate to the Systems Manager > Manage > VPP page.
- On the Licensed applications tab, click on the name of the desired app.
- Check the box for the user to revoke access.
- Select Revoke license from user(s).
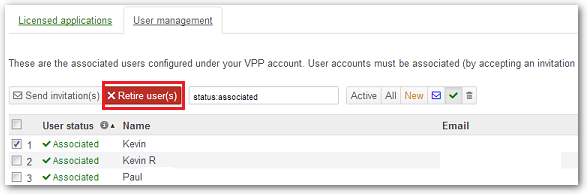
To revoke licenses for all distributed apps by retiring user:
- Navigate to the Systems Manager > Manage > VPP page.
- Select the User management tab.
- Check the box next to the user to revoke access.
- Select Retire user(s).
 a User's App License
Apple Books (iBooks) App License are Irrevocable
- Apple Book licenses are permanent and cannot be revoked or reassigned.
Irrevocable next to an App verifies the license is permanent and cannot be revoked from the Apple ID it is assigned to.