
Systems Manager Self-Service Portal
Overview
A newly redesigned version of the Systems Manager Self-Service Portal is now available at https://portal.meraki.com.
This makeover includes a fresh, mobile-friendly, new look that maintains all current functionality and introduces support for Trusted Access device management. The old Self Service Portal will be deprecated on February 4th 2023.
The Meraki Self-Service Portal (SSP) allows your end users to perform basic management tasks on devices they are configured as the owners of, such as:
- Viewing basic device details
- Viewing device location and compliance status with security policies
- Issuing MDM commands, e.g. locking a device
- Viewing available apps and update information
- Issuing app install commands for available apps
- Managing and adding Trusted Access devices
Users access this portal through a website that does not require Meraki Dashboard admin credentials. Enrollment authentication must first be configured in your Systems Manager network, as users will use the same credentials when initially enrolling devices to access the portal. This article will describe how to enable the Self Service Portal for your Dashboard network and access it as a user.
Configuring the Self Service Portal
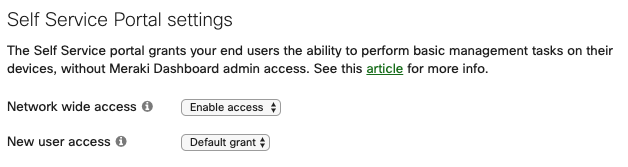
The Self-Service portal may be enabled on the Systems Manager > Configure > General page on Dashboard under the Self Service Portal settings. In order to enable the SSP, some form of enrollment authentication must first be configured, as end-users will use their enrollment credentials to access their device portal.
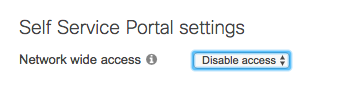
The new user access option specifies whether new owners, as they are created, will have access to the SSP or not. See the below section for managing individual SSP user access.
The portal link is the URL your end users will use to access the SSP. This link uses the 10-digit network enrollment code (found under Systems Manager > Manage > Add devices) to uniquely identify your Dashboard network.
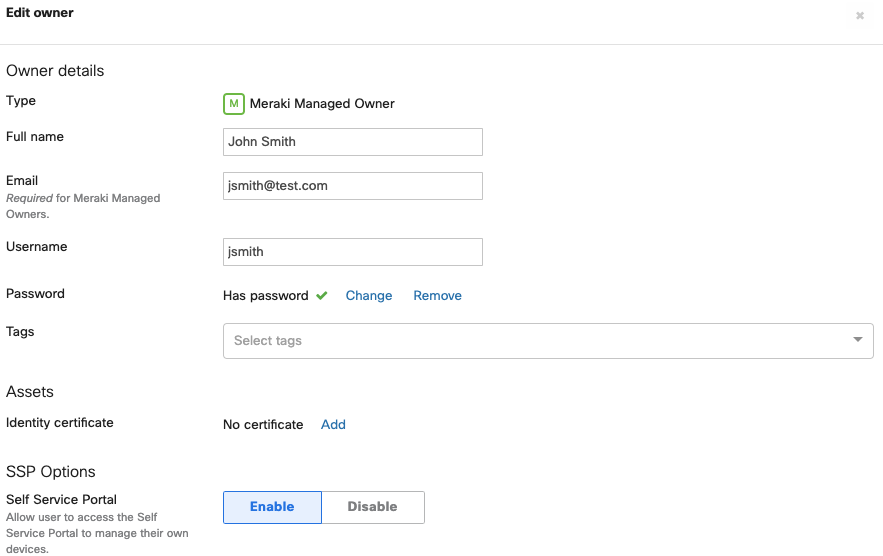
Managing User Access
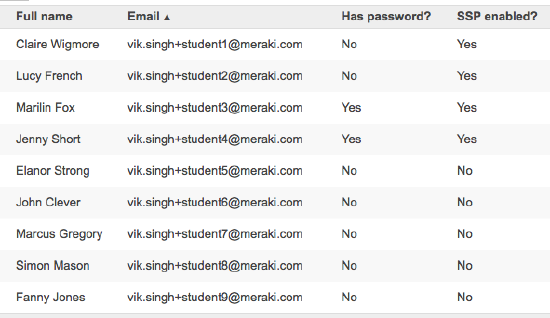
By default, existing owners will have SSP access, unless otherwise configured. To change whether newly created owners have access by default or not, toggle the setting mentioned above. SSP access can be modified on a per-user basis by navigating to Systems manager > Configure > Owners. Access is indicated by the SSP enabled? field. Users will have access to the devices they are marked as the owner for.
Modifying User Access
To edit access for users in bulk, select the owners you wish to edit by checking boxes on the left. Use the 'Self Service Portal' toggle to enable or disable, apply the options then save changes.
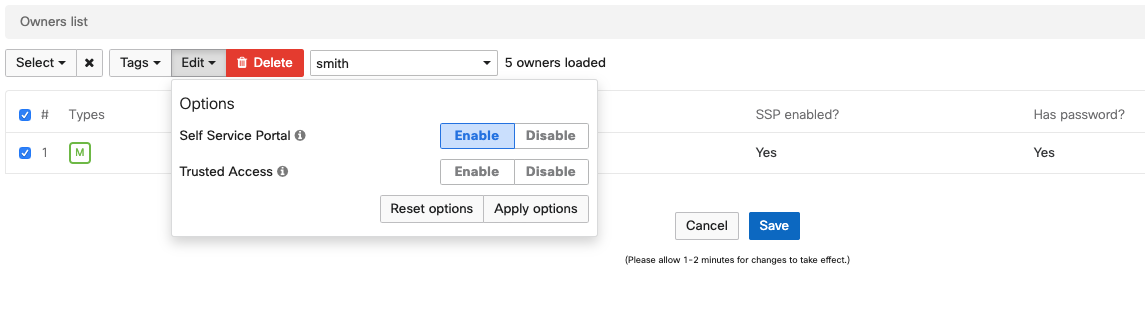
To edit access on an individual entry, you can also click into the owner and toggle the 'Self Service Portal' selector.
Accessing the Self Service Portal
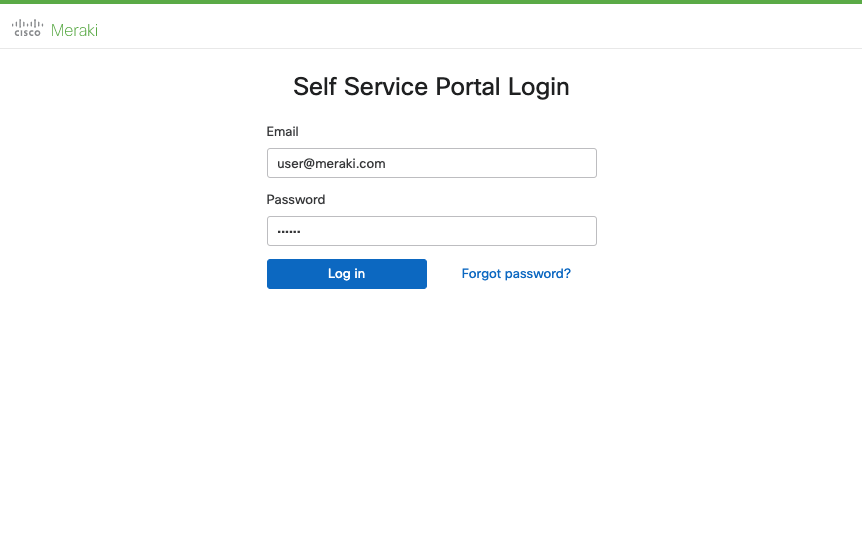
To access the SSP, your end users should be sent the portal link found under Systems manager > Configure > General which should look like 'https://portal.meraki.com/111-222-1234', ending with your 10-digit network enrollment code (which can also be found under Systems Manager > Manage > Add devices). Alternatively, you can use your Network Enrollment String in place of the enrollment code.
Note that this link/code is unique to each Dashboard network, meaning if you have multiple Systems Manager networks in your organization, each one will have SSP configured independently. You may want to bookmark this link or push it out as a webclip for quick reference.
After following the link, users will hit a sign-in page that varies depending on the type of enrollment authentication configured. In the below image, the portal is configured with Meraki authentication, so users will need to sign in with the email associated with their Meraki-managed owner. If configured with Google authentication, for example, users would see an OAuth prompt to sign into their work-domain joined Google account.
Using the Self Service Portal
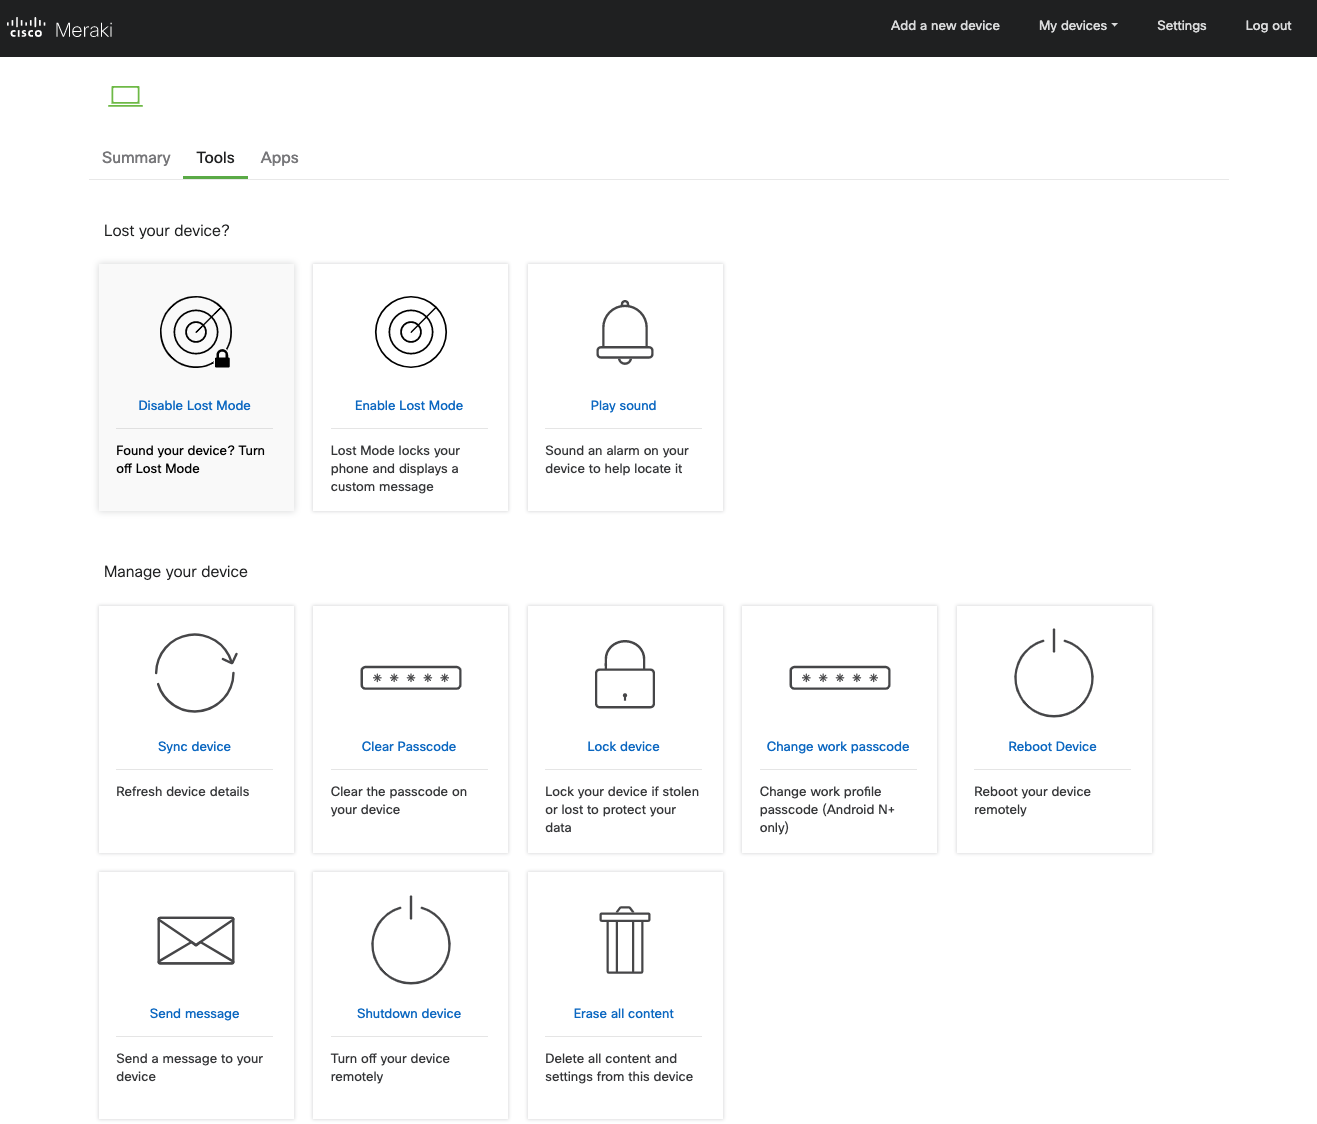
Upon signing into the portal, users will see all the devices they are designated as an owner of available on the left, as well as any MC phones if the phone portal has been set up with the same email. From the Summary tab, users can access basic device information, some live tools, and monitor their device's compliance status. This page will notify if their device is missing apps, violating any Dashboard security policies, and display its location and alert if outside of a designated geofence.

Tools
The tools tabs grants access to a subset of the MDM live tools available in Dashboard. End users can utilize these tools to minimize the number of basic support tickets for requests like unlocking or tracking down their devices.
Apps
The apps tab shows all applications made available to this device. What is listed here is determined by which apps are scoped within Dashboard, so end users can only see apps their devices have been explicitly tagged for. They cannot search and download unscoped apps from the Apple App or Google Play Stores, for example. Users can switch between the sections to view available apps, when their apps were last updated, and install, uninstall, or reinstall apps remotely from the portal.