
Enrollment and Self-Service Portals for Systems Manager
Overview
Systems Manager has two portals for end users to access:
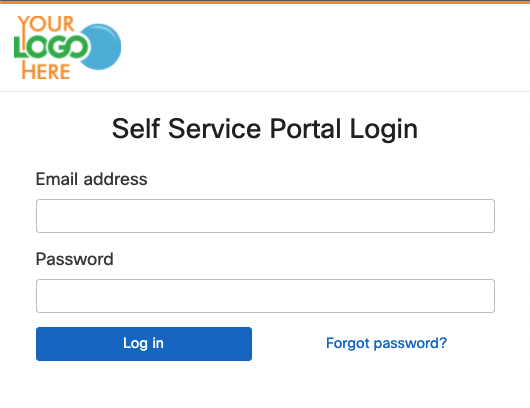
- Self Service Portal (portal.meraki.com)
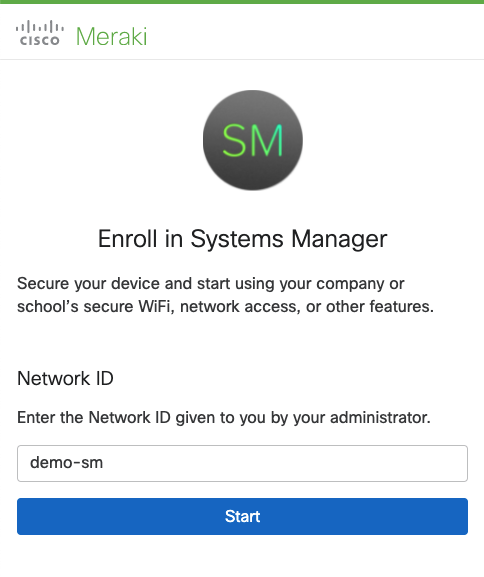
- Enrollment Portal (enroll.meraki.com)
The Self Service Portal allows end users to view/managed their SM enrolled devices and add/remove/edit their Trusted Access devices. More information on the SSP specifically here.
The Enrollment Portal allows end users to enroll their device into Systems Manager. This portal is accessible via enroll.meraki.com to provide a method of manual enrollment.
Authentication
End users can authentication against Meraki Owners, Active Directory, Azure AD, Open ID, Google OAuth, SAML, and more. For information and seteps on how to setup the various end user authentication options please view the SM authentication documentation.
Custom Branding
Custom Branding in Systems Manager allows you to personalize the appearance of the Self-Service Portal for end users. By enabling and configuring custom branding, you can create a cohesive and recognizable experience for your organization. Here's how to set it up:
- Navigate to Network-Wide > Configure > General for combined networks. For Endpoint management-only networks, navigate to Systems Manager > Configure > General.
- Enable the Self Service Portal Branding, and then upload your Logo, add Logo Alternative Text, and set the Brand Color hex.
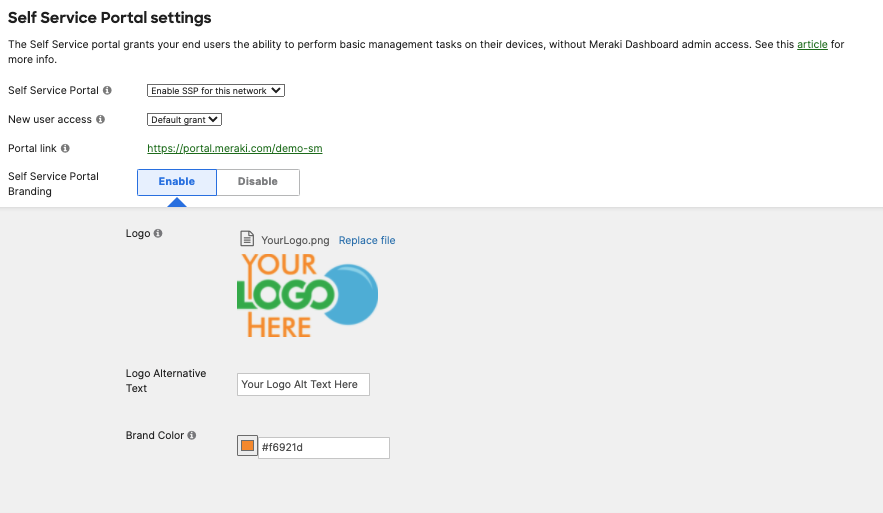
- Click Save in the bottom right corner to save changes.
Now when end users access the Self Service Portal and Enrollment Portal, they will see this custom branding.
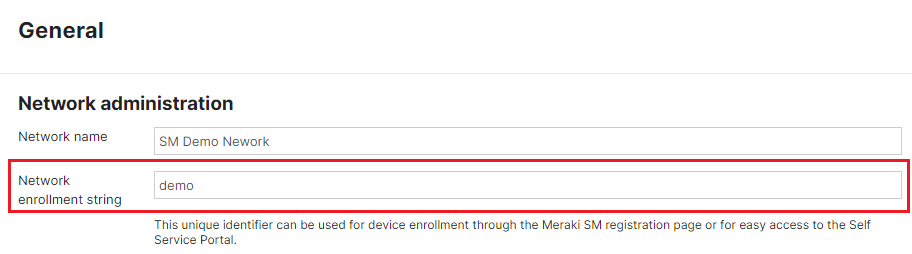
Network Enrollment String
A network enrollment string allows end users to access their organization’s enrollment portal (enroll.meraki.com) or self-service portal (portal.meraki.com) using a known and recognizable network identifier. Network enrollment strings are unique to each Endpoint management network and can be used as a substitute for the randomly-generated 10-digit network ID.
Network enrollment strings are case insensitive and must follow these guidelines:
- Must be 4 or more characters in length
- Cannot exceed 50 characters in length
- Cannot include any of the following characters: ;:@=&$!‘“,?.(){}[]\*+/#<>|^%
- Cannot be a 10 digit string
- Cannot follow the format XXX-XXX-XXXX where X represents a digit
Configure a Network Enrollment String
-
Navigate to Network-Wide > Configure > General for combined networks. For Endpoint management only networks, navigate to Systems Manager > Configure > General.
-
Enter the desired string into the Network enrollment string field.
-
Click Save in the bottom right corner to save changes.
If Systems Manager is a part of a combined network, then "-sm" is automatically appended to the end of the network enrollment string.
Change a Network Enrollment String
-
Navigate to Network-Wide > Configure > General for combined networks. For Endpoint management only networks, navigate to Systems Manager > Configure > General.
-
Change the desired string in the Network enrollment string field.
-
Click Save in the bottom right corner to save changes.
Changing a network enrollment string may cause existing bookmarks or links to break. Please be sure to review all internal documentation and references before editing a network enrollment string to prevent adverse impact to existing workflows.
Once enabled, a network enrollment strings can be changed but they cannot be deleted.