
Configuring Simple Guest and Internal Wireless Networks
Many organizations require two wireless networks (formally known as SSIDs) for client access. In most cases, the desired end result is one SSID for internal users - a secure encrypted extension of the wired LAN - and a second SSID that provides Internet-only access to your guests with minimal administrative overhead. This article describes how to configure, name and enable each SSID so that each provides the proper level of access to connected clients.
Note: This configuration applies to MR Access Points only. For a similar configuration on the Z1 Teleworker Gateway and MX60W Security Appliance, see this page.
Learn more with these free online training courses on the Meraki Learning Hub:
Name and Enable the 'Guest' and 'Internal' SSIDs
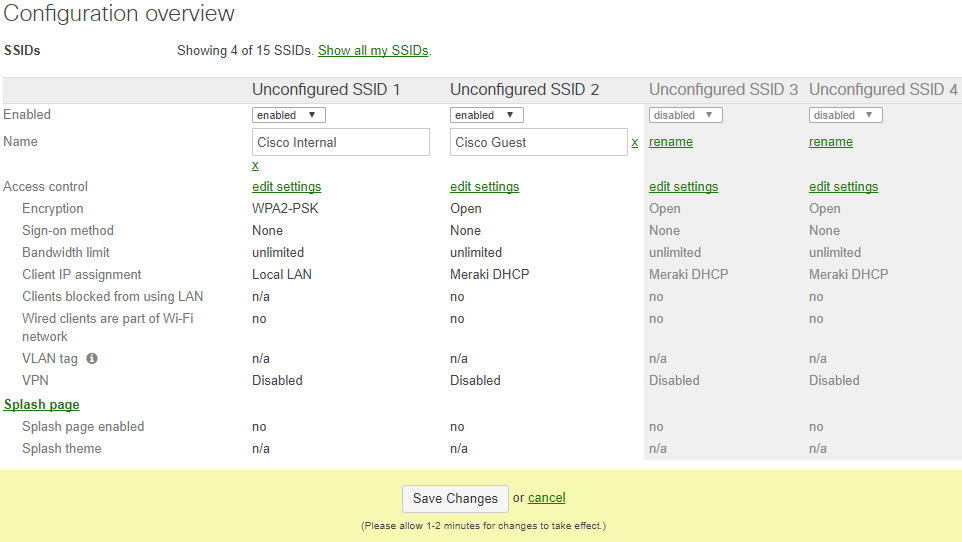
- In Dashboard, navigate to Wireless > Configure > SSIDs.
- For the Name section of each SSID, click the rename link.
- Enable and rename the Guest and Internal SSIDs appropriately. This is the name of the wireless network that clients will see in their list of available network connections.
- Click the Save Changes button.
Configure the 'Guest' SSID
- Navigate to Wireless > Configure > Access control.
- Select your guest network from the SSID drop-down menu.
- For Association requirements, choose Open (no encryption).

- For Splash page, choose None (direct access).
Note: To configure a Click-through splash page to display a company logo or welcome message, see Enabling Click-through splash-page or Customizing the Splash page.

- Scroll down to the Addressing and traffic section of the page.
- Ensure that "NAT mode: Use Meraki DHCP" is selected. In NAT mode, Clients receive IP addresses in an isolated 10.0.0.0/8 network. Clients cannot communicate with each other. See this article for more information on NAT mode.

- Click Save Changes at the bottom of the page.
- Navigate to the Configure > Firewall & traffic shaping page.
- Ensure that the Guest network is selected on the SSID drop-down menu at the top of the page.
- In the Layer 3 firewall rules section, select Deny from the drop-down menu for the rule labeled Wireless clients accessing LAN. More information on this setting is available in 'Deny Local LAN' settings in Cisco Meraki MR firewall.

- Scroll down to the Traffic shaping rules section and select a Per-client and/or Per-SSID bandwidth limit.
- Click Save Changes.

Configure the 'Internal' SSID
- Navigate to Configure > Access control.
- Select your guest network from the SSID drop down.
- For Association requirements, choose Pre-shared key with WPA2 and enter a key that Clients will use to connect to the network.

- For Splash page, choose None (direct access)

- Scroll down to the Addressing and traffic section of the page.
- Select "Bridge mode: Make clients part of the LAN". In Bridge mode, Meraki devices operate transparently (no NAT or DHCP). Clients receive DHCP leases from the LAN or use static IPs. See this article for more information on NAT mode versus Bridge mode.

- Click Save Changes at the bottom of the page.
- Navigate to the Configure > Firewall & traffic shaping page.
- Ensure that the Internal network is selected on the SSID drop-down menu at the top of the page.
- In the Layer 3 firewall rules section, make sure Allow is selected for the rule labeled Wireless clients accessing LAN.

- Click Save Changes
After these steps are complete, the AP's in your network will broadcast two different SSIDs. One network will allow Guest access to the Internet only, the other will allow Internal users to access the network through a secure extension of your wired LAN.