
A Guide to Troubleshooting Blocked Traffic
Introduction
There are various security and filtering tools available on MX appliances. Network administrators often prefer to segment VLANs, police traffic, and prevent certain websites from being accessed which results in a large number of rules and policies configured on an MX. A large number of rules and policies can make it difficult to locate which rule and/or policy is contributing to inaccessible resources. Oftentimes users experience issues with accessing blocked websites, servers, or resources over a VPN tunnel.
The aim of this document is to serve as a guide for troubleshooting blocked traffic by outlining the information to be gathered, the security features that may be blocking the traffic, and where to check logging for each feature. The actions, suggestions, and behavior in this document are not exhaustive.
This document is divided into the following sections:
- Preliminary Information Gathering
- Firewall Rules
- Content Filtering
- Threat Protection
- Group Policies
- Strategies and General Guidelines
- Additional Resources
Note: In this document, "blocked traffic" and "accessibility to resources" may be used interchangeably as one often implies the presence of the other.
Learn more with these free online training courses on the Meraki Learning Hub:
Preliminary Information Gathering
In order to paint a clear picture for the root cause of the blocked resource we will need to gather information to narrow down the scope of the issue.
The following information is helpful (and oftentimes necessary) for troubleshooting:
Device Information
- How many devices are affected?
- What is the IP Address and MAC Address of one (or more) affected devices?
- Has this device always had issues accessing this resource?
- What is the Operating System of the device?
- Is this occurring with all device types (i.e phones, laptops, printers, etc)?
- Does the device have a group policy applied via AD, the clients page, or VLAN?
- If the device is allow listed on the client's page, are they able to access the blocked resource?
- If so, and you are familar with the dashboard, there is a section at the end of this article called "Adding a device to the "Allow list" that can be referenced for next steps.
Network Information
- Is the resource accessible from a different network (i.e home, coffee shop, hotspot, etc)?
- How long has this resource been inaccessible?
- What are the firewall rules configured at Security & SD-WAN > Firewall?
- Are there recent Layer 7 firewall events matching the IP/MAC of the affected user at Network-wide > Event log?
- Are there recent Content Filtering Blocked URL events matching the IP/MAC of the affected user at Network-wide > Event log?
- What are the Content Filtering Categories and URLs configured at Security & SD-WAN > Content Filtering?
- Are there recent events matching the IP/MAC of the affected user at Security & SD-WAN > Security Center?
- Is the traffic being routed through the VPN? If so, check the Site-to-site VPN firewall at Security & SD-WAN > Site-to-site VPN.
Blocked Resource/Traffic Information
- Is an entire domain blocked?
- If so, check Security & SD-WAN > Configure > Content Filtering and Security & SD-WAN > Configure > Firewall for the domain, category and/or IP.
- Is it only a specific URL within a domain (i.e such as an enterprise login within a larger domain)?
- If so, check Security & SD-WAN > Configure > Content Filtering for the domain
- Does the webpage start loading but fail?
- If so, check Security & SD-WAN > Configure > Content Filtering and Security & SD-WAN > Configure > Firewall for the webpage's URL and/or IP.
- Does the webpage show an error when it fails to load?
- If so, check Security & SD-WAN > Configure > Content Filtering and Security & SD-WAN > Configure > Firewall for the webpage's URL and/or IP.
- Are you redirected to another page stating the resource was blocked?
- If so, check Security & SD-WAN > Configure > Content Filtering.
- Are you able to access the resource by IP and not by hostname?
- If so, check Security & SD-WAN > Configure > Content Filtering.
- Does the webpage load entirely or only pieces of the page?
- Does the webpage continue loading/spinning forever?
- Can you ping the website?
- Can you ping the IP address of the resource?
- Is the traffic experiencing issues related to a backup?
- If so, check Security & SD-WAN > Monitor > Security center for IDS/IPS events. Group policies that prioritize such traffic can be configured in case the traffic is not being dropped but the backup is not completing properly.
Firewall Rules
We will be focusing on the Layer 3 and Layer 7 firewall rules in this section. The layer 3 outbound rules can be used to block a variety of different sources, destinations, protocols, and port ranges. Layer 7 can block destinations, port ranges, application groups (such as Social Media, News, Sports, etc), countries, and HTTP hostnames.
For more information on how these function please refer to Using Layer 3 Firewall Rules, Creating a Layer 7 Firewall Rule and MX Firewall Settings.
Layer 3 Outbound Rules
Layer 3 outbound rules can be found at Security & SD-WAN > Firewall.

How to Troubleshoot Layer 3 Firewall Rules
- A Firewall Logging Tool is available at Security & SD-WAN > Appliance status > Tools.
- You can run the tool while passing the blocked traffic and see if the traffic was dropped or allowed by the layer 3 firewall.
- This feature is available on MX firmware release 18.2 and newer.
- If a Syslog Server is configured under Network-wide > General, and the Syslog box above is checked you will be able to see logging which will indicate if traffic was dropped or allowed for the specific rule.
- More information can be referenced at Syslog Event Types and Log Samples.
- Live packet captures can be utilized to determine if the MX is blocking traffic or not.
Layer 7 Firewall Rules
Layer 7 Firewall Rules can be found under Security & SD-WAN > Configure > Firewall and are located below the Layer 3 Outbound Firewall Rules.

Layer 3 rules are processed before Layer 7 rules.
How to Troubleshoot Layer 7 Firewall Rules
-
Layer 7 rule blocks populate under the Network-wide > Monitor > Event log.

- Layer 7 rules not utilizing NBAR content categorization will not show up in the Event Log under the event type "Layer 7 firewall rule".
- NBAR can be enabled under Network-wide > Configure > General > Traffic analysis.
- A list of NBAR IDs to Layer 7 rule mappings are included in the following KB: Mapping Layer 7 Firewall Rules to NBAR IDs
- A Firewall Logging Tool is also available at Security & SD-WAN > Monitor > Appliance status > Tools.
- You can run the tool while passing the blocked traffic and see if the traffic was dropped or allowed by the layer 3/7 firewall.
- This feature is available on MX firmware release 18.2 and newer.
- When a Layer 7 firewall rule is hit, the user will most likely experience a white page that loads/spins forever or they receive a "connection error".
- Live packet captures can be utilized to determine if the MX is blocking the affected traffic or not.
Layer 3 Site-to-site VPN Firewall Rules
Similar to the regular Layer 3 Outbound Firewall rules the MX also supports Layer 3 Outbound Site-to-site VPN firewall rules.
- These rules take effect when traffic is routed over a Non-Meraki VPN or Auto VPN tunnel.
- Traffic routed over the VPN is NOT subject to the Layer 3 Outbound Firewall rules configured on Security & SD-WAN > Configure > Firewall.
- Layer 7 firewall rules configured on the Security & SD-WAN > Configure > Firewall page will still apply locally to client traffic destined across both AutoVPN and Non-Meraki peers.
- These rules apply to all security appliances in the Dashboard Organization.

Troubleshooting Site-to-site VPN Rules
First determine if the traffic is being routed through the VPN.
-
Check the MX's routing table. The MX's routing table can be located at Security & SD-WAN > Monitor > Route table. The route table can then be filtered for the destination subnet corresponding with the affected traffic.

- Traceroute can be leveraged to an extent to determine the hops the traffic is taking.
- If a Syslog Server is configured under Network-wide > Configure > General and the Syslog box above is checked you will be able to see logging which will indicate if traffic was dropped or allowed for the specific rule.
- More information at Syslog Event Types and Log Samples.
- Packet captures on the LAN interface and the site-to-site VPN interface can be leveraged to see if the traffic was dropped when transitioning from the LAN to site-to-site VPN interface.
Content Filtering
Content filtering can be found by navigating to Security & SD-WAN > Configure > Content Filtering. Content filtering on MX17 and up will use Cisco Talos Intelligence. This allows the MX’s Content Filtering feature to classify URLs based on web content and threat categories curated by Cisco Talos.

How Content Filtering Functions
Inspection
-
MX will inspect both HTTP and HTTPS.
Block Pages
-
For HTTP requests matching a blocked category, MX will redirect the client to a block page as shown below:

-
For HTTPS requests matching a blocked category, MX will reset the TCP connection.
-
Additionally, if the website/IP is being blocked by any layer 7 firewall rules, these will take effect before the content filtering rules do.
-
For example, if "instagram.com" is blocked by a Layer 7 rule and it is also listed as blocked URL under the Content Filtering section, the Layer 7 rule will take effect first.
-
Troubleshooting Content Filtering
There are a few tools available to troubleshoot Content Filtering.
-
On the Security & SD-WAN > Configure > Content filtering page there is a URL lookup tool to see if the URL that is blocked falls into any of the categories that are configured. The blocked and allowed URLs sections should also be checked.
- To determine if traffic is being blocked a user can check the Event Log, found under Network-wide > Configure > Event log. The event type "Content filtering blocked URL" will display events where the Content Filtering service blocked traffic.

- If the user fails to load the page and sees something along the lines of a "connection error" or "reset" on their browser it may be due to Content Filtering or a Layer 7 rule.
- Packet captures can also be taken on the appropriate interfaces (usually LAN and WAN) to see if the MX is blocking traffic.
Threat Protection
The Threat Protection section consists of two Security Features: IDS/IPS (Intrusion Detection and Prevention) and AMP (Advanced Malware Protection).
Advanced Malware Prevention (AMP)
Advanced malware prevention (AMP) inspects HTTP file downloads through an MX security appliance and blocks or allows file downloads based on threat intelligence retrieved from the AMP cloud. For more information about AMP, see this article.
You can enable AMP by setting the Mode option to Enabled in the Security & SD-WAN > Configure > Threat protection page.
Intrusion Detection and Prevention
The MX’s Intrusion Detection and Prevention System (IDS/IPS) is powered by Snort. Snort is an open-source intrusion prevention system designed to detect and prevent cyber attacks by monitoring network traffic for malicious activity. It uses rulesets to analyze network packets and match them against known and emerging threats, such as viruses, worms, and other forms of malware.
Traffic Inspection
In both IDS and IPS modes the following is inspected:
-
all traffic between LAN and the Internet
-
all traffic between VLANs
In both IDS and IPS modes the following is not inspected:
-
Intra-VLAN traffic (where Client 1 and Client 2 are both in the same VLAN)
Troubleshooting IDS/IPS and AMP
This one is more straight forward as all logs related to any traffic detected and allowed/blocked by AMP and IDS/IPS are located at Security & SD-WAN > Monitor > Security Center.

- Syslogs can also be leveraged to check security events. More information can be found in the following article: Syslog Event Types and Log Samples
- Lastly, a packet capture can be taken to see if the security appliance is blocking the traffic or not. Depending on the destination of the traffic, packet captures may be taken on different interfaces.
- For example, if a file transfer is blocked over AutoVPN, then take a packet capture on the LAN and site-to-site interfaces.
- If a backup is blocked to a Public Cloud Server, then take a packet capture on the LAN and WAN interfaces.
Group Policies
Group policies provide the ability to configure custom firewall, traffic shaping & bandwidth, AMP, content filtering, and wireless rules for individual devices or groups of devices. Group policies can be applied by client, VLAN, AD groups, and amongst other methods.
When troubleshooting blocked traffic, it is imperative that the device(s) affected/being tested are checked for a Group Policy. Group Policies can affect the same network settings, or overwrite network default settings. While the network firewall may be configured to blocked Social media, the Group Policy can be configured to allow it.
There is an order of priority in place for which settings will affect a client. This order is as follows, from top priority to lowest:
- Policies set manually for a specific client (on their client details page) take top priority. This includes the Allow Listing and Blocking default rules.
- Network-wide policies applied automatically by device type, VLAN, SSID, etc. will override network default settings, but be overridden by manual policies.
- Network settings will be overridden by any policies applied to the client.
Troubleshooting Group Policies
First and foremost, when troubleshooting blocked traffic and group policies, we want to check for the presence of a policy on an affected client.
If a specific device or group of devices cannot access a resource because it appears to be blocked, it is important to check if the device has a policy applied to it.
Checking Group Policy Application
By Client
Group policies can be manually applied to clients from the Network-wide > Monitor > Clients page.
- Check the box next to the desired client(s) in the list.
- Click the Policy button at the top of the list.
- Select Group policy and then choose the specific policy in the drop-down.
- Click Apply policy.
Devices can be allowed by selecting the "Allow list" policy and they can be blocked by selecting the "Block list" policy.

Alternatively, on wireless and combined networks, different group policies can be applied depending on the SSID the client is associated to. This is applied from the same page as the previous steps.
- Check the box next to the desired client(s) in the list.
- Click the Policy button at the top of the list.
- Select Different policies by [connection or] SSID.
- For each SSID, select the desired group policy, built-in policy, or leave as normal.
- Click Apply policy.
Policies can also be applied to individual clients by clicking on the client in the clients list and then choosing a Device policy under the Policy section.
By Device Type
In wireless networks, group policies can be automatically applied to devices by type when they first connect to an SSID and make an HTTP request.
- Navigate to Wireless > Configure > Access control.
- Select the desired SSID.
- Set Assign group policies by device type to "Enabled."
- Click Add group policy for a device type.
- Select the desired Device type and the Group policy that should be applied to it.
- Repeat steps 4-5 as needed to assign policies to all desired devices.
- Click Save changes.
This only occurs when a device first connects to the SSID and persists until it is manually overridden. Thus, some previously connected clients may need to have policies manually assigned. It is also possible for a client to be misclassified based on the initial HTTP request, depending on how it is generated by the device. If this occurs, manually assign the desired policy.
Refer to the documentation for more information on applying group policies by device type.
By VLAN
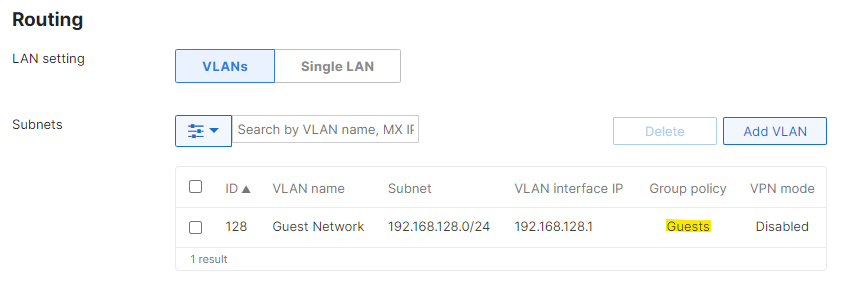
On security appliance networks, group policies can be automatically applied to all devices that connect to a particular VLAN. From the Security & SD-WAN > Configure > Addressing & VLANs page:
- Ensure that VLANs is "Enabled."
- Click on the desired Local VLAN.
- Select the desired Group policy.
- Click Update.
- Click Save Changes.
Any clients that are placed in this VLAN will now be given the desired Group policy.
When a group policy is applied to a VLAN, that policy becomes the new "network default" for any other group policies applied to clients in that VLAN. Since this policy is the new "network default," the client devices will still show a "normal" policy applied under Network-wide > Monitor > Clients.
For example, a group policy named "Guest Network" with more restrictive layer 3 firewall rules than the network-wide configuration is applied to the guest VLAN, and a second group policy "Low Bandwidth" has a custom bandwidth limit, but is set to Use network firewall & shaping rules. If the Low Bandwidth group policy is applied to a client on the guest VLAN, the client will use the layer 3 firewall rules configured on the Guest Network group policy, not the network-wide layer 3 firewall rules configured on the Security & SD-WAN > Configure > Firewall page.
By Active Directory Group
Security appliance networks with Advanced Security licensing can use Active Directory groups to assign policies to clients. Refer to the article on configuring AD-based group policy for more information.
By RADIUS Attribute
Wireless networks that are using RADIUS to authenticate clients can be configured to assign group policies via RADIUS attributes. Refer to the article on configuring group policies with RADIUS attributes for more information.
By Identity PSK (iPSK)
Identity PSK or iPSK comes in two variants, iPSK with RADIUS and iPSK without RADIUS. Identity PSK with RADIUS authentication acts as a standard WPA2 PSK SSID to clients, while authenticating clients to a central server based on their MAC address. iPSK without RADIUS allows a network administrator to use multiple PSKs per SSID without the use of a RADIUS server. Further, the feature allows you to assign group policies in the dashboard based on the PSK used by the client device to authenticate to the Wi-Fi network. Please refer to the article iPSK with RADIUS Authentication and/or iPSK Authentication without RADIUS.
Adding a device to the "Allow list"
Adding a device to the "Allow list" is a great way to determine if the MX is blocking traffic to/from the device.
Allow listing the device allows it to bypass Layer 3 and Layer 7 firewall rules, AMP, most splash pages, bandwidth limits, traffic shaping rules, and content filtering. IDS/IPS will not be bypassed. When allow listing the device it is crucial to ensure the MX's configuration is "Up to date" and it has been five minutes since allow listing the device before performing any testing.
If traffic is not blocked and/or the resource is accessible after allow listing the device, that means a rule on MX is contributing to the blocked traffic.
If the traffic is still blocked and/or the resource is not accessible chances are the security and/or filtering on the MX is NOT contributing to the blocked traffic.
- The Security Center should be checked to ensure IDS/IPS is not blocking traffic as it is not exempt by allow listing a device.
- Attempt to access the resource when located outside of the MX's network such as a home network or hotspot.
- Accessibility to the resource should be tested on different devices as well.
- Host-based firewalls, antivrus applications, or RADIUS/AD/MDM policies applied outside of the MX should be verified.
- Packet captures on the MX LAN and WAN should be taken and analyzed for any TCP RSTs, missing traffic, or drops.
Strategies and General Guidelines
- In general, accessibility to the resource should be tested outside of the MX's network such as a home network, hotspot, etc.
- This may not always be possible as some resources are only accessible from the LAN due to their location or security purposes. In this case accessing the resource outside of the MX's network is not applicable.
- A top-down approach can be used to troubleshoot blocked traffic. For example, the following components can be troubleshooted in order: group policies, firewall rules, content filtering, and threat protection.
- Ideally, traffic should be passed continuously so that logging for each component above can be reviewed more easily.
- If a large number of devices are unable to access a resource, two (or more) devices should pass traffic so that the components above can be reviewed.
- Suppose a device is finally able to access a resource that was previously blocked after allow listing it (adding it to the "allow list" policy). What is a possible next step?
- You can apply a custom group policy to the device and bypass each security/filtering component individually to narrow down which one is blocking the resource.
- For example, with the settings below the Layer 3 and Layer 7 firewalls can be bypassed by selecting "Ignore network firewall & shaping rules".
- If the traffic is not blocked anymore, then the culprit was one (or more) of the firewall rules. The remaining step includes tracking down the specific firewall rule.
- For example, with the settings below the Layer 3 and Layer 7 firewalls can be bypassed by selecting "Ignore network firewall & shaping rules".
- You can apply a custom group policy to the device and bypass each security/filtering component individually to narrow down which one is blocking the resource.

- This methodology can be repeated for Content Filtering, AMP, etc until the component that is blocking the traffic can be isolated.