
Android Zero-Touch Enrollment
Android zero-touch enrollment is a streamlined way to automatically enroll supported devices on Android 8.0+ into Systems Manager.
During initial setup, devices will automatically download and install Systems Manager and initiate the fully managed device provisioning method. This allows for quick and easy mass deployment of company-owned devices, making it simple for end users receiving these devices to seamlessly enroll in device management out of the box.
Below, you will find instructions on how to add devices to your zero-touch portal and configure them so that they automatically download and install SM during setup, as well as guidelines and best practices on enrollment and provisioning with zero-touch and Systems Manager.
Zero-touch enrollment is now supported on Android 9 and later Samsung devices. For a full list of supported zero-touch devices, please check the Android zero-touch device collection.
Android zero-touch portal
The first step to enrolling devices in Systems Manager using zero-touch is to create and assign the proper configuration in the Android zero-touch portal.
In order to access the zero-touch portal, you'll need to have purchased devices from an authorized zero-touch reseller and imported them into your zero-touch portal. You can read more about authorized resellers and setting up the zero-touch portal in the following Android Enterprise Help page, and find a list of resellers in the Google Enterprise Solutions Directory.
Creating zero-touch configurations
Once you have successfully setup your zero-touch portal, you'll need to assign configurations to your purchased devices. This can be done on a per-device basis, or you can set a default configuration for all devices.
First, you'll need to create a configuration that specifies Systems Manager as the EMM DPC and provides your SM enrollment network.
- In the zero-touch portal, go to Configurations > press the + symbol on the top right of the configuration list. You will see a modal to create your configuration:
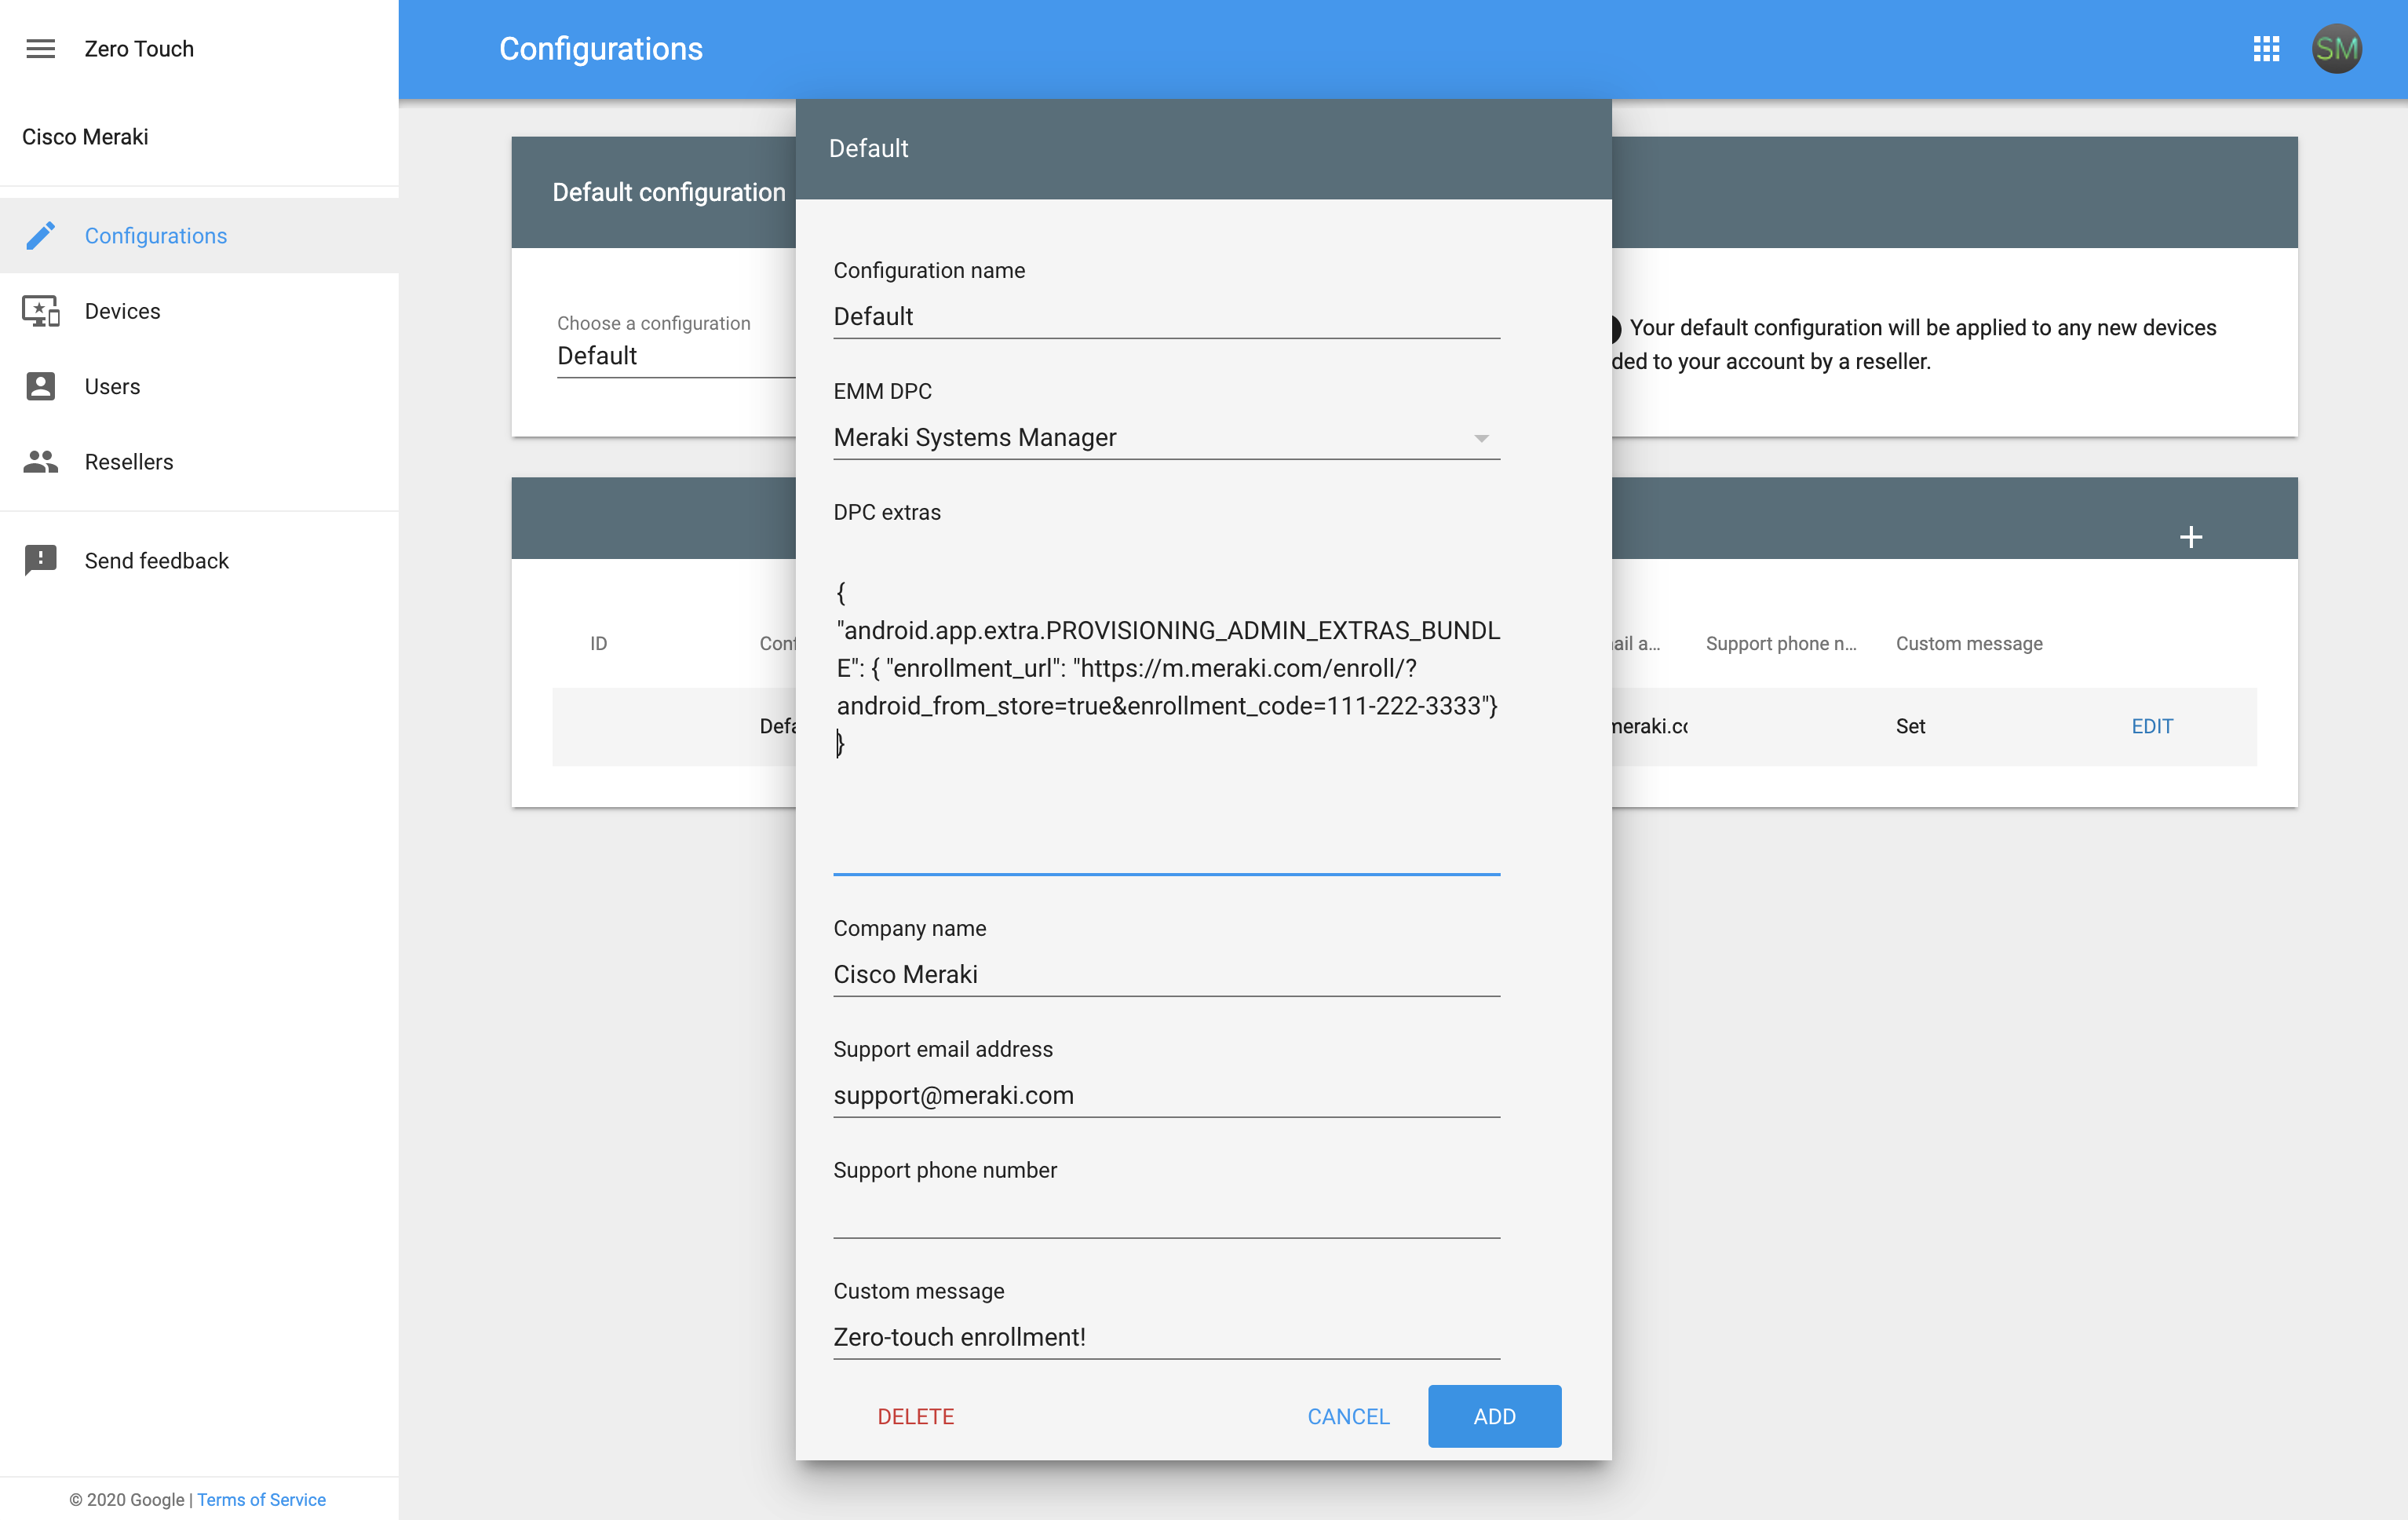
- Fill in the following values:
Field Description Configuration name Enter a name for the configuration. EMM DPC Select "Meraki Systems Manager".
This will ensure the device downloads and installs Systems Manager during the device setup flow.
DPC extras This field is a set of configuration parameters for Systems Manager.
Enter the following DPC extras JSON with your SM network enrollment URL as the only parameter, formatted as follows:
{
"android.app.extra.PROVISIONING_ADMIN_EXTRAS_BUNDLE":
{ "enrollment_url": "https://enroll.meraki.com/enroll/?android_from_store=true&enrollment_code=%enrollment_identifier%"}
}Where %enrollment_identifier% is your SM network ID or network enrollment string, if configured.
Both of these values can be found at the bottom of the Systems Manager > Add devices page in your Dashboard.
Example: If your network ID is 111-222-3333, your entry would be as follows:
{
"android.app.extra.PROVISIONING_ADMIN_EXTRAS_BUNDLE":
{ "enrollment_url": "https://enroll.meraki.com/enroll/?android_from_store=true&enrollment_code=111-222-3333"}
}Company name The name of your company. This name will be displayed to users during the zero-touch flow. Support email address The email address users will be told to contact if they run into issues during the zero-touch flow. Support phone number The phone number users will be told to contact if they run into issues during the zero-touch flow. Custom message A custom message that will be displayed to users prior to installation of Systems Manager during the zero-touch flow. - Click Add.
- Optional: You'll now be able to select a default configuration at the top of this page. When set, the default configuration will be applied to any new devices added to your zero-touch account by device resellers.
Please note: Devices already in your zero-touch portal will not automatically get assigned a newly selected default configuration. Only devices added to your portal after the default has been set will be automatically assigned. Read below for instructions on how to assign configurations to devices already in your zero-touch portal.

You have now created a zero-touch configuration which downloads Systems Manager during device setup, and enrolls the device into your network. If you manage multiple SM networks for different devices, you can create multiple configurations and set different networks for each one with the corresponding enrollment identifier.
Assigning zero-touch configurations
After creating zero-touch configurations for Systems Manager, you'll have to assign these configurations to existing devices in the zero-touch portal.
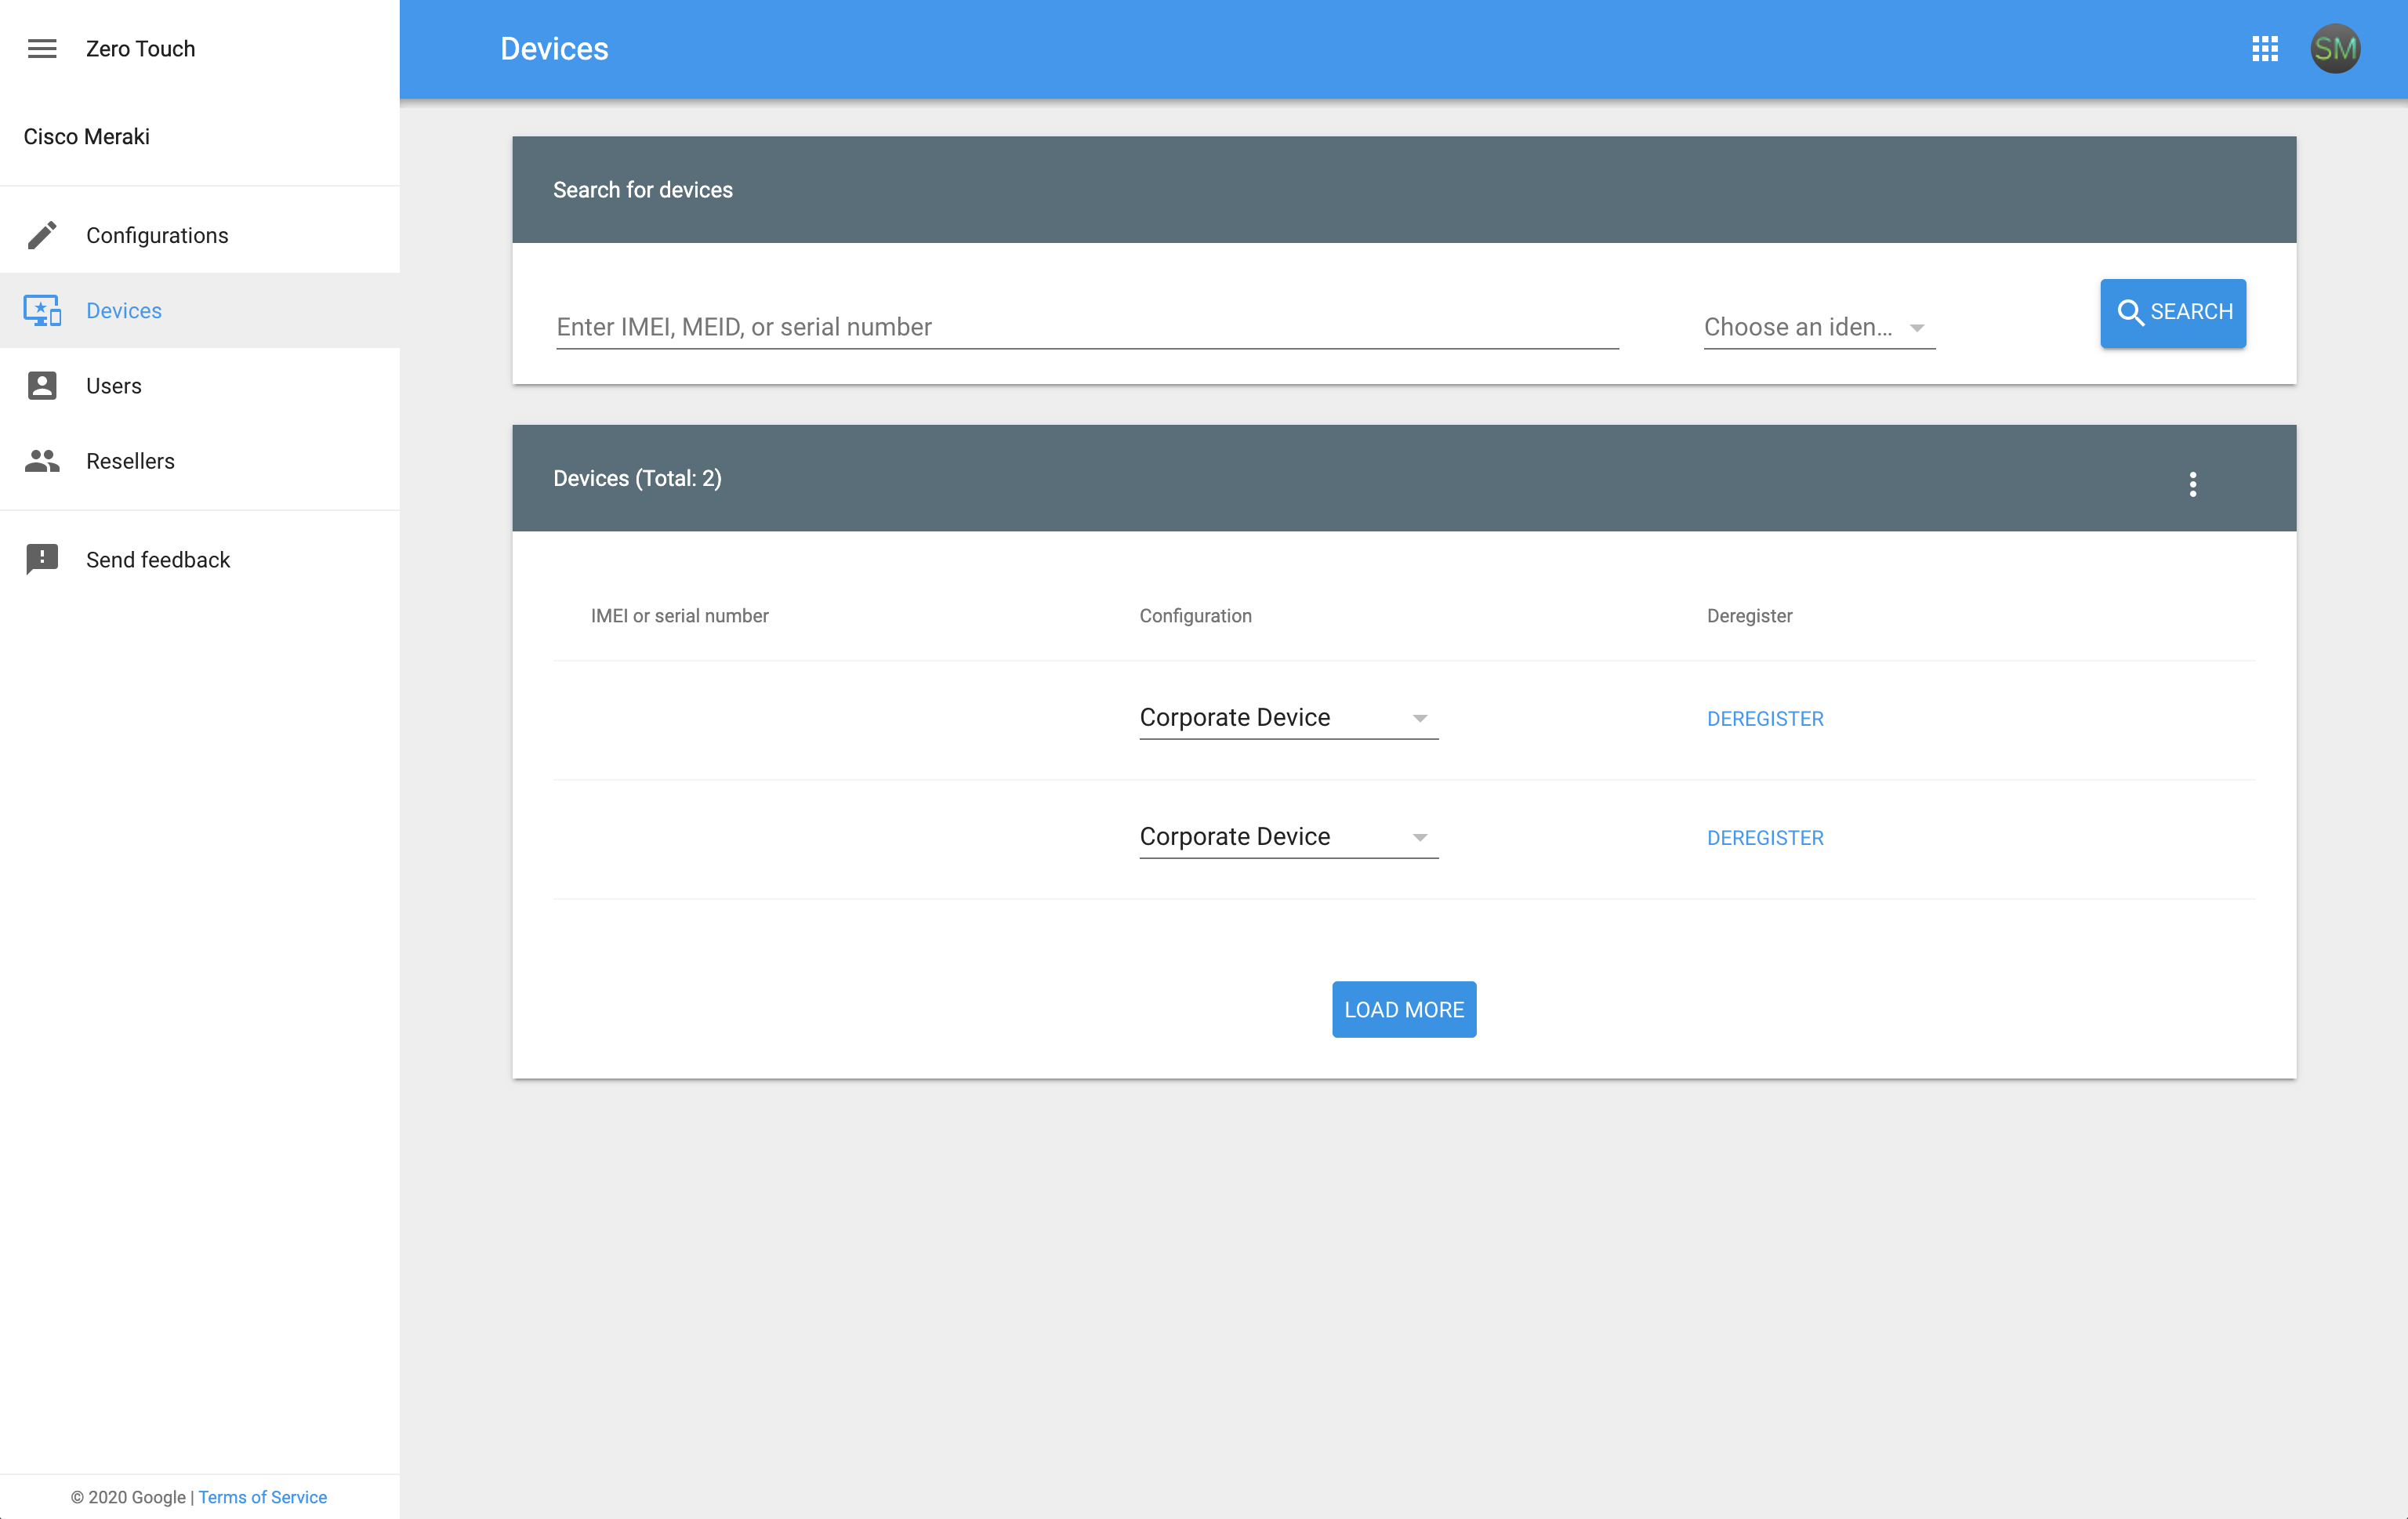
- In the zero-touch portal, go to Devices and select the configuration you created in the "Configuration" column for each device:

- Alternatively, you can select the three-dot menu on the top-right of the Devices list and upload batch configurations using a .csv file. Google provides an example CSV you can download.
Devices with assigned configurations will now enter the zero-touch flow when they first connect to the internet during initial device setup. Systems Manager will be installed automatically during this process.
Systems Manager enrollment with zero-touch
Initial enrollment
When a zero-touch device with an assigned configuration begins initial setup, it will automatically download and install Systems Manager as part of its setup flow. The end user will be informed that their device is under corporate management. At the end of the device setup process, Systems Manager will launch and initiate device enrollment in the network specified in its configuration.
If you have enrollment authentication configured for your Systems Manager network, the device will prompt the user for their username and password before completing enrollment.
If you require devices to automatically enroll in Systems Manager without a username and password, you will need to disable enrollment authentication within Dashboard in Systems Manager > General. Please keep in mind that this will allow anyone to enroll in your Systems Manager network with your network ID or network enrollment string.
If use of enrollment without authentication is required, you can use enrollment auto-quarantine, which restricts newly enrolled devices from receiving any subsequent configuration profiles or apps without authorization from a Systems Manager network administrator.
Automatically configuring newly enrolled devices
Once a device completes enrollment into Systems Manager, it will automatically receive settings and apps within its scope. You can read more about assigning and scoping settings and apps with tags in our relevant knowledge base articles:
- Using Tags in Systems Manager
- Types of Tags in Systems Manager
- Dynamic Settings and Profiles using Tags
- Tags Management Page for Systems Manager
Here are a few tips for making sure newly enrolled zero-touch devices automatically receive your desired settings and apps:
- You can scope settings and apps to the Android device-type tag. Any profiles or apps scoped to all Android devices will automatically apply to devices enrolled using zero-touch.
- You can set a default tag(s) in Systems Manager > General, which will be applied to all newly enrolled devices. zero-touch devices will automatically receive this tag after it has been set, and any profiles and apps scoped to it.
- If you are using the Meraki Managed enrollment authentication method, you can set tags for users when creating them in Dashboard. These tags will be automatically applied to the users' devices when they enroll in Systems Manager.
- If you are using the Active Directory enrollment authentication method, Systems Manager will automatically import groups as user tags.