
Quick Start Guides
Learn more with these free online training courses on the Meraki Learning Hub:
-
Log in to the Meraki dashboard (http://dashboard.meraki.com). If this is your first time, create a new account.
-
Find the dashboard network to which you plan to add your APs, or create a new network. (under Organization > Configure > Create Network)
Note: Separate networks must be created for different Meraki device types (MR, MX, MS, etc), unless creating a combined network. -
Add your APs to your network. You will need your Meraki order number (found on your invoice if you ordered directly from Meraki; it usually has nine characters) or the serial number of each AP (which looks like Qxxx-xxxx-xxxx and is found on the bottom of the unit). You will also need your Enterprise Cloud license key, which you should have received via email from shipping@meraki.com or your authorized Meraki distributor (which also looks like Qxxx-xxxx-xxxx).
-
Once an AP is added to a network, the network will self-configure an SSID for ease of use and deployment. It is strongly recommended to review this SSID and make any configuration changes desired prior to connecting the APs to the LAN.
-
Make any additional configuration changes under the Wireless > Configure section of the dashboard network. Be sure to review the SSIDs, Access Control, and Firewall & Traffic Shaping configuration pages.
-
Unpack your AP and attach it to power (via adapter or PoE) and a wired connection with internet access.
-
After powering on, your AP will request an IP by DHCP, reach out to the Meraki cloud through the internet (check the Configuring Firewall Settings to Allow Meraki Cloud-Management Access section for details about the minimum internet access the AP's will need) and download the latest software. This may take up to an hour, depending on the internet connection speed. While upgrading, the AP's power LED will flash blue. Once the AP has checked into the dashboard, the LED will turn green.
Note: A solid orange light indicates that the device has not checked in with the Meraki cloud yet. -
Once the AP is upgraded, ensure that an IP address is assigned to the AP correctly (see below).
-
You're done!
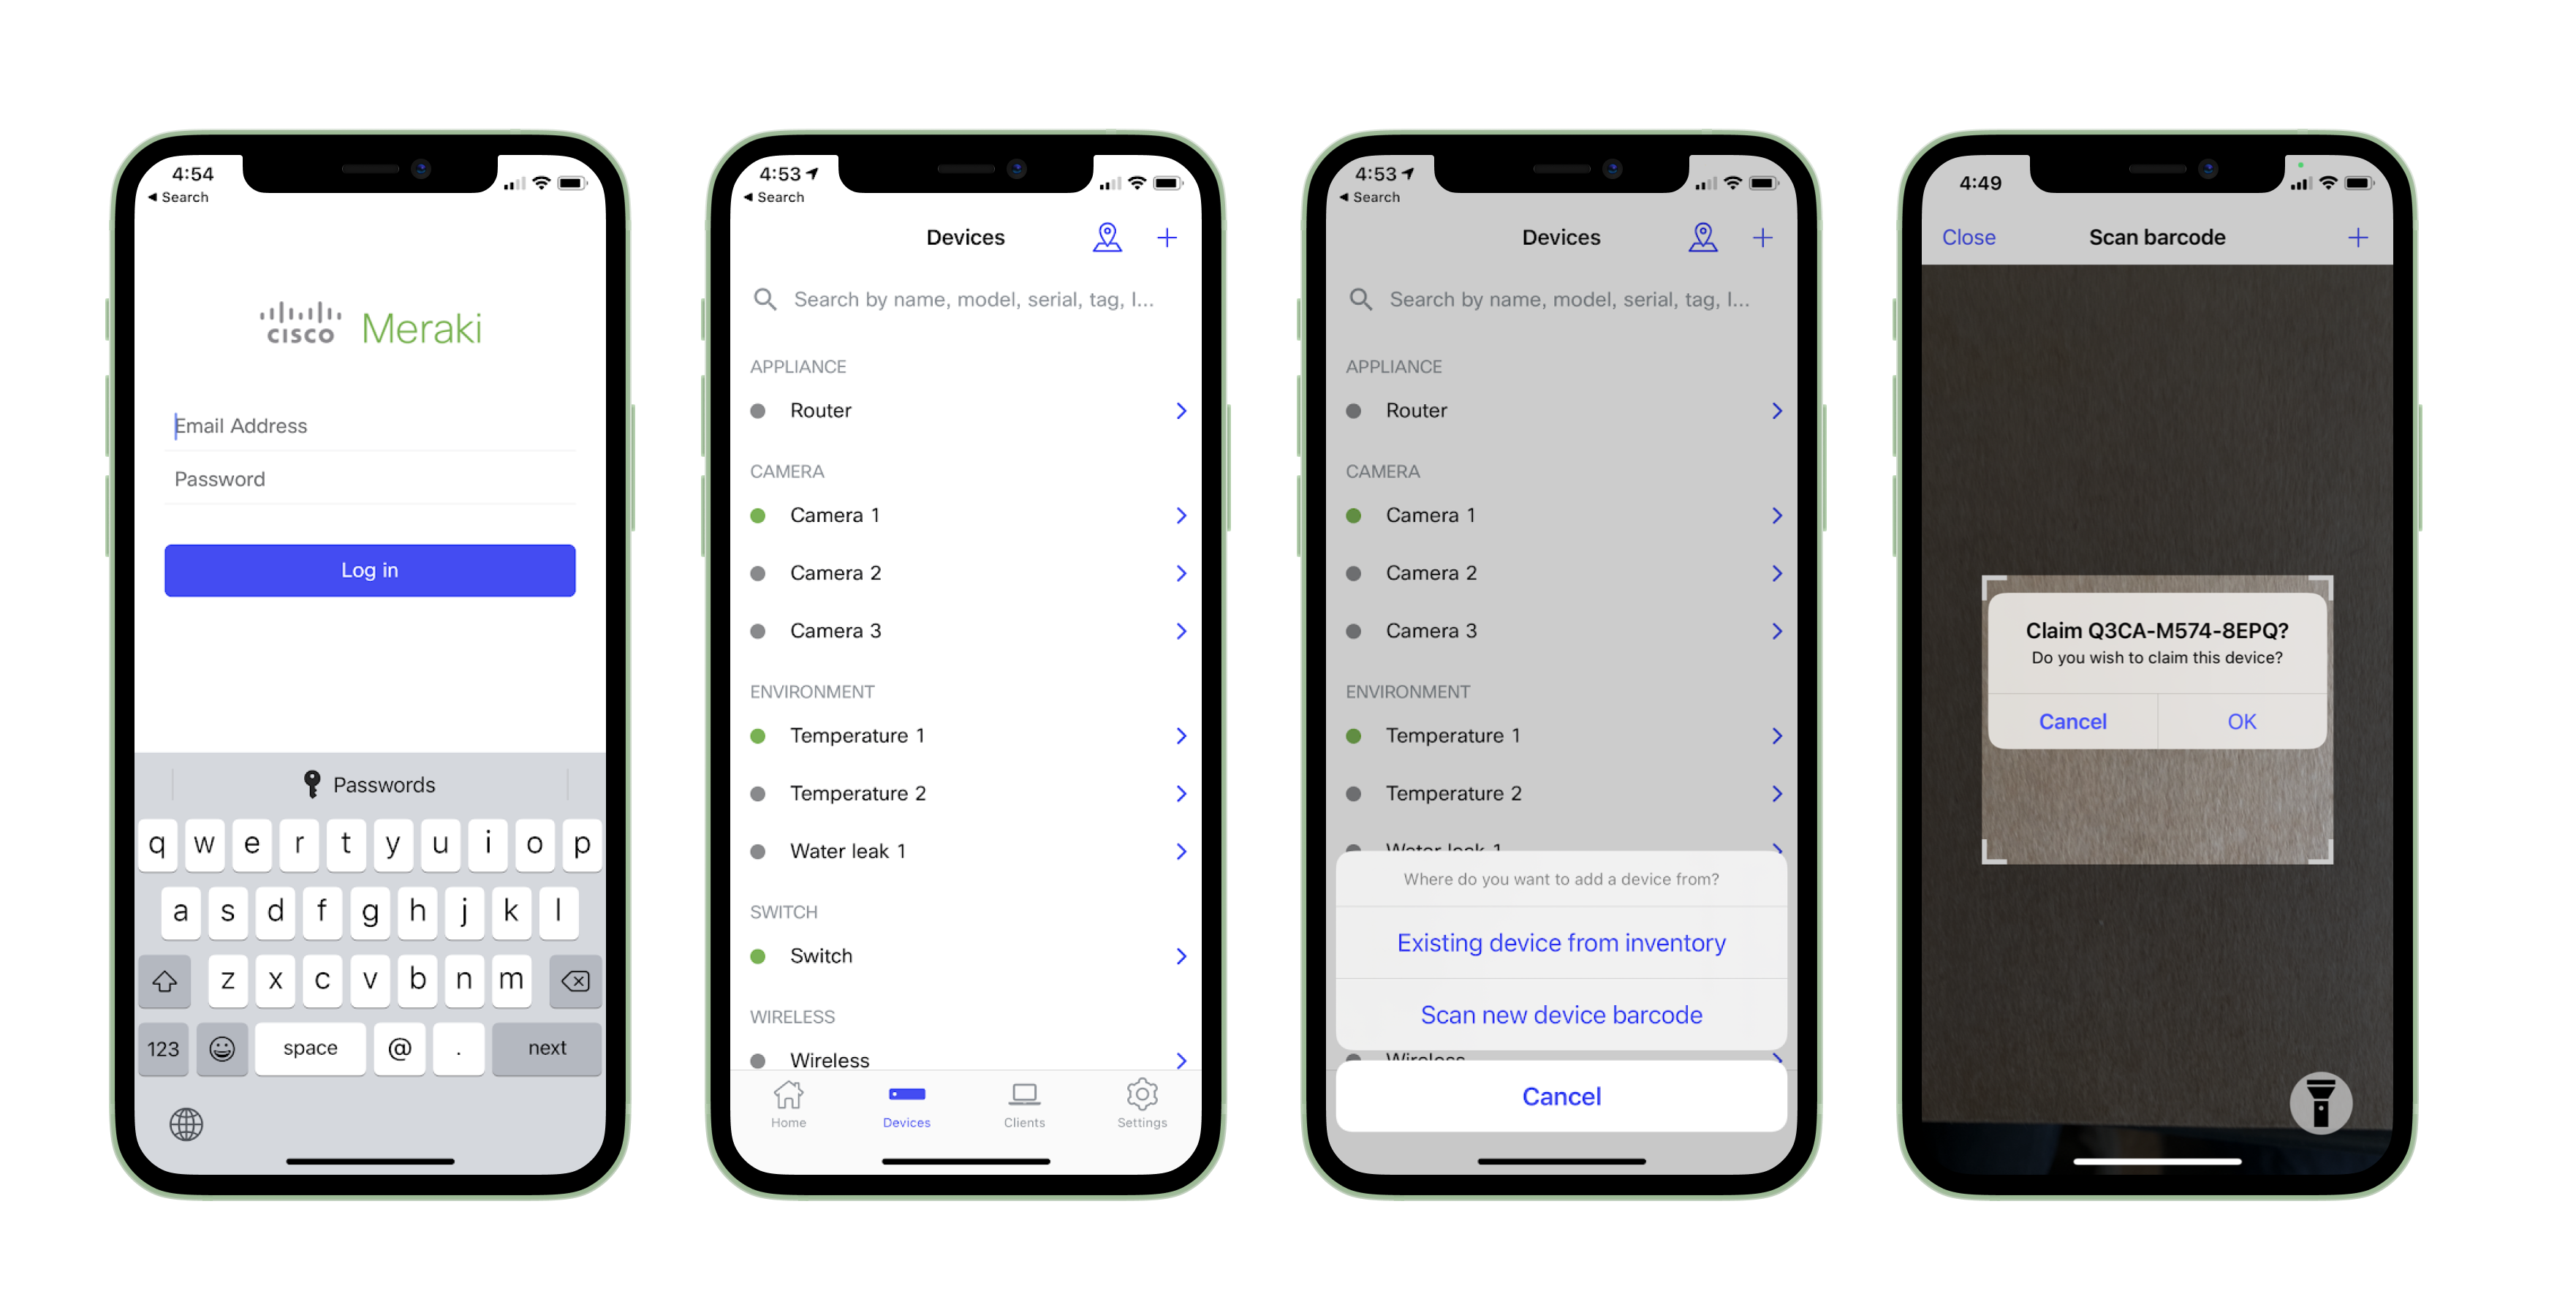
Quickly Scan and Claim Multiple Devices through the Meraki Mobile App
If you have to claim multiple devices, the quickest way is by scanning their barcode using the Meraki app.
- Log in to your Meraki iOS or Android app with your Meraki dashboard account. Create a new account if you do not have one.
- Navigate to the correct network through the left-side bar.
- Go to the Devices tab from the bottom navigation bar.
- Select the + icon on the top right of the screen and pick Scan new device barcode.
- Point your phone camera toward the hardware barcode to claim the device.
- Enter device information and then select Done. Press Add another to claim a new device.
Installation Guides
For additional, model-specific information on installing a new MR access point, please refer to our MR Installation Guides article:
- Campus Gateway Installation Guide
- Cisco Wireless 9171 Series Access Point Installation Guide
- Cisco Wireless 9174 Series Access Points Installation Guides
- CW-ANT-GPS1-M Installation Guide
- CW9162 Installation Guide
- CW9163E Installation Guide
- CW9164 Installation Guide
- CW9166D1 Installation Guide
- CW9166 Installation Guide
- CW9172H Installation Guide
- CW9172I Installation Guide
- CW9176D1 Installation Guide
- CW9176I Installation Guide
- CW9176 Landing Page
- CW9178I Installation Guide
- MA-MNT-ANT-1 Installation Guide
- MA-MNT-ANT-2 Installation Guide
- MA-MNT-ANT-3 Installation Guide
- MA-MNT-ANT-4 Installation Guide
- MA-MNT-MR-H2 Installation Guide
- MA-MNT-MR-H3 Installation Guide
- MA-UMNT-MR-A2 Universal Mounting Adapter Installation Guide
- MA-UMNT-MR-A3 Aruba Mounting Adapter Installation Guide
- MR20 Installation Guide
- MR28 Installation Guide
- MR30H Installation Guide
- MR33 Installation Guide
- MR36H Installation Guide
- MR36 Installation Guide
- MR42E Installation Guide
- MR42 Installation Guide
- MR44 Installation Guide
- MR45 Installation Guide
- MR46E Installation Guide
- MR46 Installation Guide
- MR52/53 Installation Guide
- MR53E Installation Guide
- MR55 Installation Guide
- MR56 Installation Guide
- MR57 Installation Guide
- MR70 Installation Guide
- MR74 Installation Guide
- MR76 Installation Guide
- MR78 Installation Guide
- MR84 Installation Guide
- MR86 Installation Guide
- Temperature and Humidity limitations of Cisco Meraki Outdoor APs
Getting your Access Point Online
All APs with Ethernet connections to the LAN must be assigned routable IP addresses. These IP addresses can be dynamically assigned via DHCP or statically assigned.
For information on deploying an MR AP in a wireless mesh, please refer to our Mesh Deployment Guide.
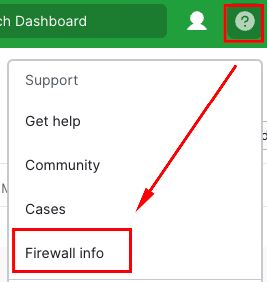
Configuring Firewall Settings to Allow Meraki Cloud-Management Access
If a firewall is in place, it must allow outgoing connections on particular ports to particular IP addresses to ensure AP connectivity with Meraki cloud-management. The most current list of outbound ports and IP addresses can be found in the dashboard under Help > Firewall info (see below). Wifi 6 access points on firmware version MR 28.1+ will use TCP port 443 to the destination IP range of 209.206.48.0/20 when communicating with Dashboard. All other access points will use TCP port 7734 and UDP port 7351.
Highest rated
(rating)Recently updated
(date updated)Recently added
(date created)